Found In the Woods

December 13, 2019

Stepping Back In Time: Lehigh Valley RR, Phillipsburg, NJ

Filed under: Blogging,Railroading — bsullivan @ 9:10 am

A hobby of mine is searching out and finding locations in old photos. I’m fascinated by the past and how we view it in the present. So often those that came before us are forgotten. Memories fade, people pass away or move on. But these photos stay. They capture a moment in time. I find a lot of them are mundane or formal. Often times railroads took photos to document their equipment or structures. These valuation photos were often throwaways to most folks. Boring images of a railroad track and a structure. But to fans like me, they are treasure troves of context. Figuring out how the railroad was arranged and what was there in that time frame is wonderful to discover. Here is an example. This image popped up on the Railfan.net Erie Lackawanna Email List Photo Archive:

http://lists.railfan.net/erielackphoto.cgi?erielack-12-12-19/X4863.jpg

The photo shows a street running down to a railroad yard and mainline. There are some buildings scattered about and more railroad cars in the distance. A station can be seen and some other structures. There’s a few more images here:
http://lists.railfan.net/erielack-photo/?erielack-photo&year=19 in the 12/12/2019 section. Check them out.

I was interested to see if I could find this spot. I’m unfamiliar with the location but that didn’t stop me. I did some Googling to find out where the Lehigh Valley passed through Phillipsburg, NJ. East to West. Ok. And there was a sort of bottleneck area here the river where a few RR’s met. Got it. And in the photo is a tiny little sign on the structure to the left “Market St”. Now I knew where to look. A little bit of poking around and I found it. Amazingly, the house on the right is a match for the one in the photo. It still stands! I be if you peeled back all the siding you’d have some original woodwork. Brilliant. Here is the current view:

https://goo.gl/maps/9ucNnBfciRDFW7c2A


Hopefully I’ll make this a more regular thing. I do enjoy it.
February 3, 2012

A Long-Awaited Update

Filed under: Railroading — bsullivan @ 12:27 pm

20120203-122425.jpg

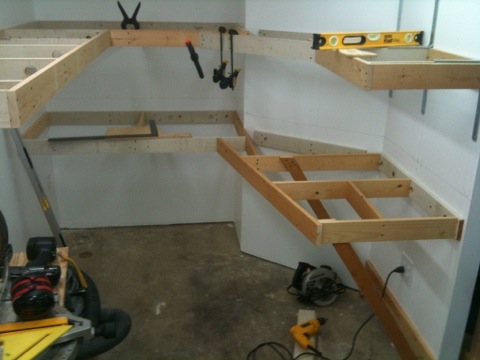
I haven’t given a status update on the basement work in quite a while and I apologize for that. It’s how I am with this blog, it comes and goes. Anyway, to sum it up, after I completed the framing & insulation, the vapor barrier went up, drywall and trim. The room was primed & painted a couple coats and is ready for prime time. Since I completed the room I have begun benchwork construction on the layout. I decided on a dual-level (double deck), around the room layout with a helix (repurposed from my old layout) connecting the two levels and located outside the room. (the track passes through the wall via a hole) So far I have completed roughly 50% of the open grid benchwork and am very pleased with the progress. I need to get some more lumber and spend some more time on this but lately I’ve been busy with my new job. (yay!) Thanks for watching! See you soon.

Great Scale Model Train Show this weekend

Filed under: Blogging,Railroading — bsullivan @ 12:18 pm

20120203-121833.jpg

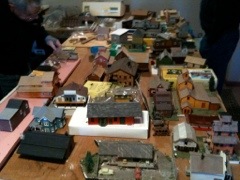
This weekend I will be at the Great Scale Model Train Show, held quarterly in Timonium, MD at the State Fairgrounds. It’s a great show and a place you can find lots of model RR related stuff at great prices. My model RR club, the Rockville Model RR Society, will be there as well with about 3+ tables worth of items for sale (see photo above). The club is liquidating many items it has had in storage. Me, well I’m selling lots of items I myself have had for many years and have no use for anymore. Hope you can make it out and if you do, say HI!

April 24, 2011

Wiring, insulation and framing is nearly done

Filed under: Projects,Railroading — bsullivan @ 1:22 am

With the incredible help of my father in law and my buddy Kelly we’ve been able to make amazing progress on the workshop/layout room. Framing is nearly done as is electrical and insulation. Doing drywall and installing fixtures are the biggest jobs left. Very excited!

April 8, 2011

Some basement progress pics

Filed under: Projects,Railroading — bsullivan @ 1:39 pm

I know these aren’t that exciting, but for me they are. 🙂 Also, it’s hard to see here but all the old wall along the back and side walls of the house are gone. Also, the wiring in the room has been removed. Next step is to make some calculations, remove a few more wall pieces, clean up some stuff and get framing the new walls and roughing in the electrical. Stay tuned.

March 29, 2011

Workshop Update

Filed under: Projects,Railroading — bsullivan @ 9:30 pm

My father-in-law Bruce came over today and helped me knock out some serious work on the workshop room. My model RR will be in this room, along with the HVAC unit, the water heater and my work bench/storage. The room was originally part of one large basement room. At some point in the last 30 years the previous owner split the room in half and turned this side into a workshop. He was a serious woodworker and had some large tools (evident by the 220 40A circuit we removed today and bolt casings in the floor) so it’s plenty big. I decided to strip it down and turn it into a combo model RR room and workshop.

When we moved in I set to work removing some of the old storage units, shelves, walls, etc. Unfortunately, there were also some circuits that needed removing around the room and due to a lack of funds after being laid off, this sort of got put on the back burner. Thanks to the generosity of some friends and family I’ve been able to get some building materials and make a go of getting this taken care of. Back to today, Bruce & I traced out circuits, chased wires, rerouted one circuit to combine some lights and removed a lot of old wire. I was even able to remove all the remaining studs from the room (finally) and get things cleared out a bit. The next step is to continue removing wires, random nailed boards and some other shelves/cabinets still in the room. Things are moving along really well. More pics next time. Thanks!

February 16, 2011

Building Building

Filed under: Projects,Railroading — bsullivan @ 10:16 am

Since I was laid off back in November, things have been different. Suddenly I’m playing Mr. Mom while a tenacious Ms. Dad has gone back to working full time to pay the bills while I search for a job. In my rare spare time I’m trying to finish up some modeling projects. I cleaned up the basement workshop room enough so that I could sit down at my table and take a stab at finishing a few projects. I did!

Life-Like Proto 2000 Hopper kit nearing completion

The P2K War Emergency Hopper Car is one I have had for years. It is a pretty nice kit. The details are exquisite. Lots of really well molded detail parts, grab irons and  a nice overall appearance. I brought this kit to Cape Cod with me last summer and never completed it because I ran out of time. It sat on my workbench all Fall and I finally picked it back up. I only had about 20 minutes of work left to complete it and the finished model looks great. Now it just needs a little weathering and it will be good to go.

Suydam 4 track car barn kit

This Suydam kit has a bit more history attached to it and I’ve decided to make it my next project to complete. This kit belonged to my father until I absconded with it years ago when he left the hobby for the most part. It’s identical to a kit that I destroyed as a child (a story for another time) and one that I’ve had half-built for about 12 years now. I picked it out one day many years ago and decided to try out the task of soldering the metal roof sections together which is something that I’d never done. It turned out so well that I painted and lightly weathered the roof. When I assembled the side walls, construction stopped. When this kit was produced, back in the 1960s and 70s, it was really nice. Card stock walls with printed brick patterns and lucite windows with printed on mullions were all relatively good looking. Now, they just look silly. In this day in age when superdetailing is at a mind boggling level, just putting a little effort can take a model like this to a whole new level.

What I’ve decided to do is complete this kit with a few modifications based on a prototype that interests me. This kit is modeled after some Southern California traction car barns. My layout/interest is with the Georgetown Branch of the B&O. I have a photo of the Chevy Chase & Kensington Electric Ry. car barn that once existed at the crossing of Connecticut Ave. in Chevy Chase, MD. The car barn was later repurposed as a car dealership and probably a host of other things before it was eventually torn down and replaced with an apartment building. My goal here isn’t to model the car barn exactly as it appeared but build a car barn model that will represent it with some degree of semblance. As such, even though it’s a very different design overall, I’ll be using this Suydam kit as a basis and adding some details that will give it a feeling of the old Georgetown Branch structure.

First up I’m ditching the old card stock walls. I’m going to replace them with Evergreen Scale Models styrene clapboard siding. The windows and doors are going to be represented with laser cut designs from Rusty Stumps doors and windows. I’m not sure how this will all turn out in the end, but if I can pull it off I think this will be a very nice model with lots of detail appeal on the layout. Who knows, I may even try to squeeze a traction line into the layout plan!

April 7, 2010

Your Name In Lights

Filed under: Railroading — bsullivan @ 2:31 pm

Years ago I helped the B&O RR Historical Society Archives out by scanning, tracing and redrawing an old B&O RR logo. The impetus of the project was a friend and fellow member needed a decent version of the logo and the iconic font for use in a B&O caboose restoration. Up in Sykesville, MD there is a B&O caboose that houses a model RR and some other exhibits. My friend Jack wanted a nice digital vector file to work with instead of the really crummy reproductions that were floating around. So being that we were involved with the B&ORRHS Archives at the time, we located some original blueprints and go to scanning. The rest of the story can be read here.

I did this project out of a love for the subject matter, largely. The B&O has held a special place for many years to me, being the main focus of my own personal model railroad and research project, the Georgetown Branch. Since getting involved with the B&ORRHS I have met minor railroad celebrities, shared ideas, heard stories and enjoyed the love of all things B&O. I’ve received praise and thanks for collaborating on the font/logo project but nothing compares to seeing the designs we created end up on a final product. I’ve had folks contact me telling me about the logo going on flags, mugs and even HO scale model railroad cars! How cool is that? But, nothing compares to the joy I get when folks share their stories of how they restored an original piece of B&O rolling stock and used our logo & font to make it happen.

This week I got a letter from a gentleman in Indiana:

Thanks guys for your font work. I wanted to attach a photo of a restored caboose I helped with in a park in Indianapolis using your fonts and logo. I do have at a higher res. if you are interested.

Pretty cool. I got a few more high res photos a few days later. Here they are, shrunk down to fit:


Before


After

October 16, 2006

Chugging along

Filed under: Blogging,Railroading — bsullivan @ 8:49 am

These last several months I've made tremendous progress on my model railroad. I got a large section of the benchwork done and lately I've been focusing on constructing the helix and associated subroadbed. All is moving along well, slowly, but well. It's hard to find large chunks of time with the kids around, but during naptime on weekends I can steal away for 2-4 hours and get some work done. Also, there is definitely a learning curve here. I've never constructed a layout of this complexity and type therefore I'm constantly referring to notes, websites, magazines & books and friends for advice. The process has been really fun and I just hope I can get trains up and running before we move out of this house some day!

This past weekend I spent some time installing a bridge which carries the track from the base of the helix through the wall to the main layout room. This was particularly tricky because I was working in a tiny space under the stairs and had to make a template for the curved roadbed. The solution was to use a piece of masonite about 16"x20" which I drew on and then slid to the side and drew the rest of the template. Then back in the main room where I had more space I recreated the alignment and used some plastic tubing to create a nice curve. I then cut the bridge piece with the jigsaw and it fit like a glove.

I also spent a few hours putting up the risers for the masonite spline subroadbed which I will use in most of the open single track areas of the layout. I have wanted to use the spline method since the beginning and I decided on Masonite after considering pine due to fact that I have a lot of it around and it bends so nicely. There is a really nice Masonite spline HOWTO writeup online at BCSJ.org . Check out the website; there are some fantastic shots and tips on there.

 bridge to main layout room

October 2, 2006

Back in the Booth

Filed under: Blogging,Projects,Railroading — bsullivan @ 9:59 am

After many, many years, I got my airbrush back up and running. A couple years ago I built a booth for it but never got around to spraying anything. Over the last several years I've also been slowly collecting Airbrush parts such as valves, water trap, pressure gauge, hoses, fittings and nozzles. Last night, inspired by some free time I had, I got everything up and running and did some trials on some old HO scale engine shells that I had stripped years ago .

The results were promising. The booth performed pretty well, although when spraying, I had to hold the model up high to allow the spray to vent through the duct. If I held it low, the spray tended to circulate around and exit the booth. Oh well. The good part is that my wife could not smell anything upstairs while I was spraying.

I did a simple coat of Floquil Railroad Colors Primer Gray which I thinned with 25% Dio-Sol. This was a real adventure, as I've never been very precise with my paint mixing before and now I'm totally into it. I used Testors Pipettes to measure and distribute the paint to the spray jar. The paint dried a ilttle "chunky" or "dusty" on the model, and I'm not sure why. It seemed that I could wipe it off the model in some places. I think the air-paint ratio was off, but again, I'm still learning. Overall, I'm super satisfied at just getting it running again.

I am excited to continue painting. I plan on painting the two diesel shells up in B&O livery and the trolley shell in DC Transit livery. The DCT trolley will definitely find its way onto the layout some day. Next up, I hope to do some weathering practice on some rolling stock and engines.

Next Page »