Rebuilding the Transmission in my 2014 Ford Fiesta ST

Quick note – this is a long, long post. I get it.. “GIMME THE TL:DR”. If you want the meat, go to the end sections where you’ll find downloads of my annotated shop manual snippets, parts list and other goodies. Hope you enjoy.
To say my journey in rebuilding this transmission was an odyssey is accurate. Merriam-Webster defines it as “a long wandering or voyage usually marked by many changes of fortune” or “an intellectual or spiritual wandering or quest.” Both of these definitions concurrently describe the entirety of this project and give hope to my own personal struggles as a result of such endeavor. As such, and with hope that it will help others on the same path (or considering it), I decided to write up some thoughts, a list of parts (as best I can), hints, pointers, war stories, the lot. So here goes.
Bought my 2014 Fiesta ST used with ~23k miles on the odometer in Jan 2015, replacing my beloved 2005 Audi B6 S4 Avant. (Beloved is just a word I used to describe my love-hate relationship with this V8 beast. Aside from the beautiful sound emitted by the Miltek exhaust, the most common thing I would hear, as I read the service manual: “Place the car in the Service Position.” B6 folks know what I am talking about.) I work 34 miles from home. I wanted something fun to drive, good gas mileage, cheap to operate and relatively utilitarian. I enjoy small cars (my first car was a 1981 VW Rabbit Diesel) and when my friend Nick found the FiST on a local car dealer site, I jumped on it.
Since owning the car, it has been fantastic. The odometer recently turned over 105k and since purchase the car has been fairly trouble-free. I replaced the throttle body after it failed a few years ago, but otherwise, nothing has gone wrong. I love this car. I had hoped to get a car that I could also take to HPDE/track days throughout the year with friends and the Fiesta has delivered. It’s been a total blast on the track and, again, performs wonderfully. Upgrades include a Mishimoto radiator and trunk brace, Boomba roll restrictor (rear motor mount), a mild Cobb stage 1 93 octane OTS tune, and when on-track; brake pads (Hawk DTC-60 front, HP+ rear) and tires (Yokohama Advan Neova AD08-R). Otherwise, the car is stock. And it’s tons of fun.
Which brings me to where I am now. The car does have a few random noises. The brakes grind a bit, and always have. Nothing bad, and I inspect them frequently, but I suspect it has to do with the somewhat aggressive OEM pads. The transmission had some whine to it. And many FiST folks complain of clunking when shifting. (I think that has more to do with a lower-end transmission than a big mechanical problem.) The whine in the trans is something that was nearly inaudible for the first couple years but got worse over time. But not bad, just worse. It was an ever-so-slight whirring noise. Sounded like faint gear noise to me. It never really bothered me and the car drove great. Over the years I did about 10-14 track days, daily drove the car, and never had any issue.
In early May I went out to PittRace with the Audi/Porsche clubs for a 3-day HPDE. This was my first time out there and I was very excited. I first noticed the transmission noise getting a bit more audible on the trip out there from home in Maryland. But, again, no real issues driving it. At the track, things progressively got worse. The first day there wasn’t that much change but on the second day it got louder and by the third day, I bailed out after only two sessions because I was worried I wouldn’t be able to drive the car home. (Spoiler alert: I made it.) The noise at this point was really loud. It was a sort of whirring/grinding/spinning noise and it was *only* under load. If I coasted, it made no sound. If I coasted where I was able to have some load on it, it would appear briefly, quieter. I also noticed another sound – a sort of rattle. The rattle was only evident when I depressed the clutch pedal (taking pressure off of the clutch) and it was different than the whirring/whine. It would be evident at idle. As you will see, in the end, I believe the two are related. Here is a video that shows what the car was doing:
I had to make a decision. Do I:
- Take the car to Ford and ask them to diagnose and fix it. Would it be a warranty claim? The 2014 FiST has a 3 yr/36,000 mi basic, 5 yr/60,000 mi powertrain warranty. I did not buy an extended warranty. There were some folks on forums and YouTube who had mentioned that Ford repaired their trans due to faulty output/input shaft bearings, and it was a “common” problem. This seemed iffy to me and I worried about dealing with the dealer on things like modifications I’d done to the car, the labor cost and the potential down time. (as we will see, this wouldn’t have been an issue.)
- Take the car to an independent shop and have them repair it? I struggled with this, as it was hard for me to find a shop that I would trust and felt comfortable with. Fewer and fewer shops nowadays specialize. Most are “total car care” because they need to be to survive. As such, much of the technical work (like rebuilding a modern manual transmission) is outsourced. I have the means to remove the transmission; why pay someone to do it?
- Have the transmission rebuilt by a shop? I figured the cost would be about the same or more than buying a used transmission IF I could find a shop that would even do it. They are not easy to find.
- Buy a used trans from a wrecking/recycling/junk yard? This option crossed my mind and I shopped around a bit. Prices range from $800-$1,300 and there are units available all over the country. I figured “why not spend the money on my own parts and tools to get the job done myself?”
- Buy a rebuilt, race-ready transmission from a place like Clarke Transmissions? This was my dream choice. I’d LOVE to have something like this in my FiST and maybe some day I will! But at prices around $3,600+, it’s outside of the scope of the car build right now. Maybe some day!
- Sell the car? No.
- Pull the trans myself, rebuild it, and see if I can fix it?I have wanted to rebuild a transmission for a very long time. It’s on my bucket list. I figured this was a good chance for me to get my hands dirty and do the job myself. I do have a copy of the OEM manual, a good selection of tools, friends with more tools, a nearby Harbor Freight, a garage, and a third car that I could use in the interim. Why not?
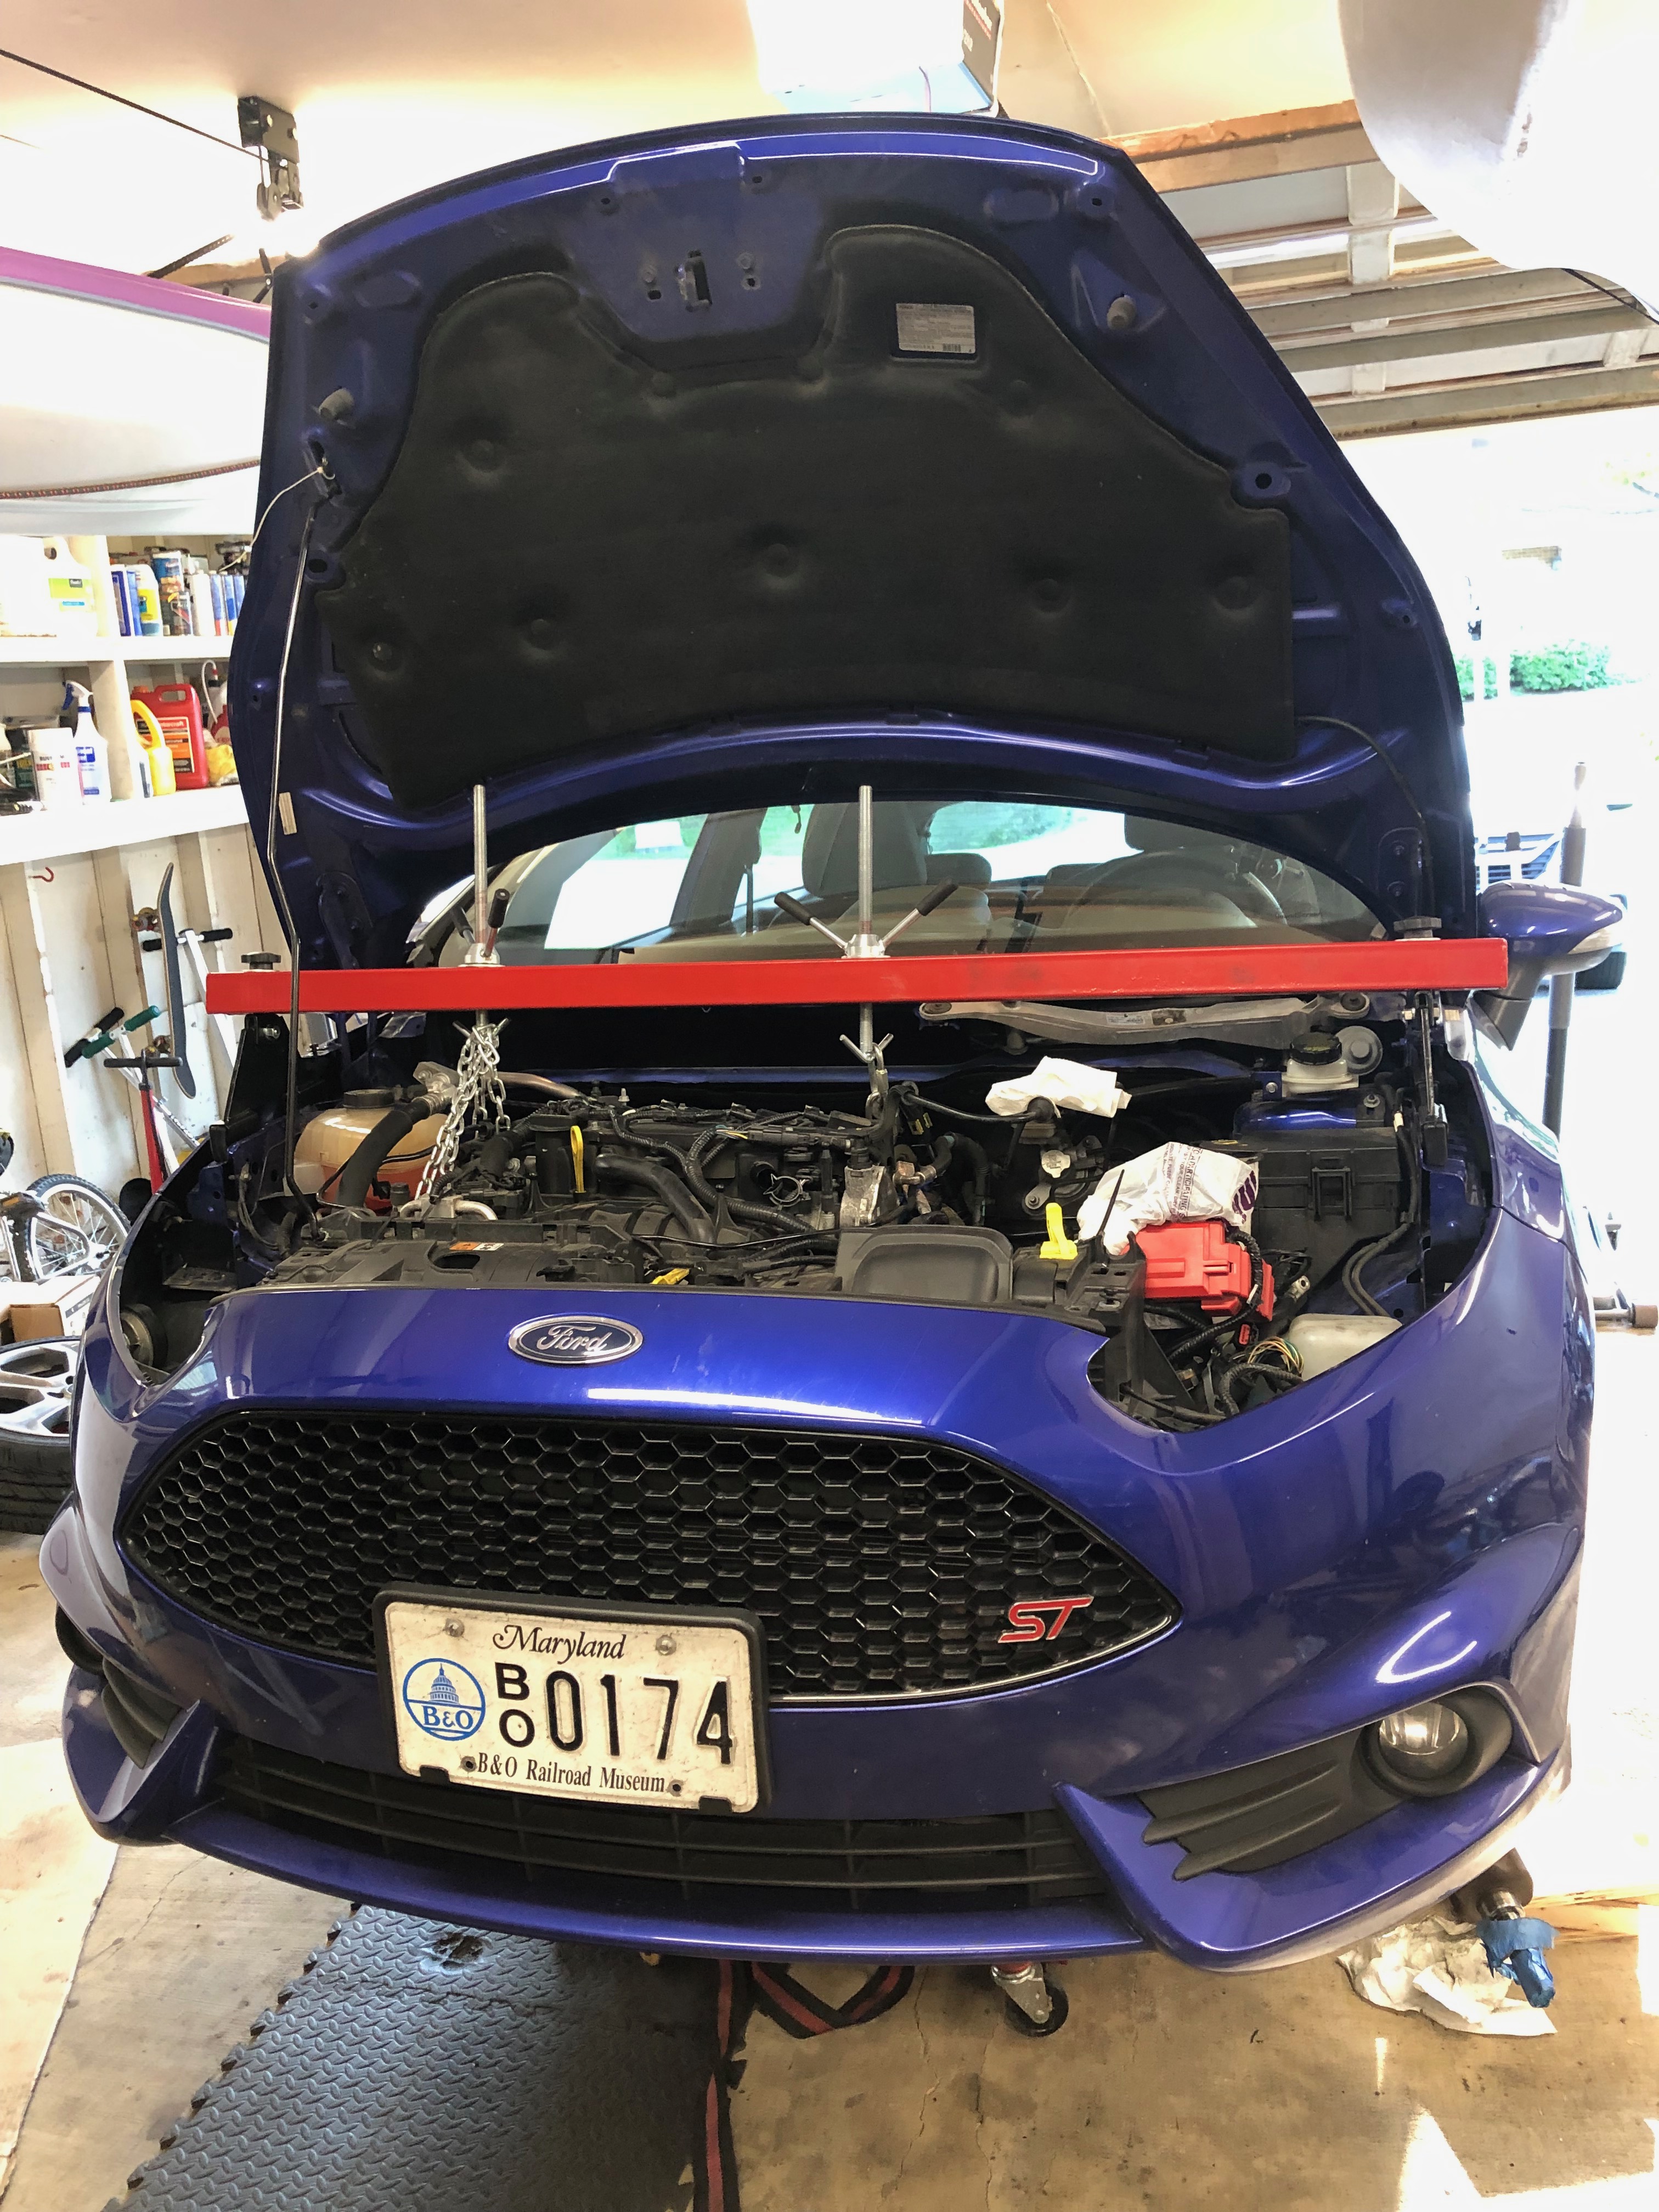
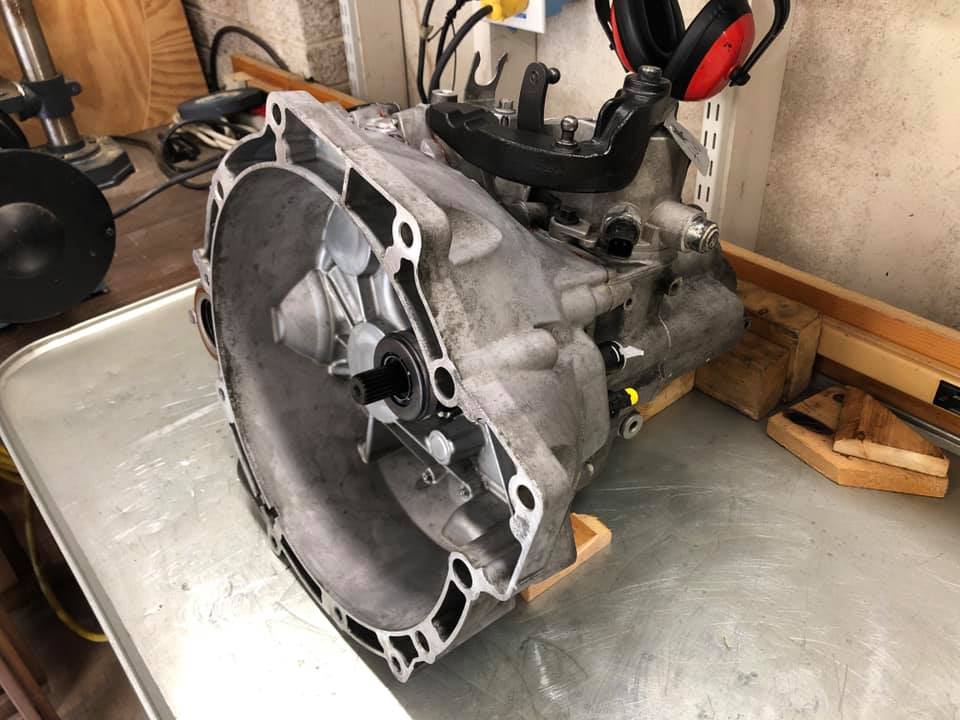
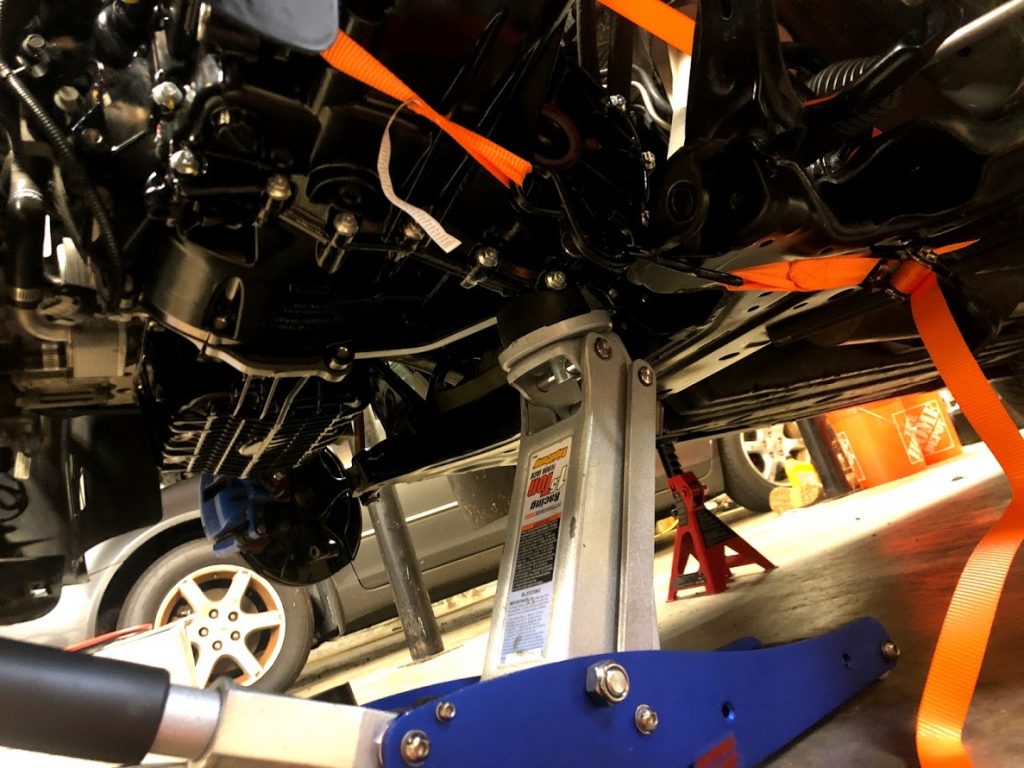
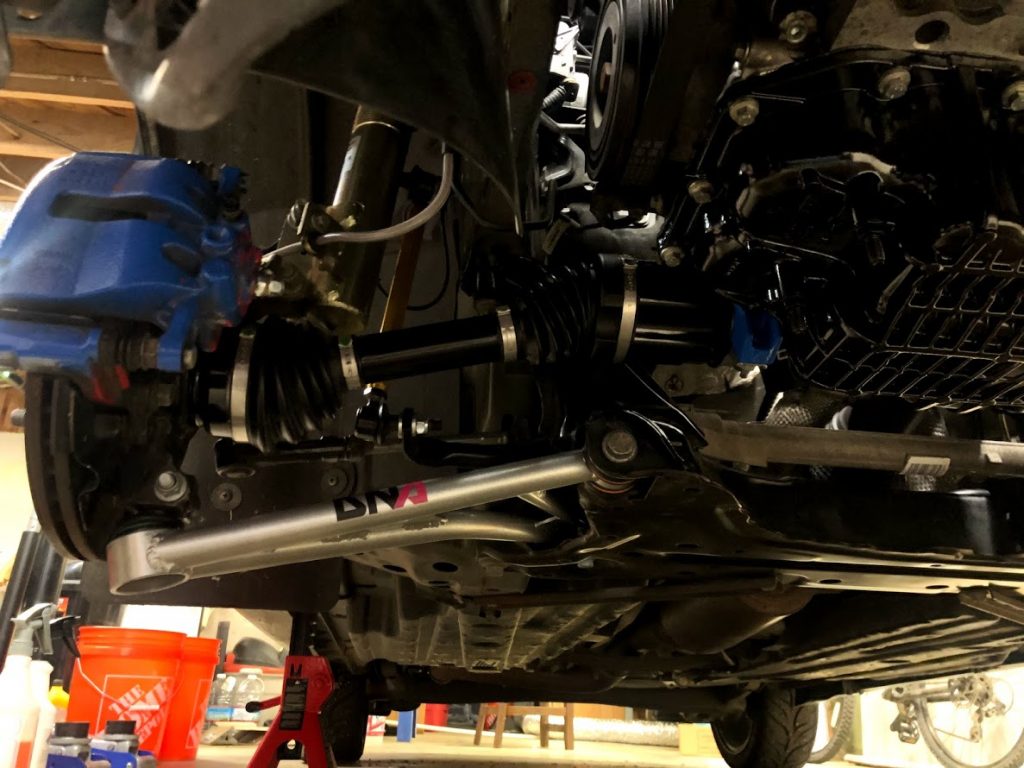
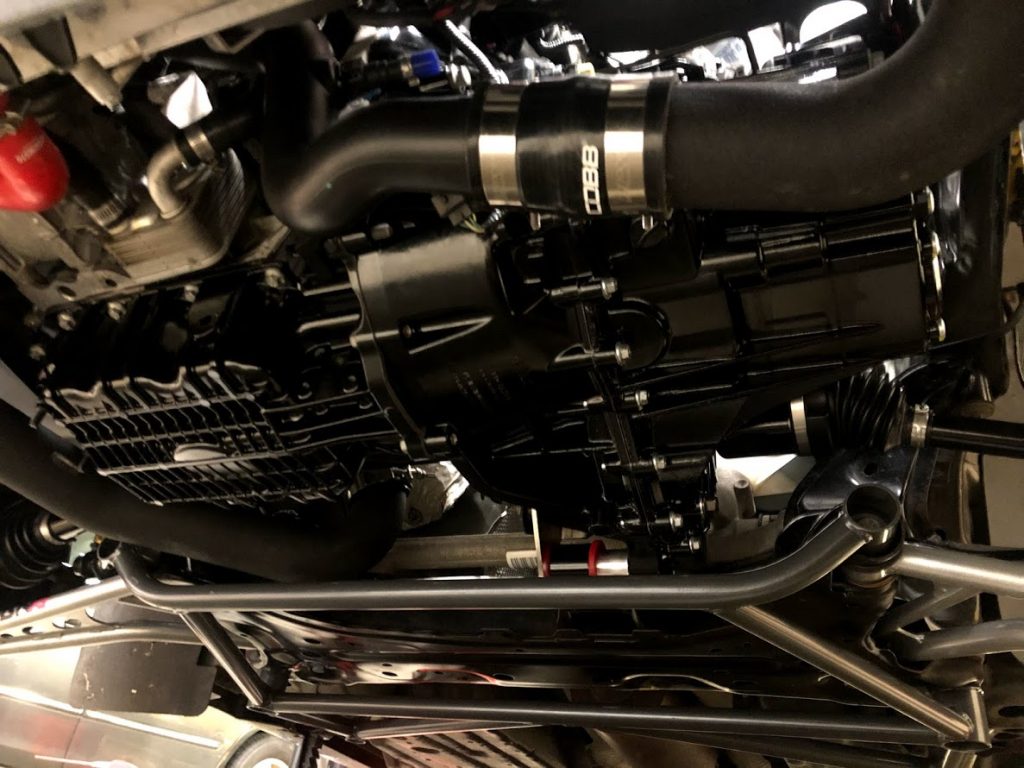
I chose #7. I figured I would recruit as much help as I could, I could source parts online and at local dealerships, buy tools I needed as I went along and if I failed completely, the worst case scenario is that I would need to buy a replacement transmission. So on I went. The first real work day wasn’t until June 9th when a couple friends came over to start the tear-down. The Ford manual tells you to remove the sub-frame, so we followed along. (Spoiler alert: the sub-frame does not need to come out in order to remove the transmission, but it does make it significantly easier. You might say “how would you know? You already said you removed the sub-frame to take the trans out!” A-HA – yes – well, see, spoiler alert #2, I had to take the transmission out a SECOND TIME. More on this later.) Jason lent me his trans jack, Randy brought some air tools, pry bars and large socket set, Ryan brought an engine support, pullers and other specialized tools (he had recently rebuild his trans). On this first day, parts were flying off the car. We got the trans out and called it a day.


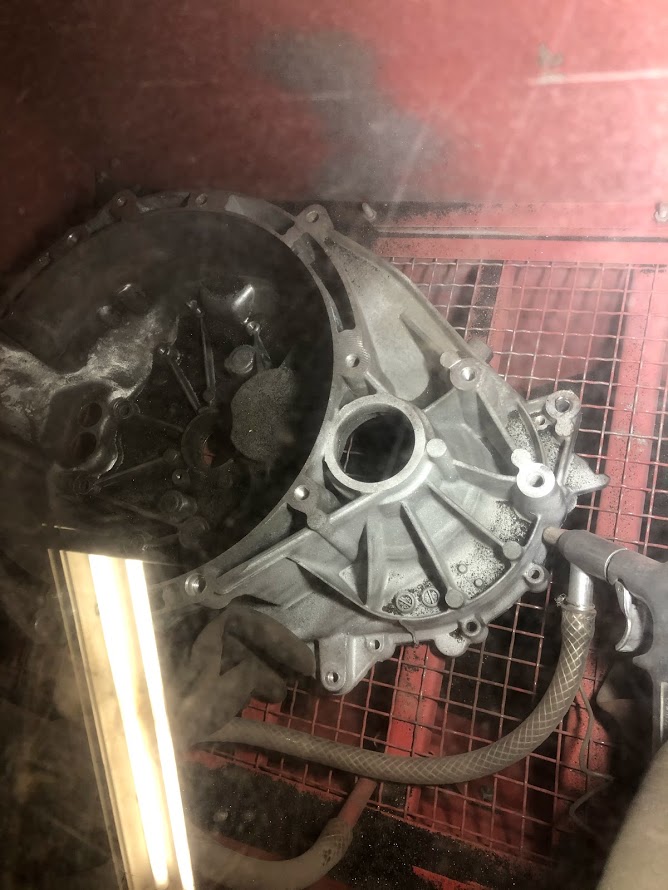
Over the next week or two I opened up the trans for an inspection.

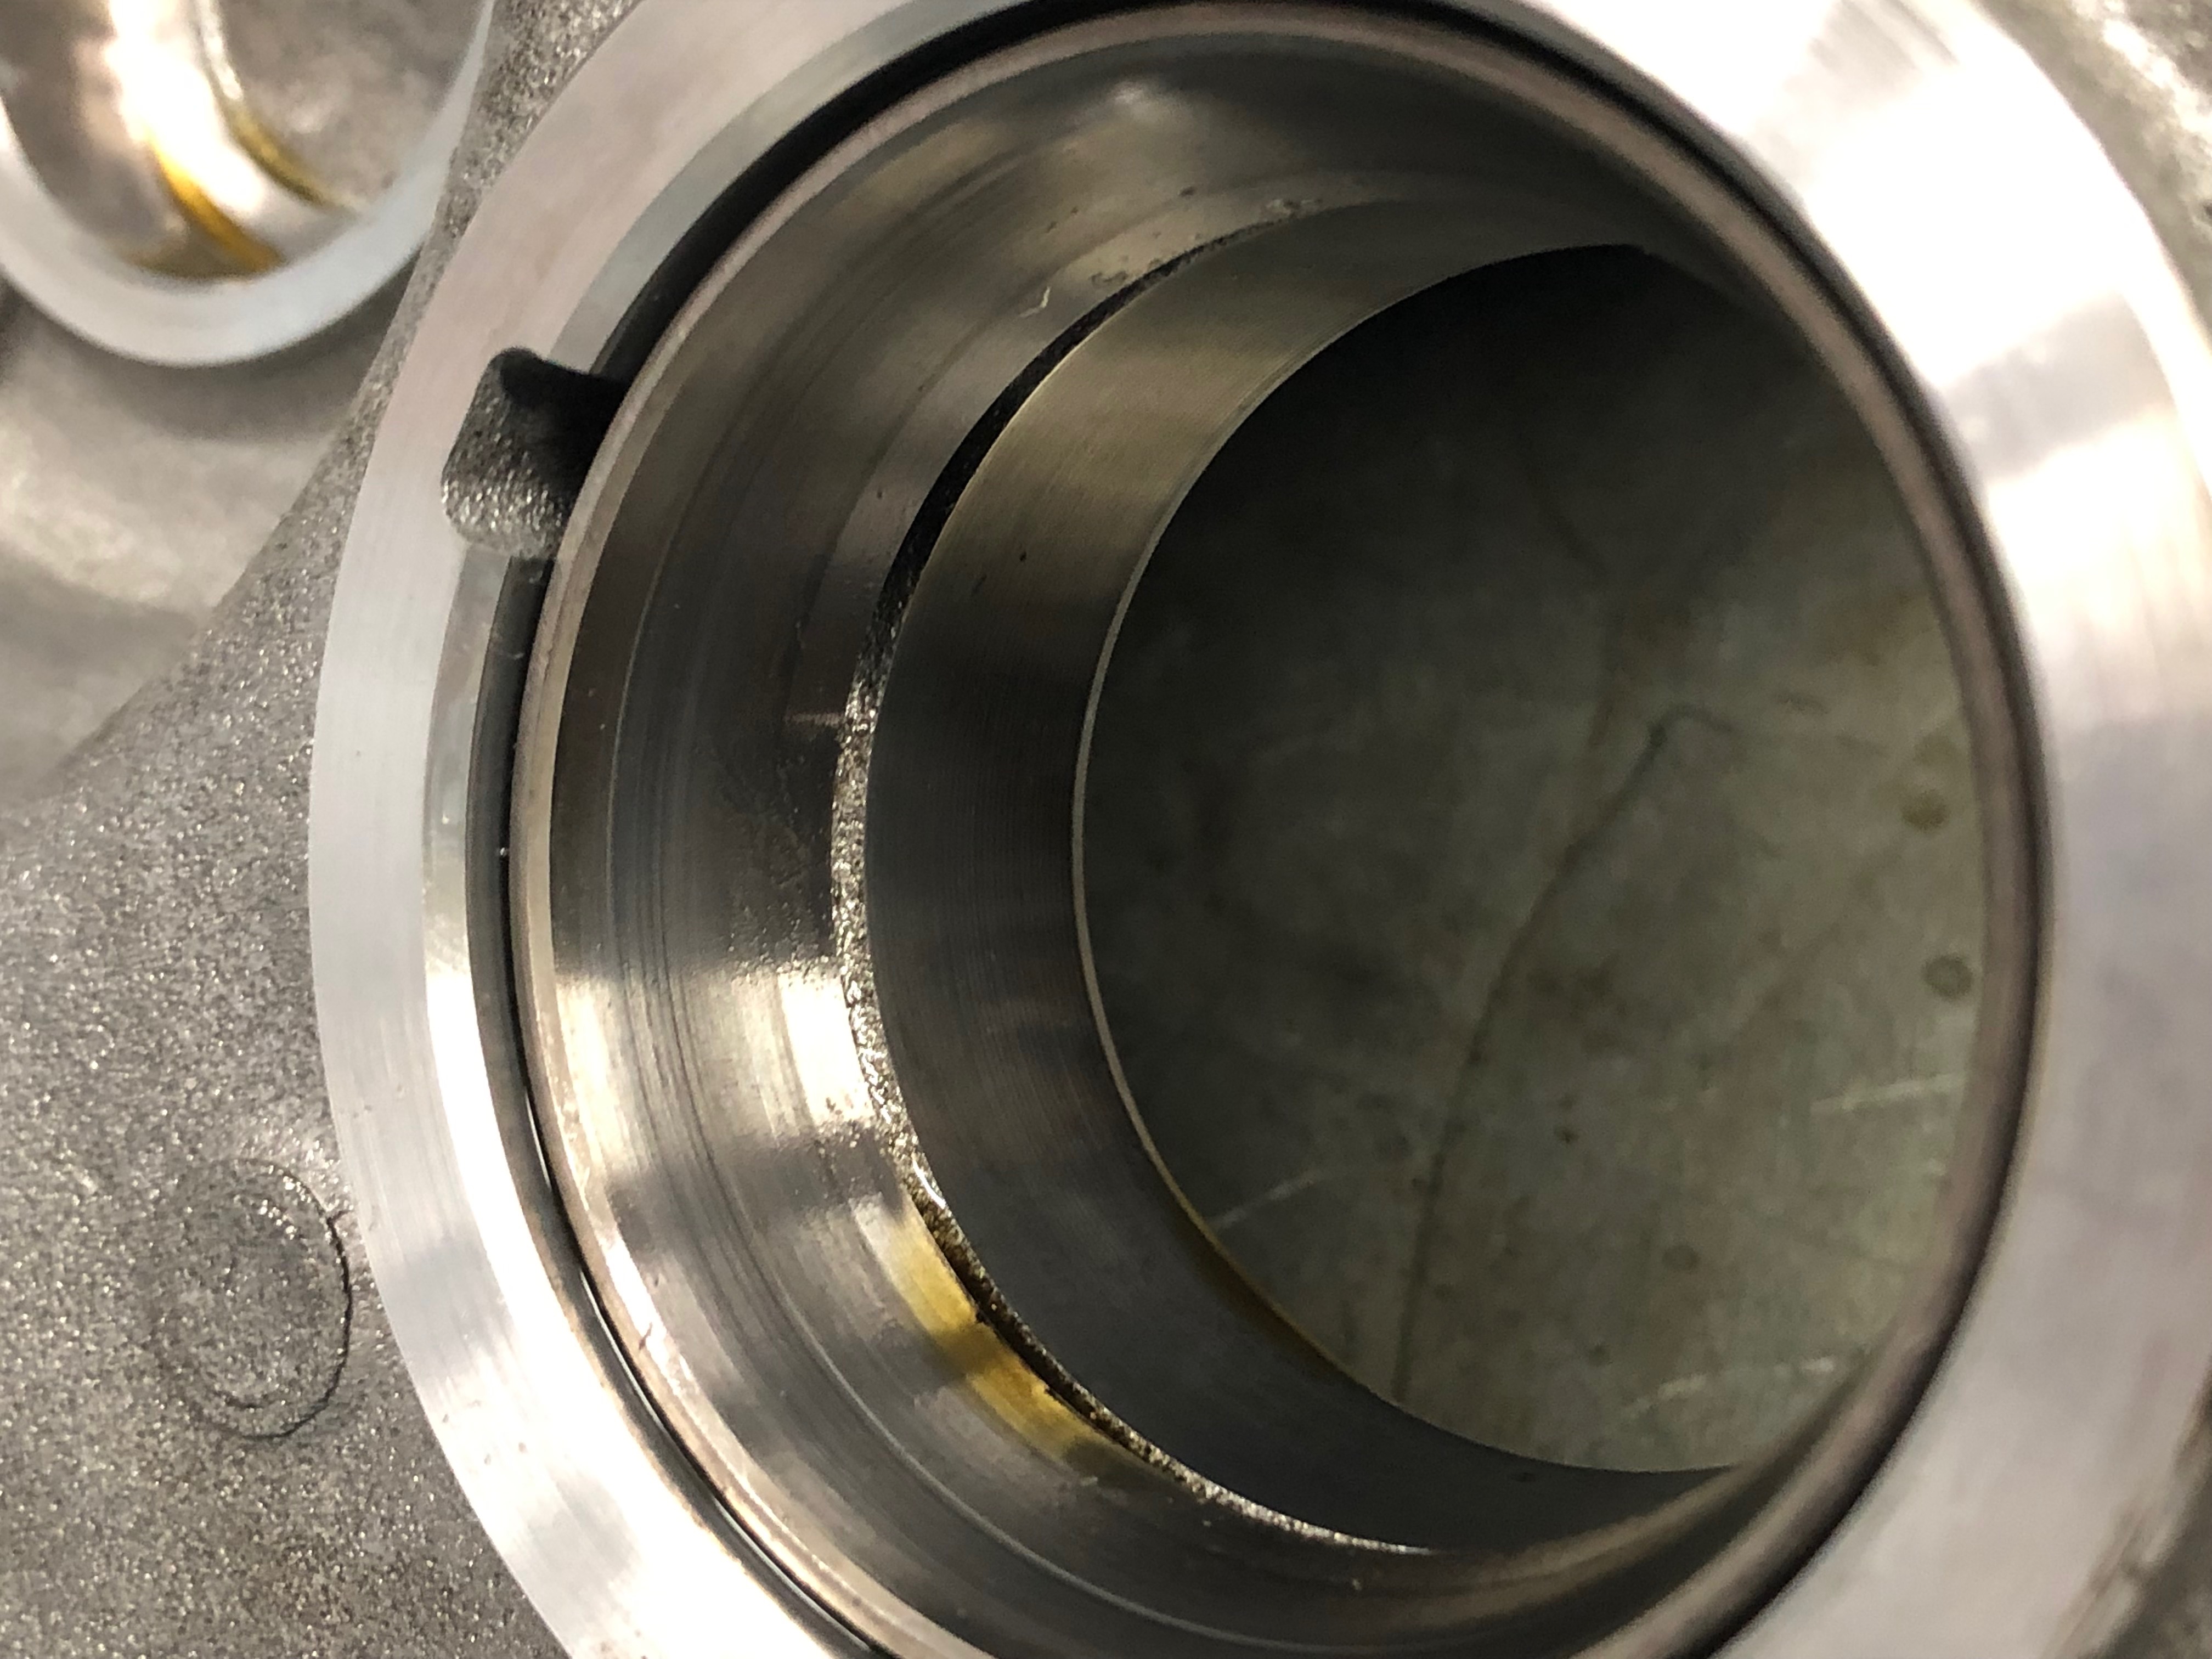
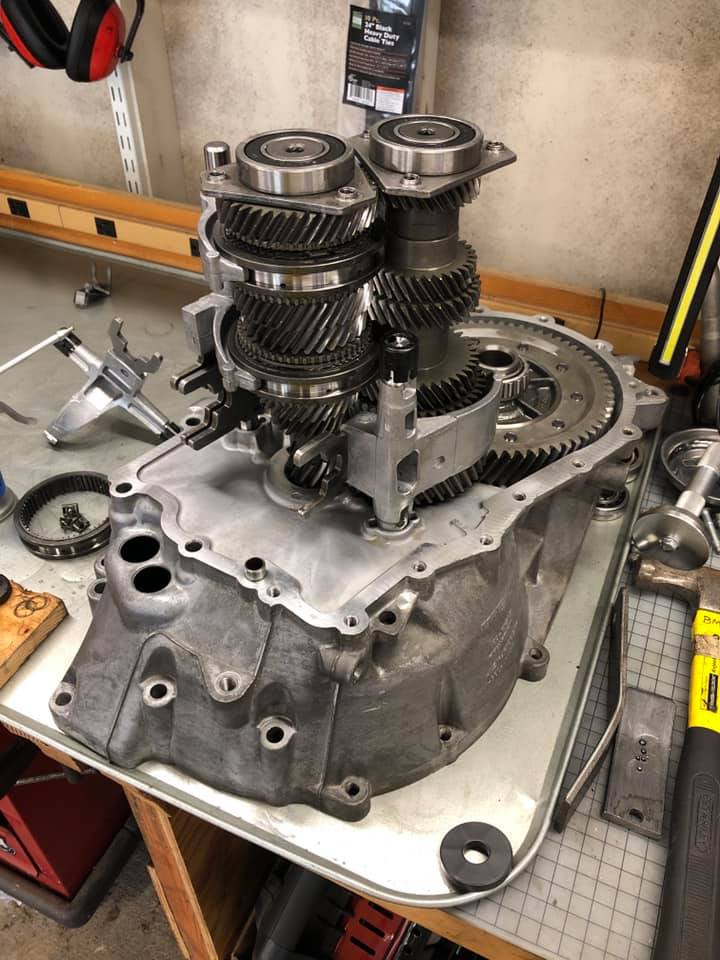
I had been hoping that once I opened the trans case I would be met with an “AH-HA” moment; something like a bearing that was obviously failed, or something loose and rattling around. I was let down. To my semi-trained ears, the bearings all seemed “fine”. Nothing glaring. Some of the bearings showed signs of wear; what I could consider normal.


I’m not an expert by any means, but I consider myself proficient with mechanics and processes. I’ve replaced plenty of items on my vehicles over the years from timing belts, water pumps, alternators, starters, AC compressors, throttle bodies, mounts, wheel bearings, etc. I have watched many automotive videos for years covering repairs and diagnostics, including complete multi-hour transmission videos, of which I have watched several. I felt confident that I could give this job a good go. I figured that the bearings that I thought were “worn” would be the ones I would need to replace and the others could be left alone. This silly, silly idea was my first major mistake.
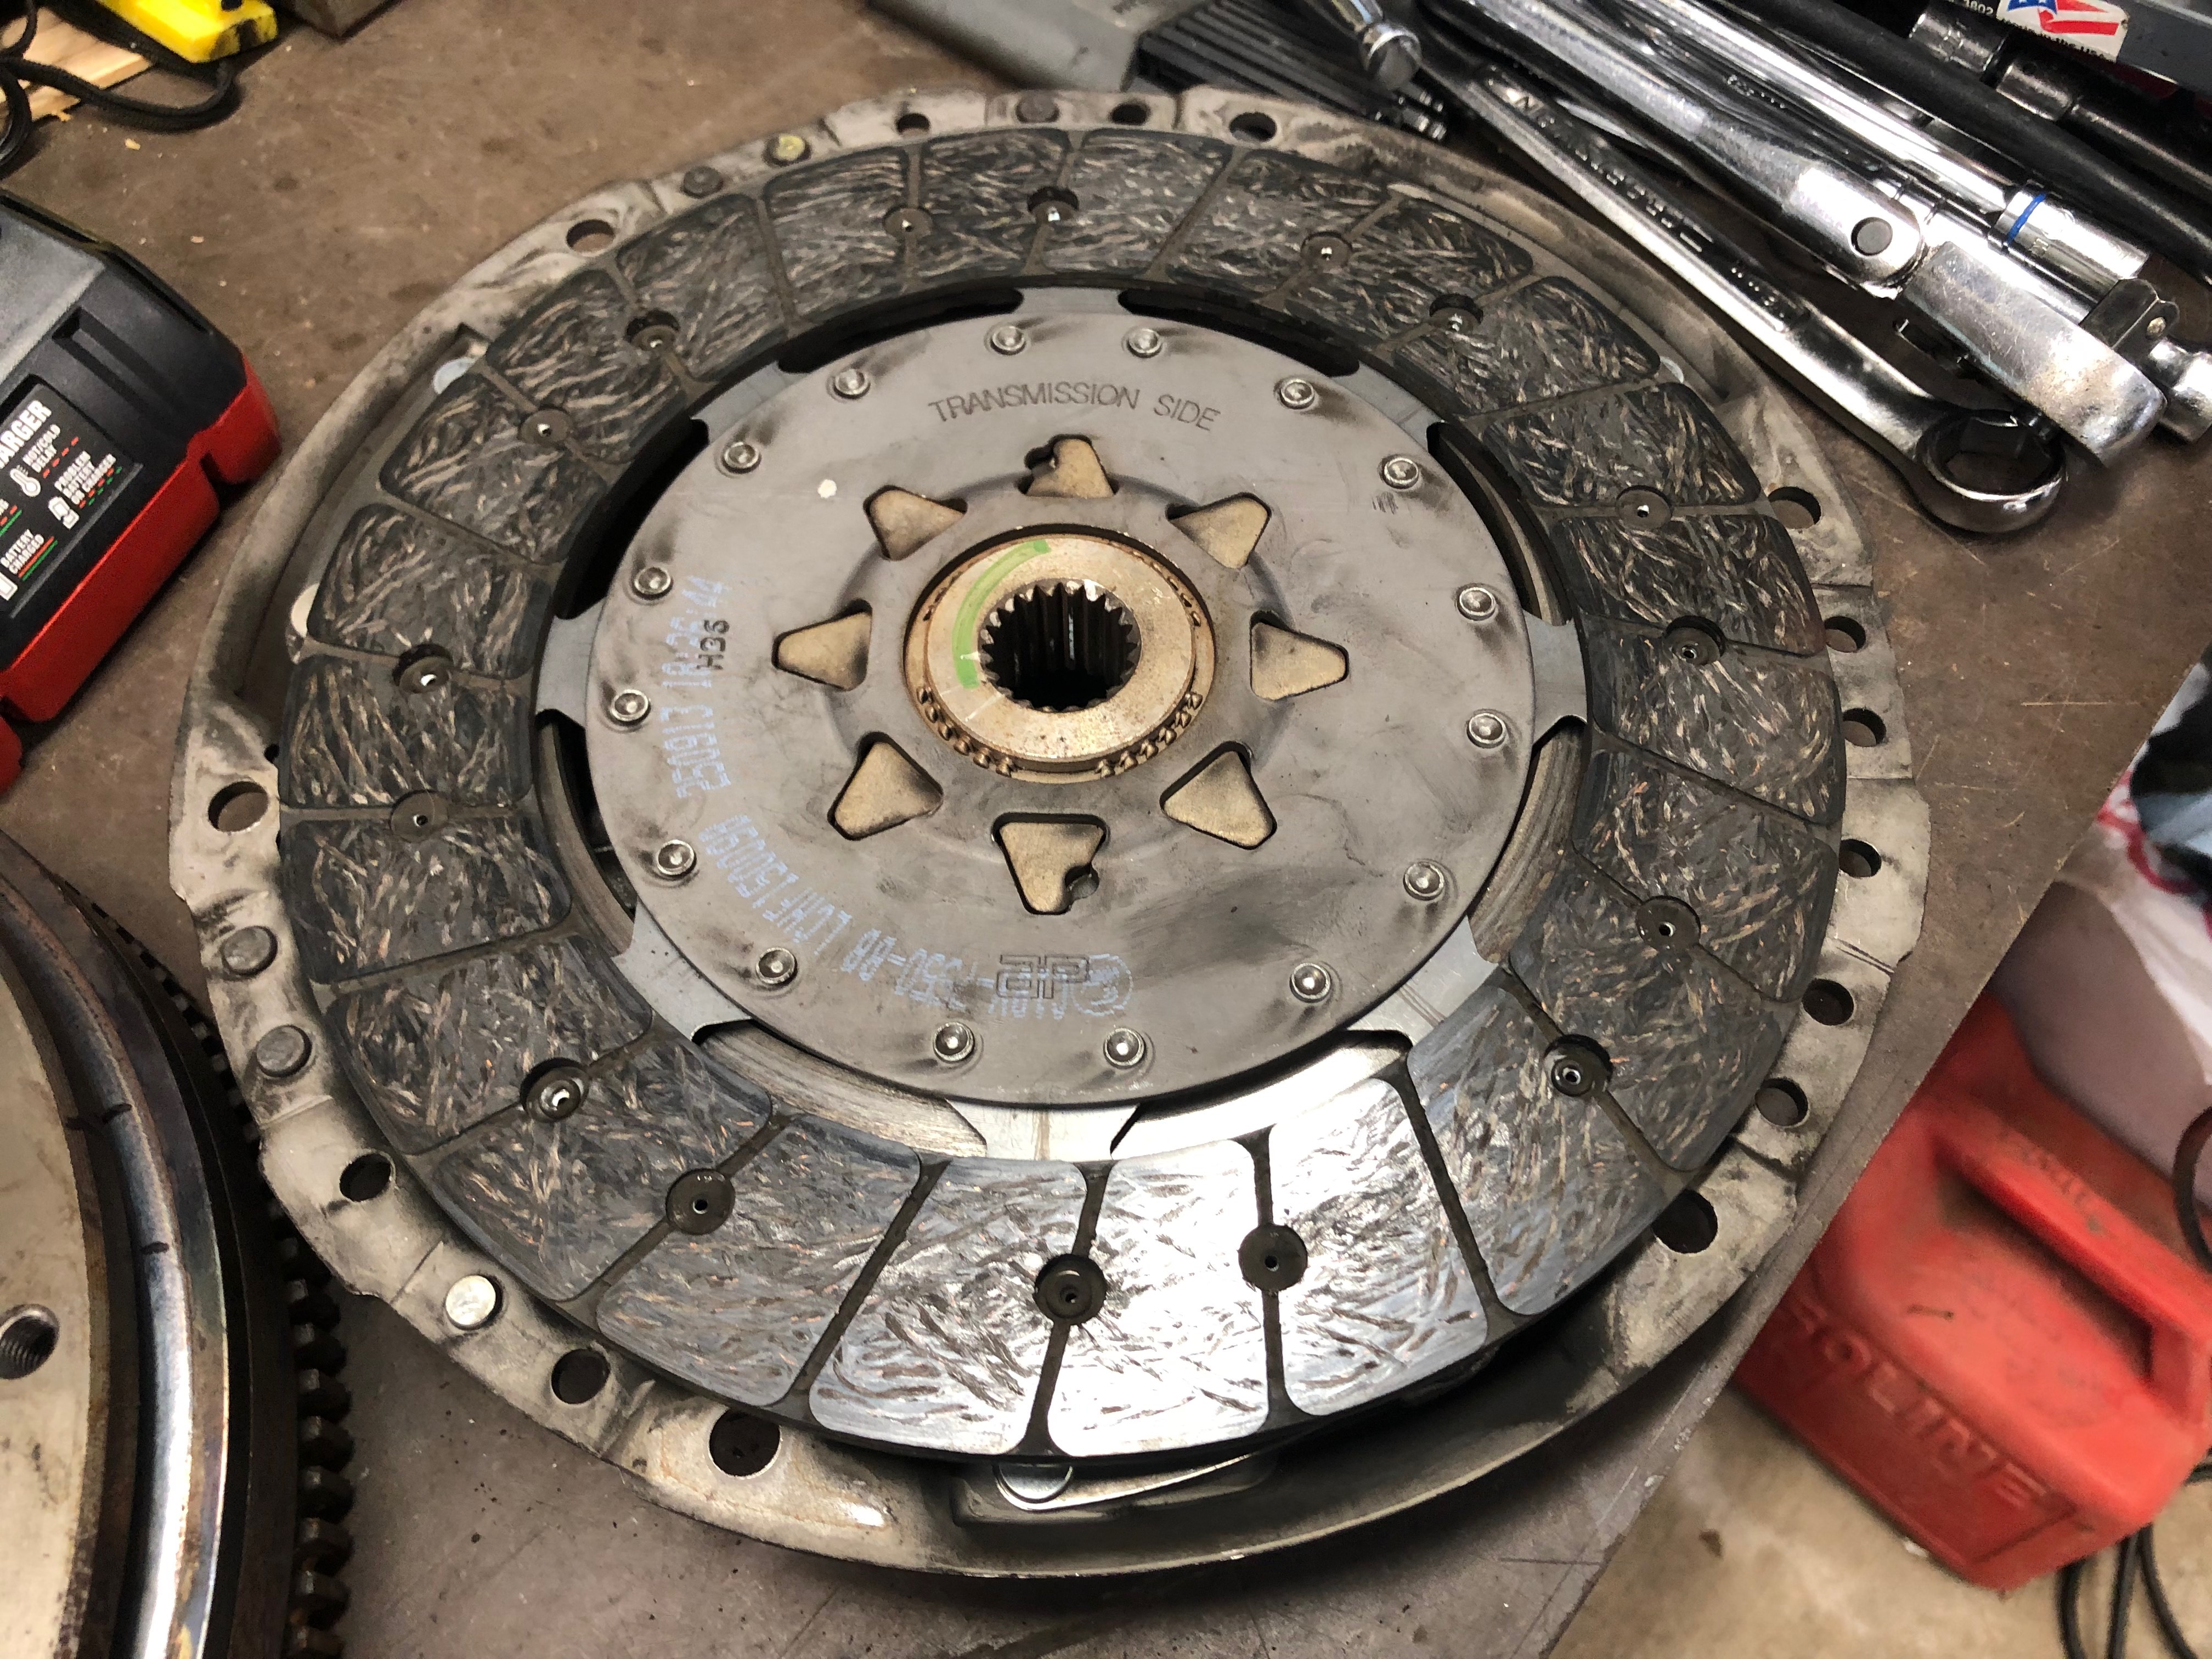
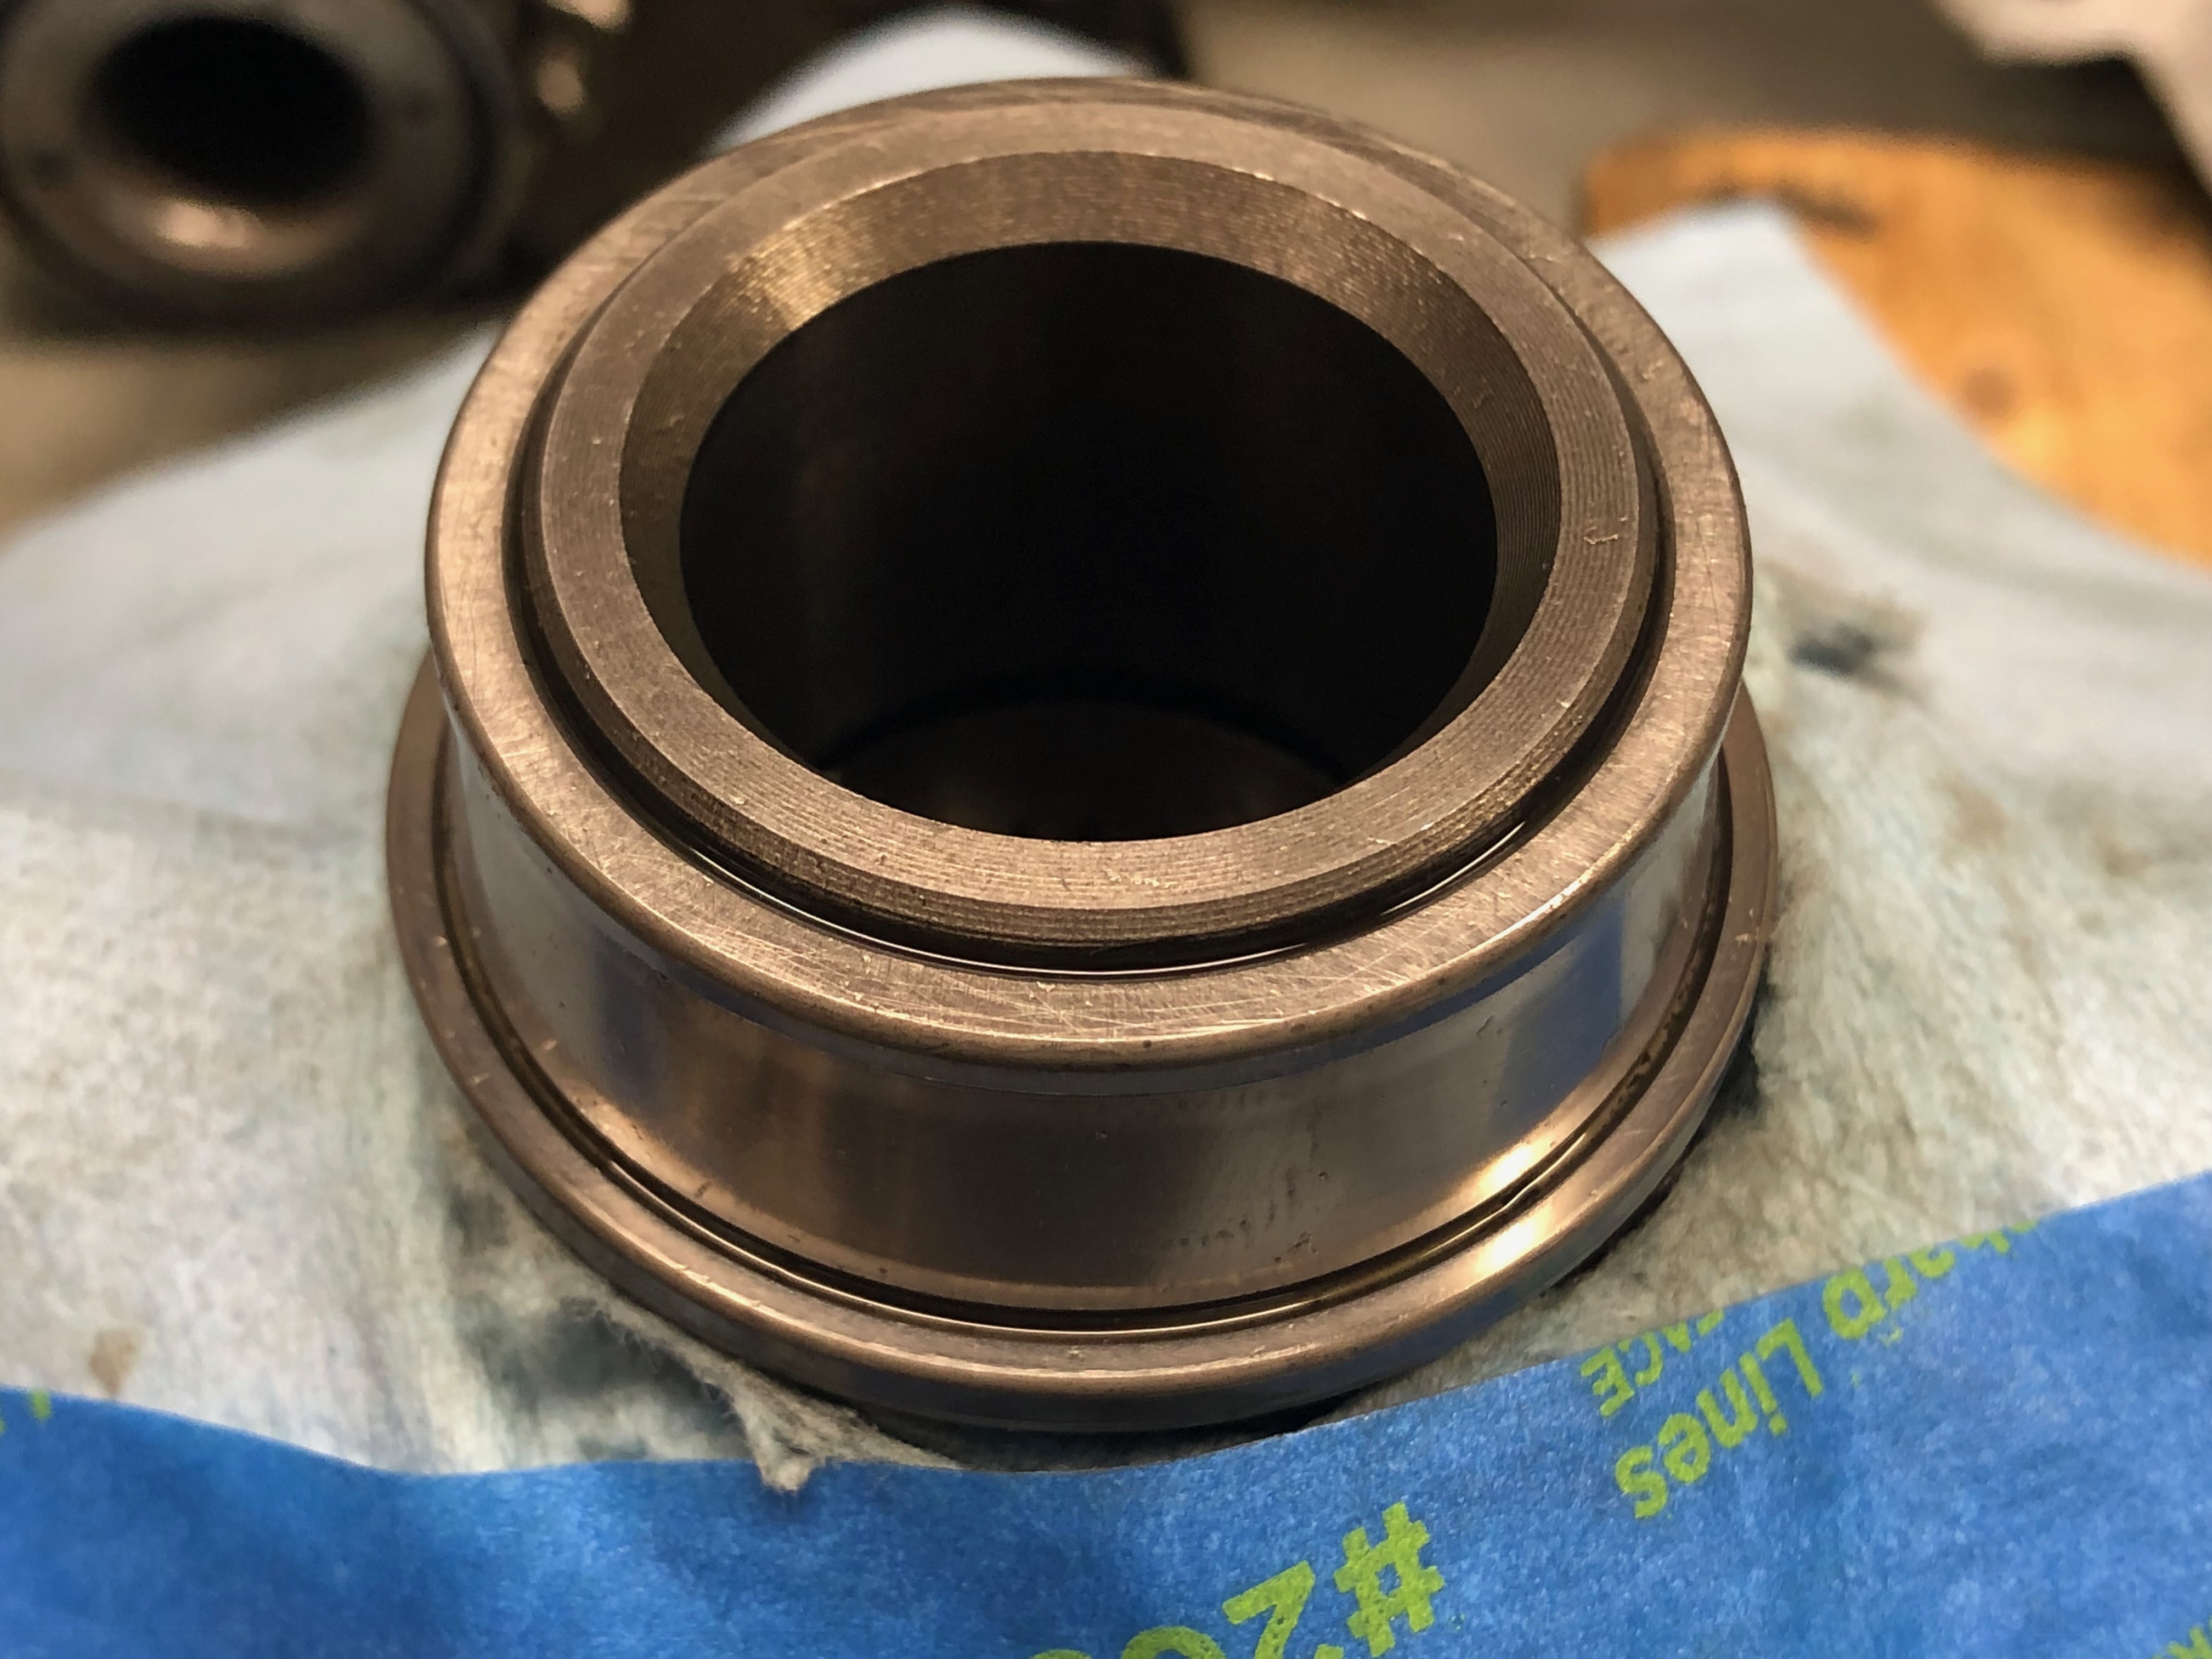
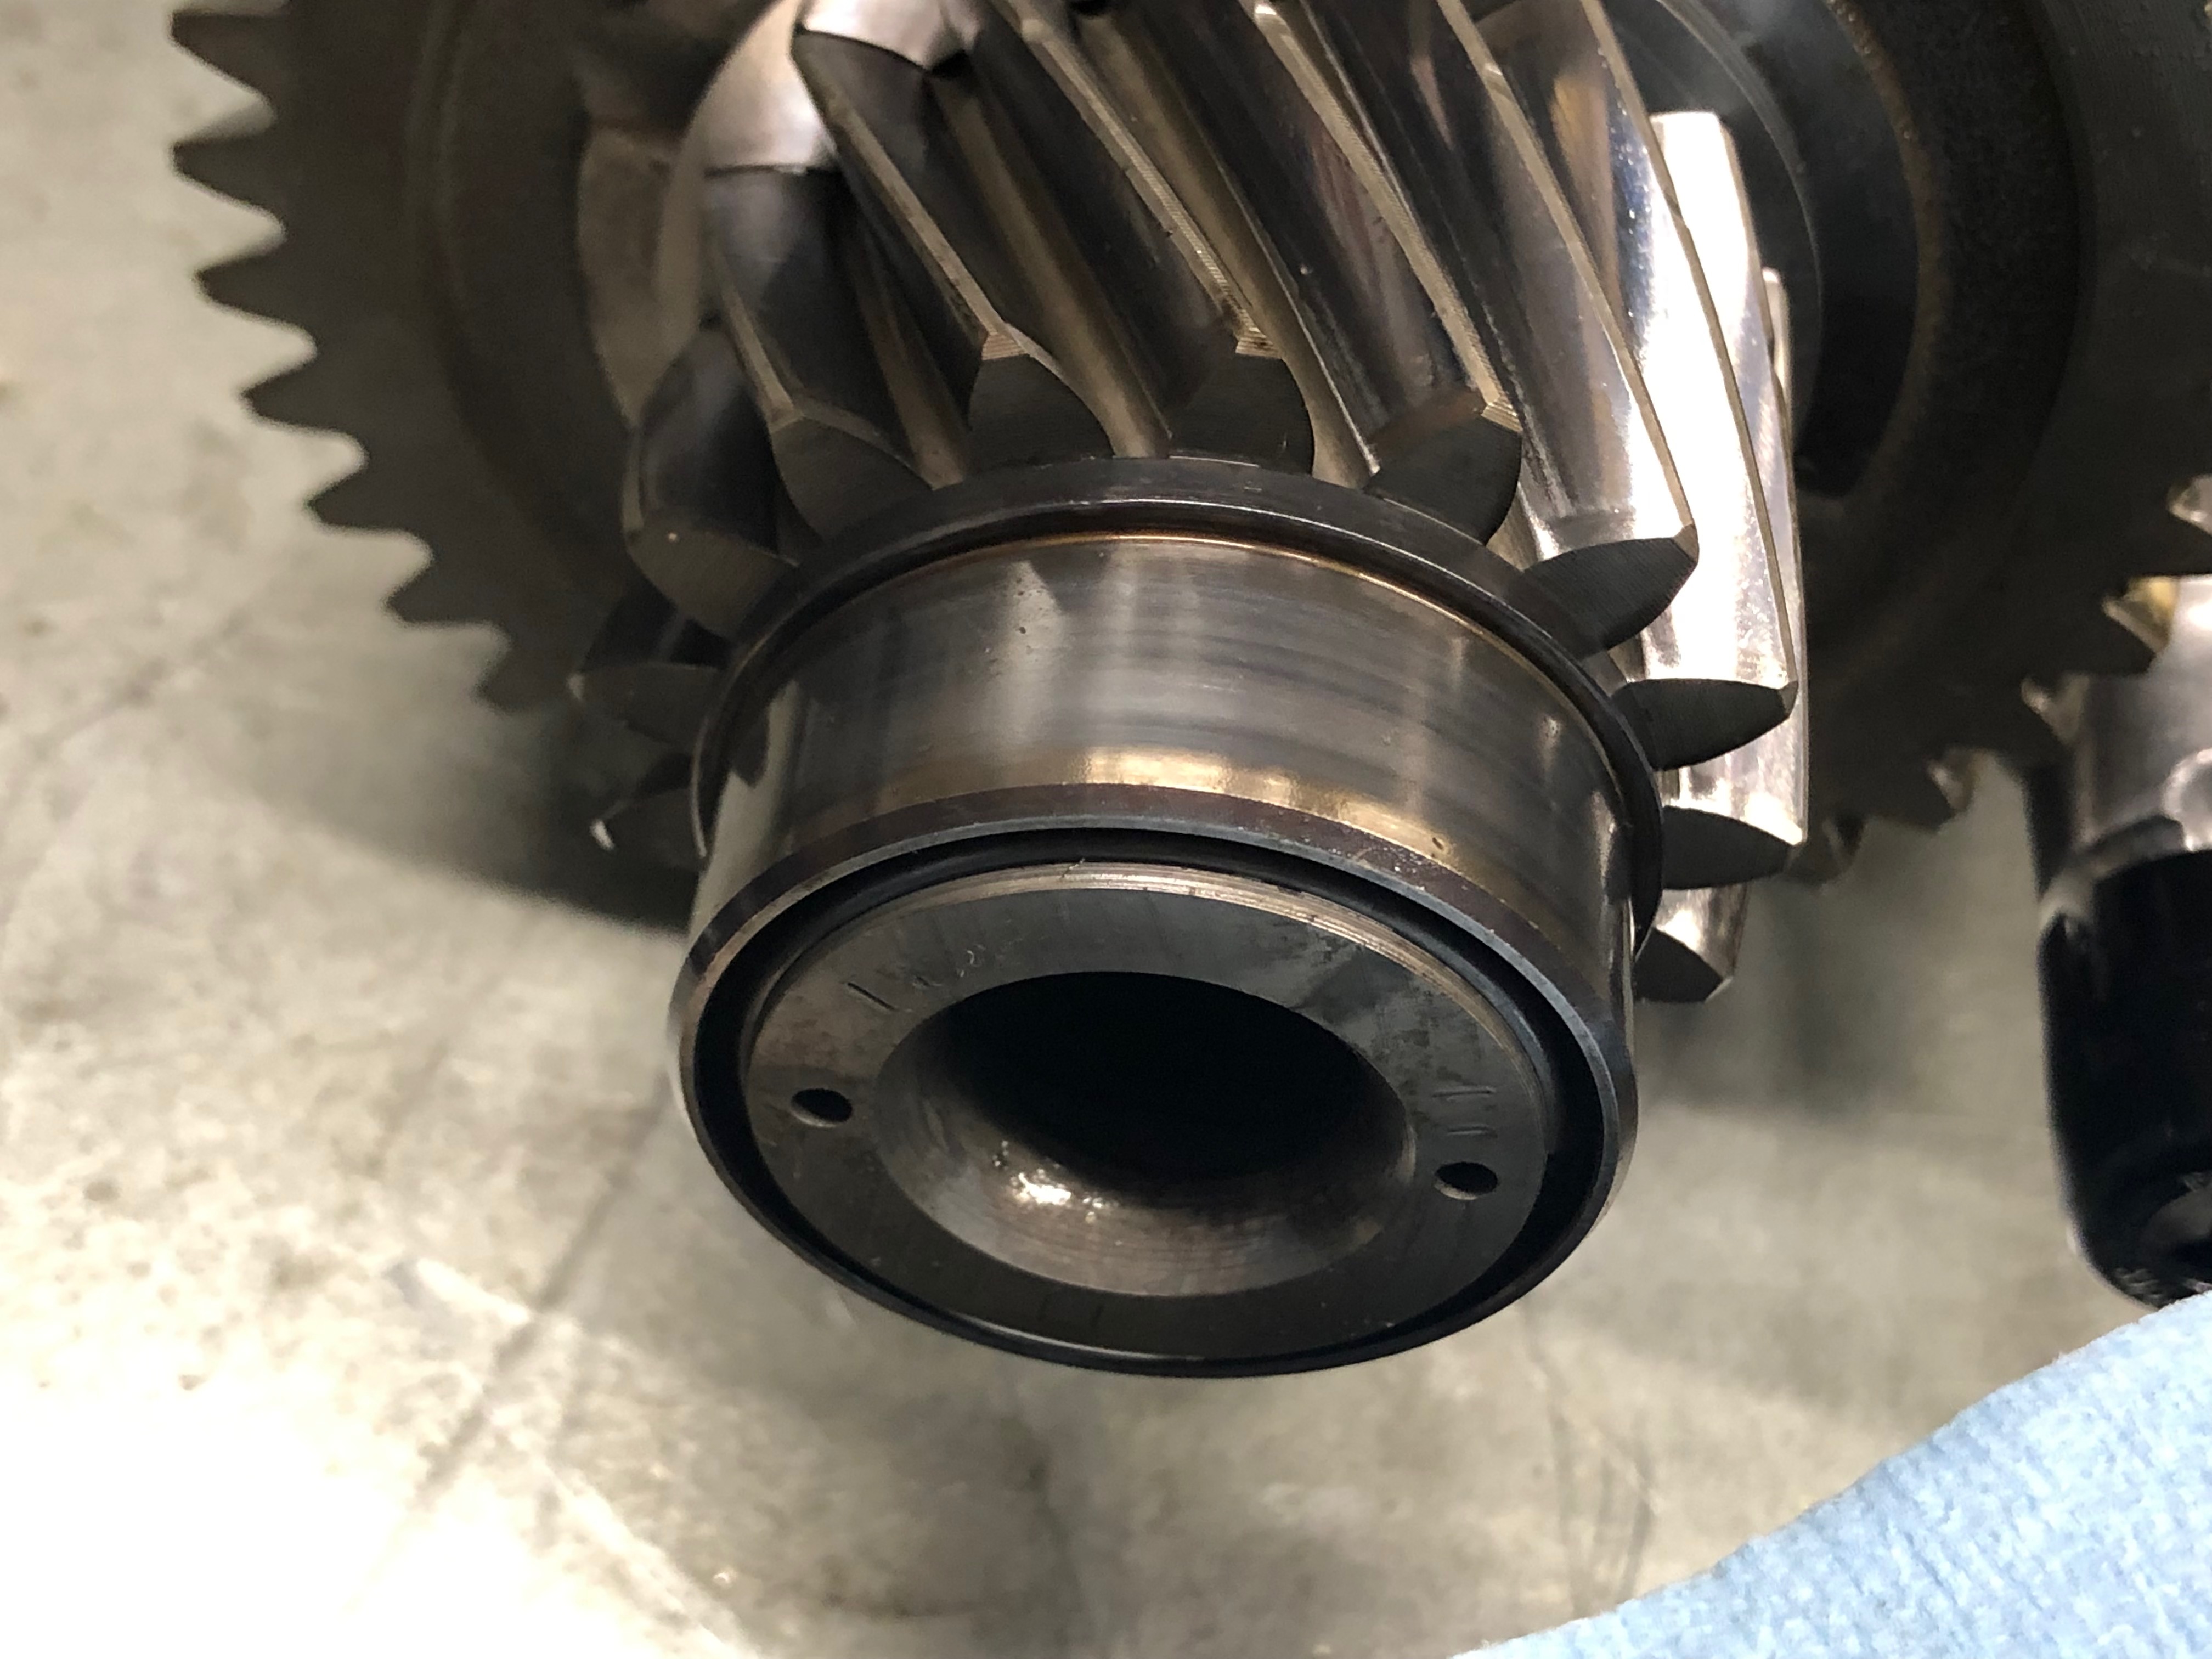
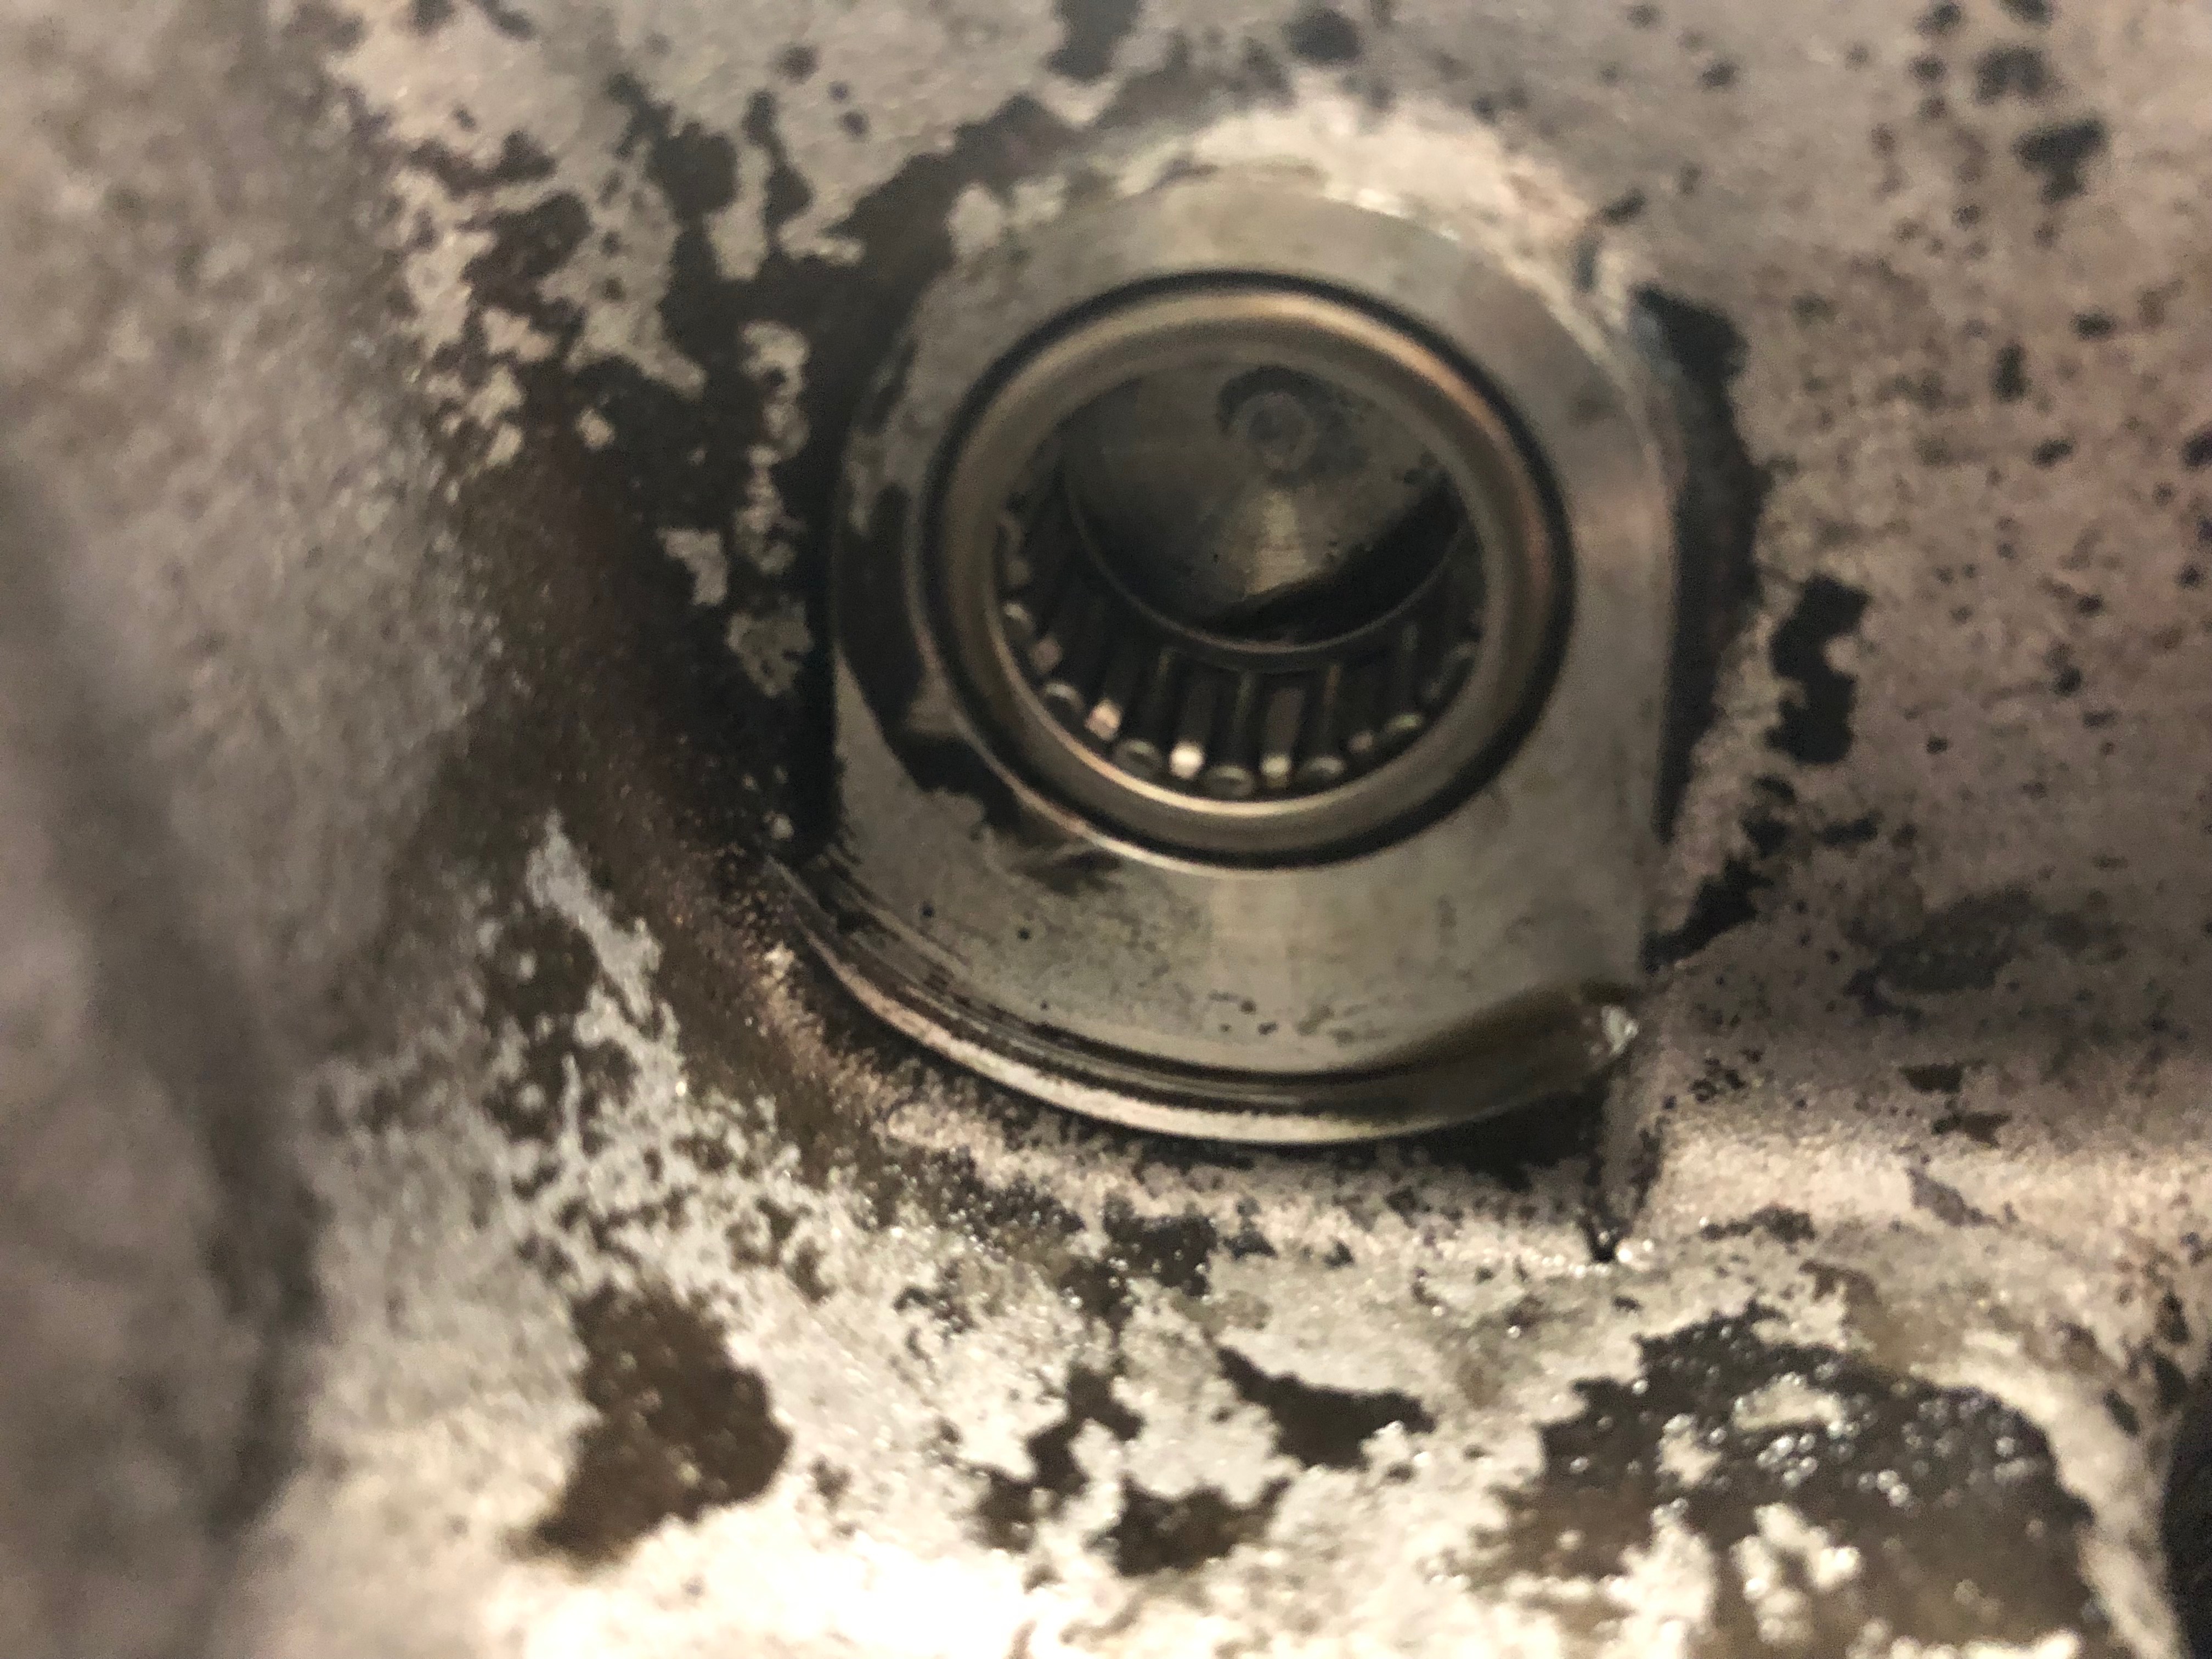
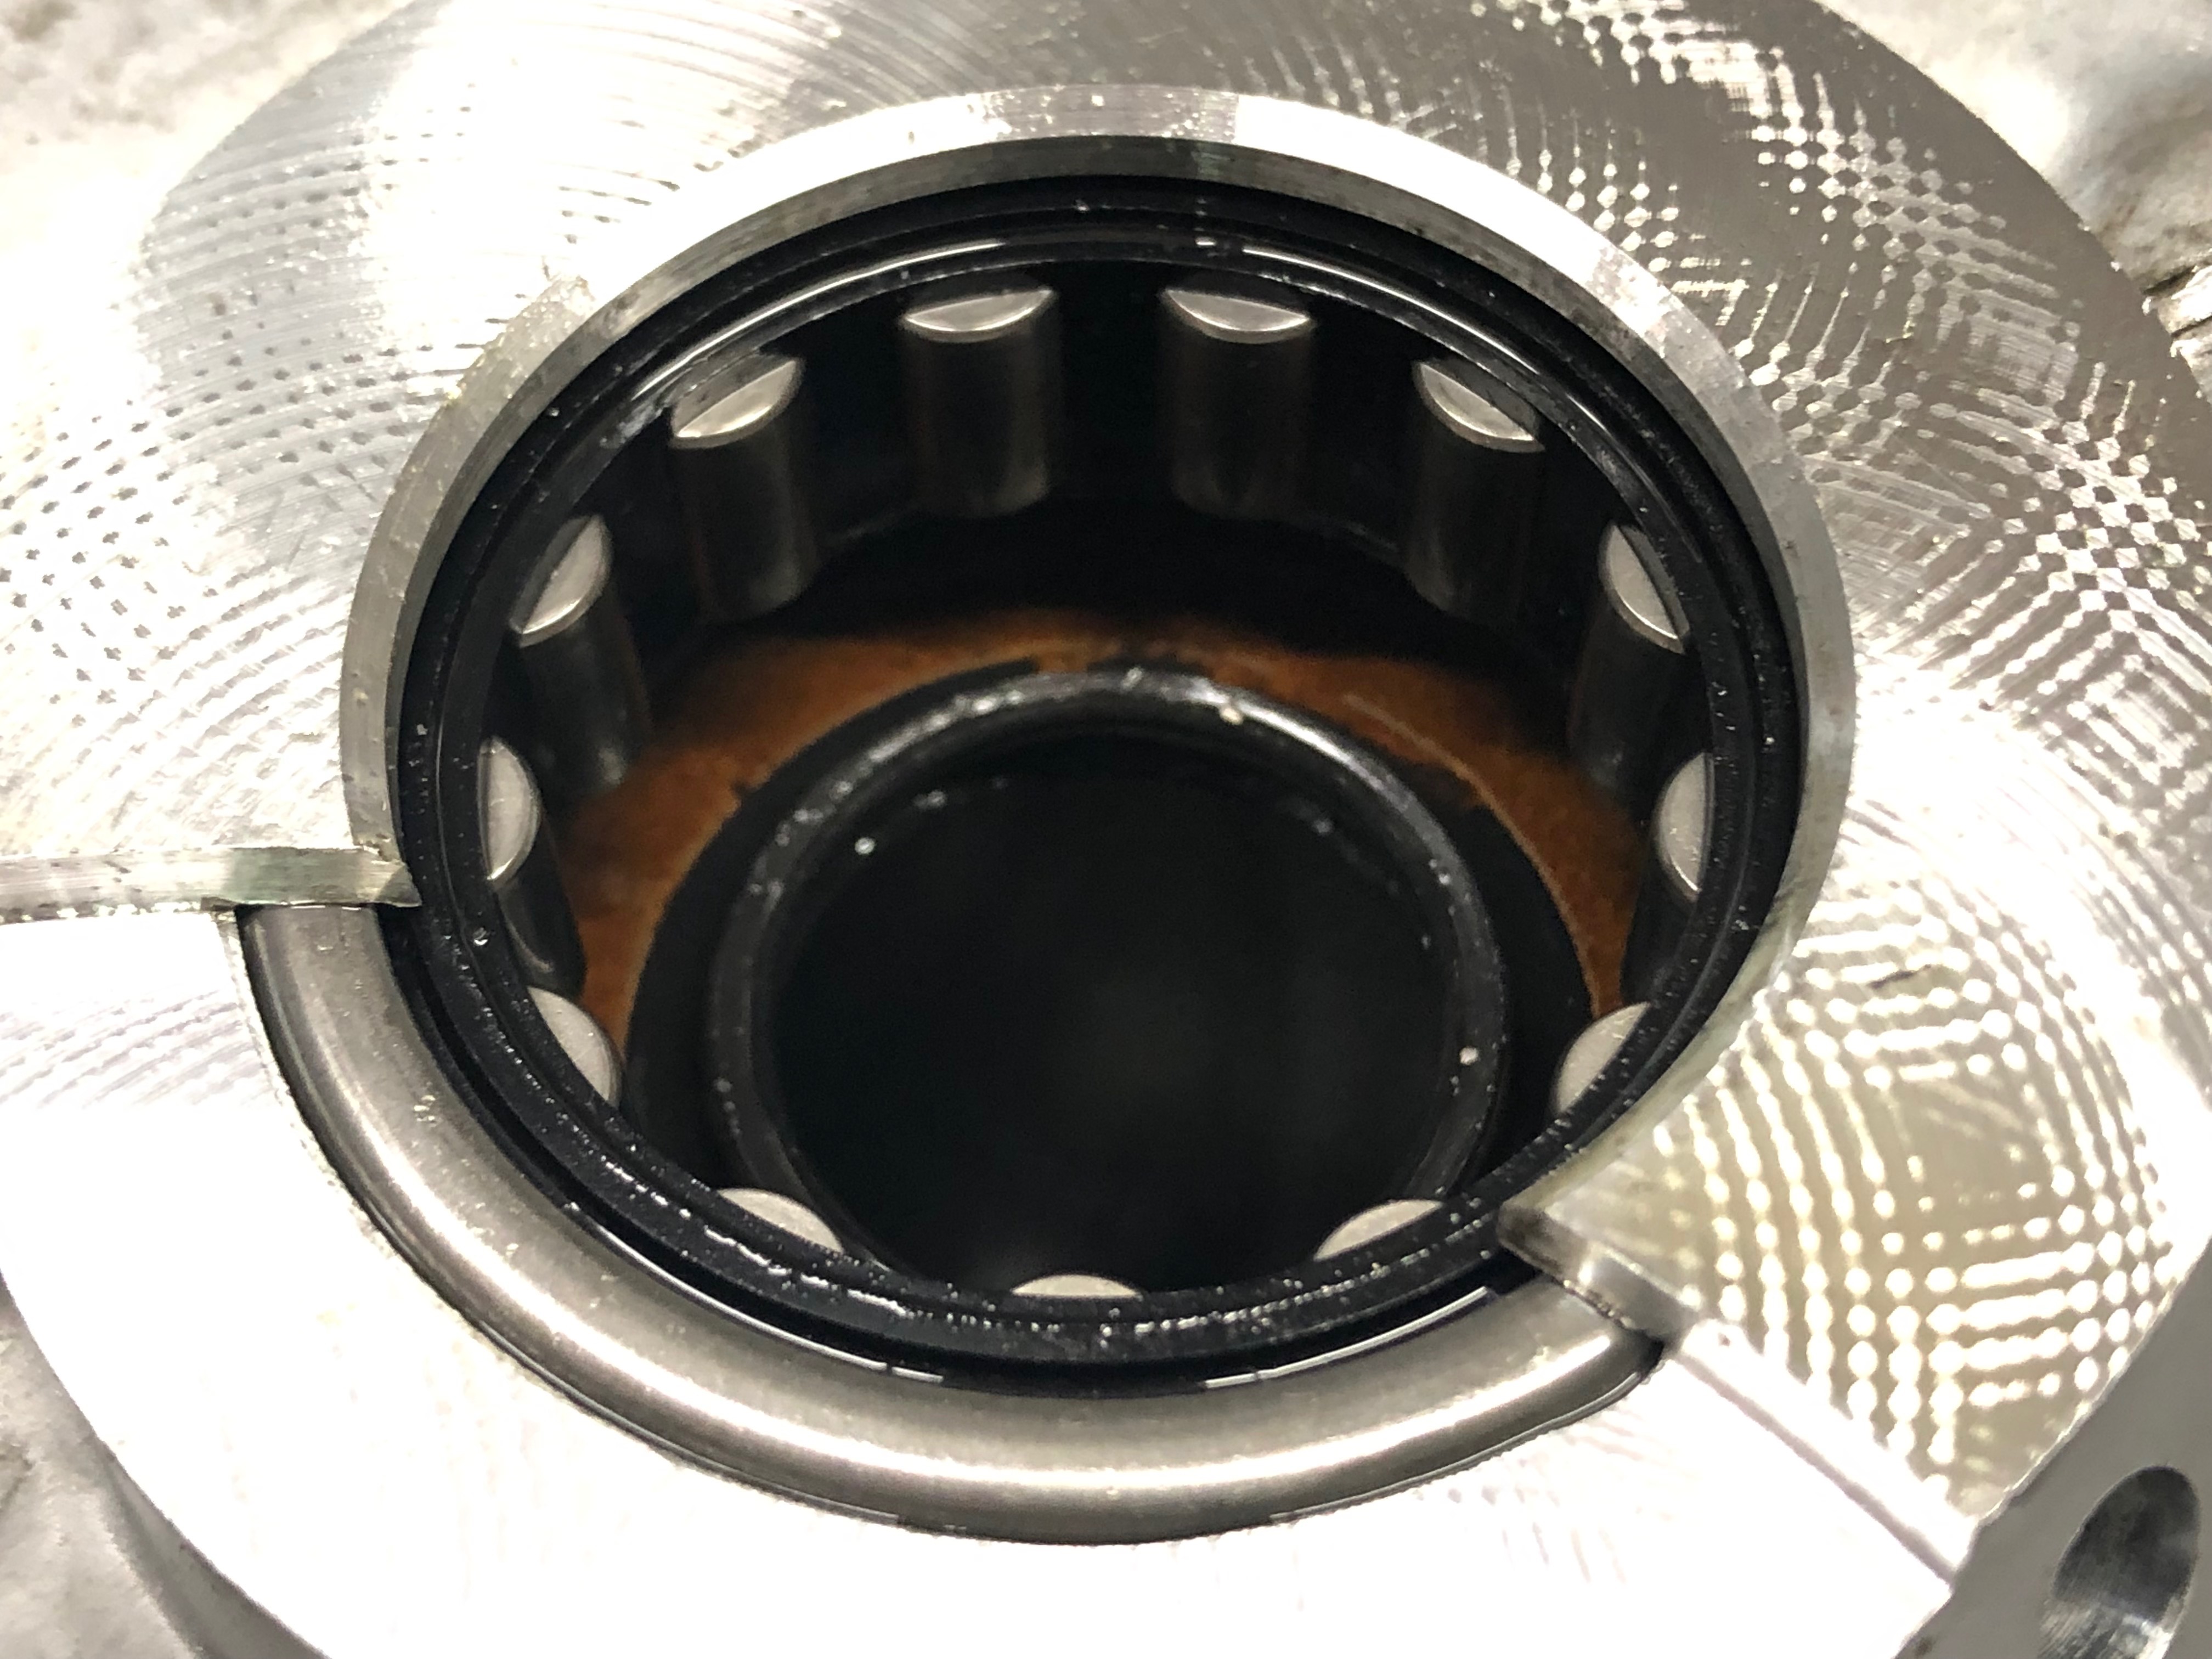
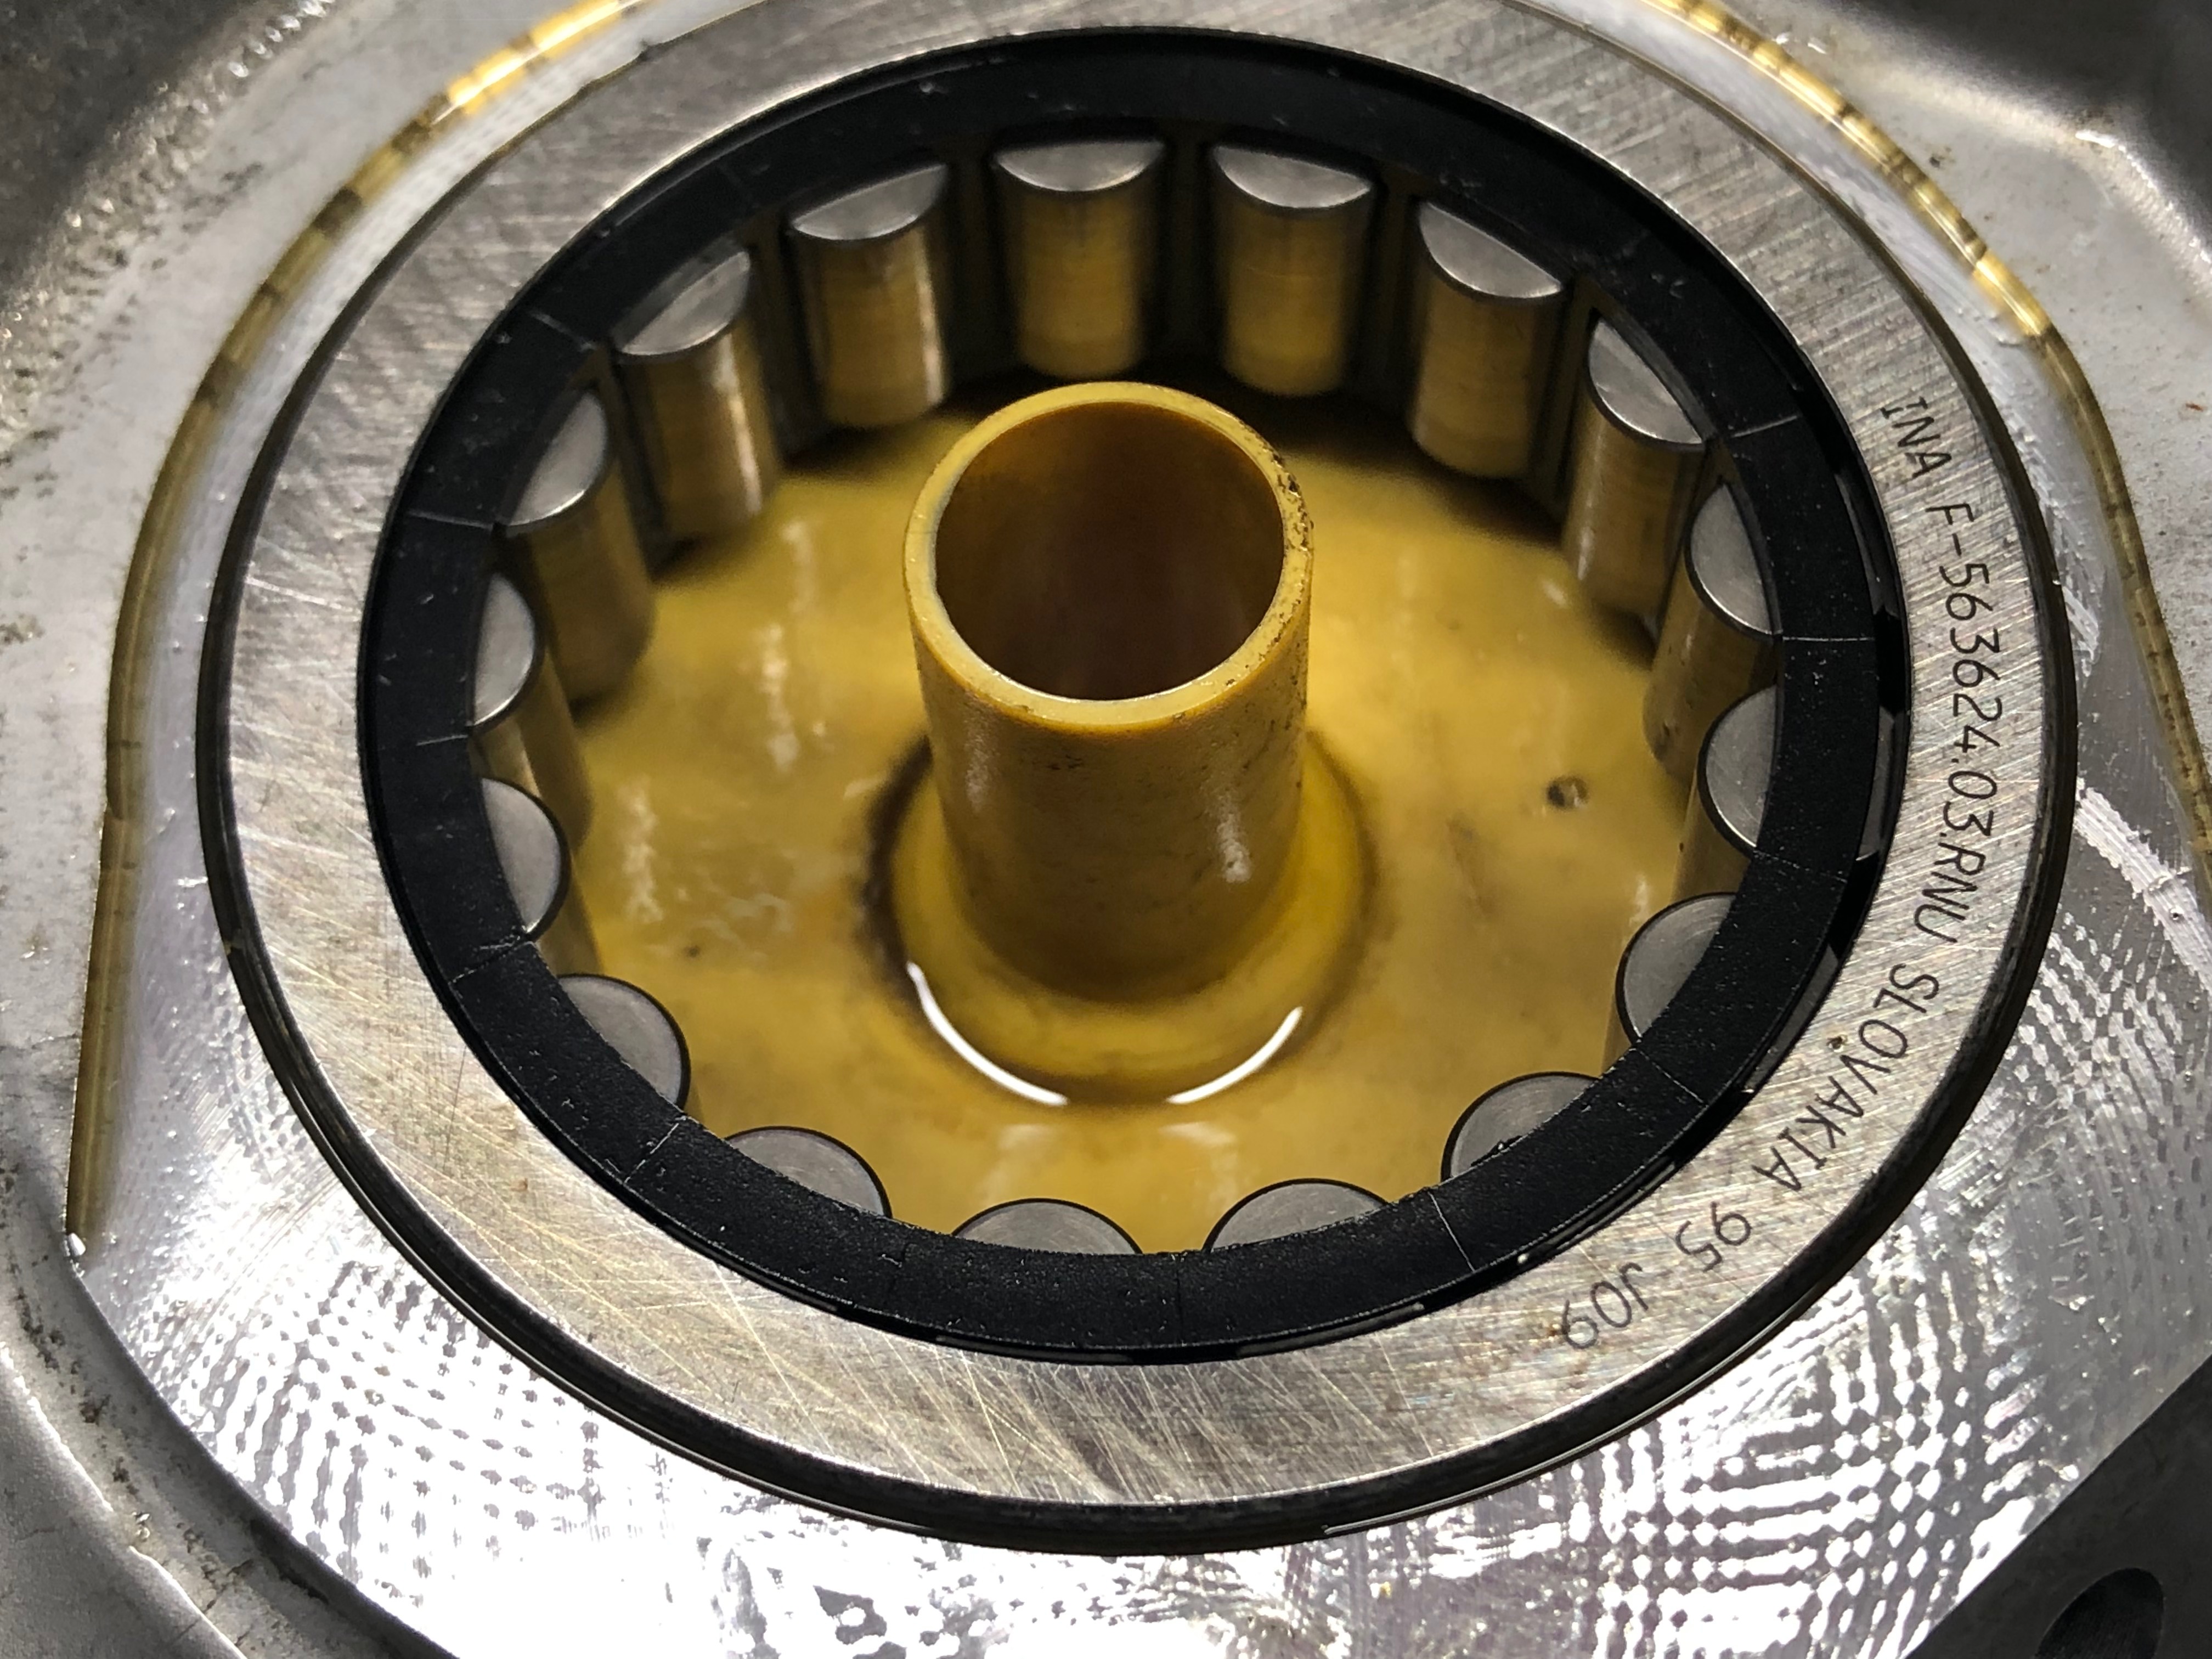
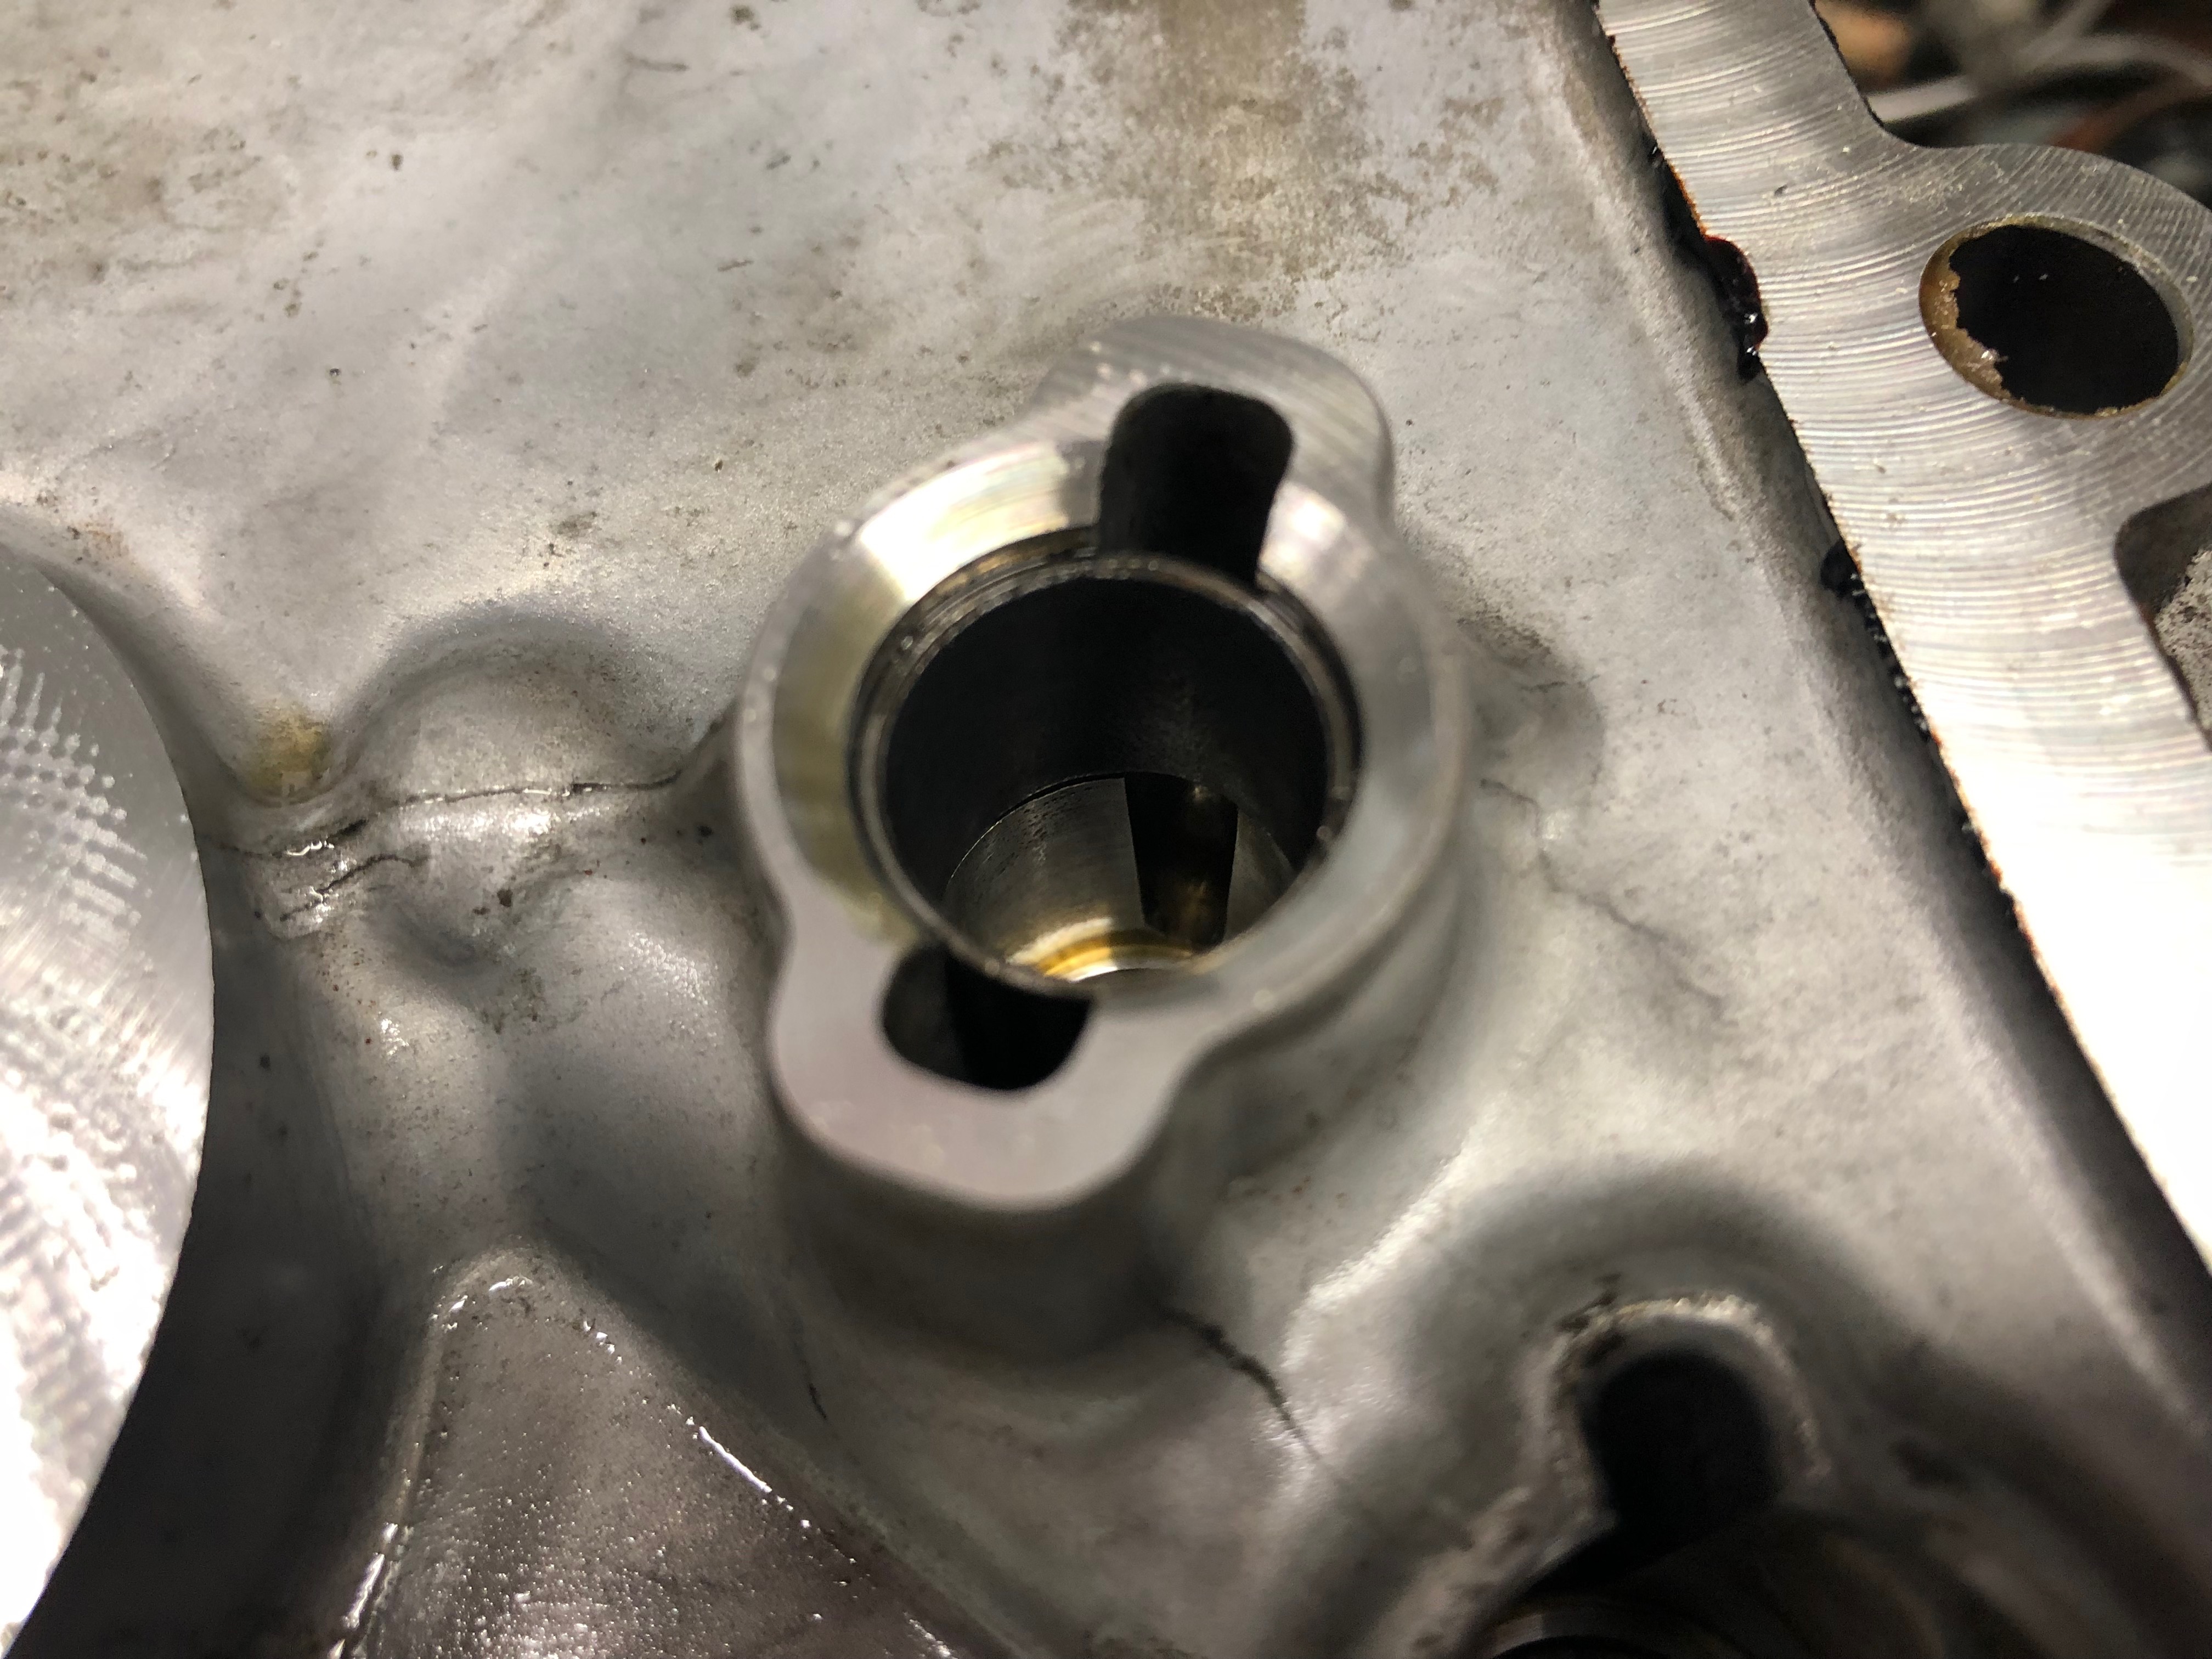
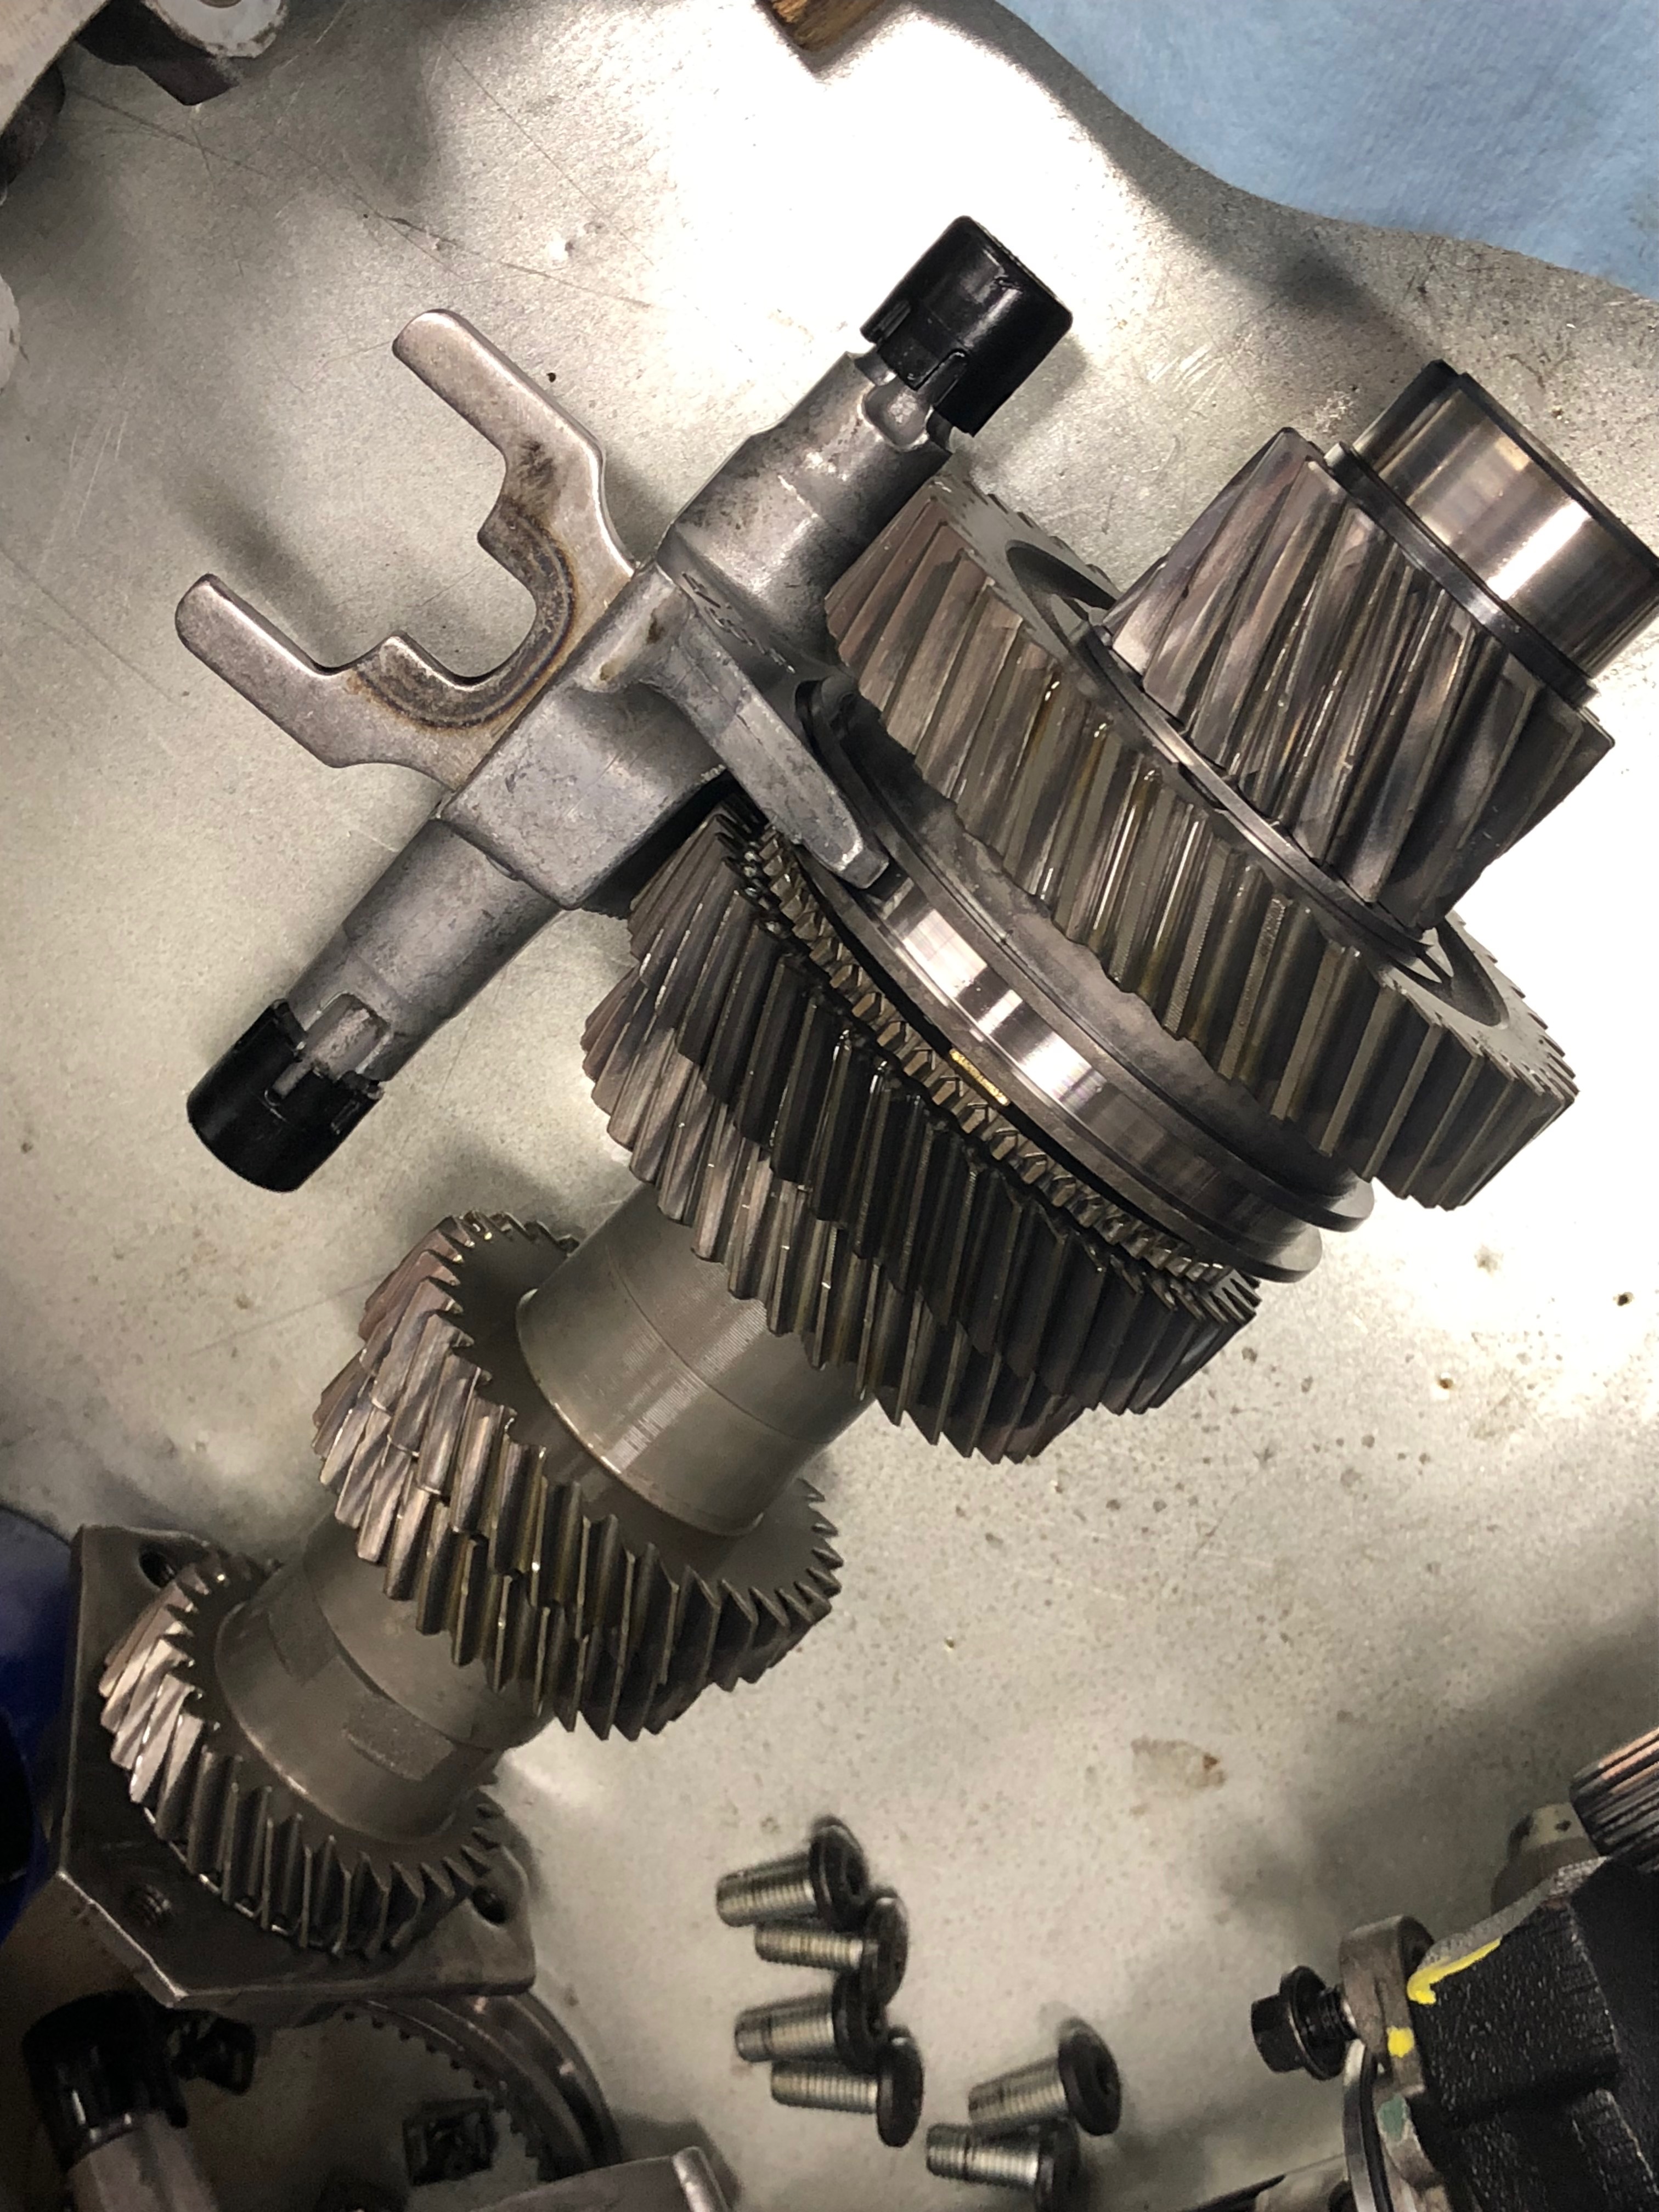
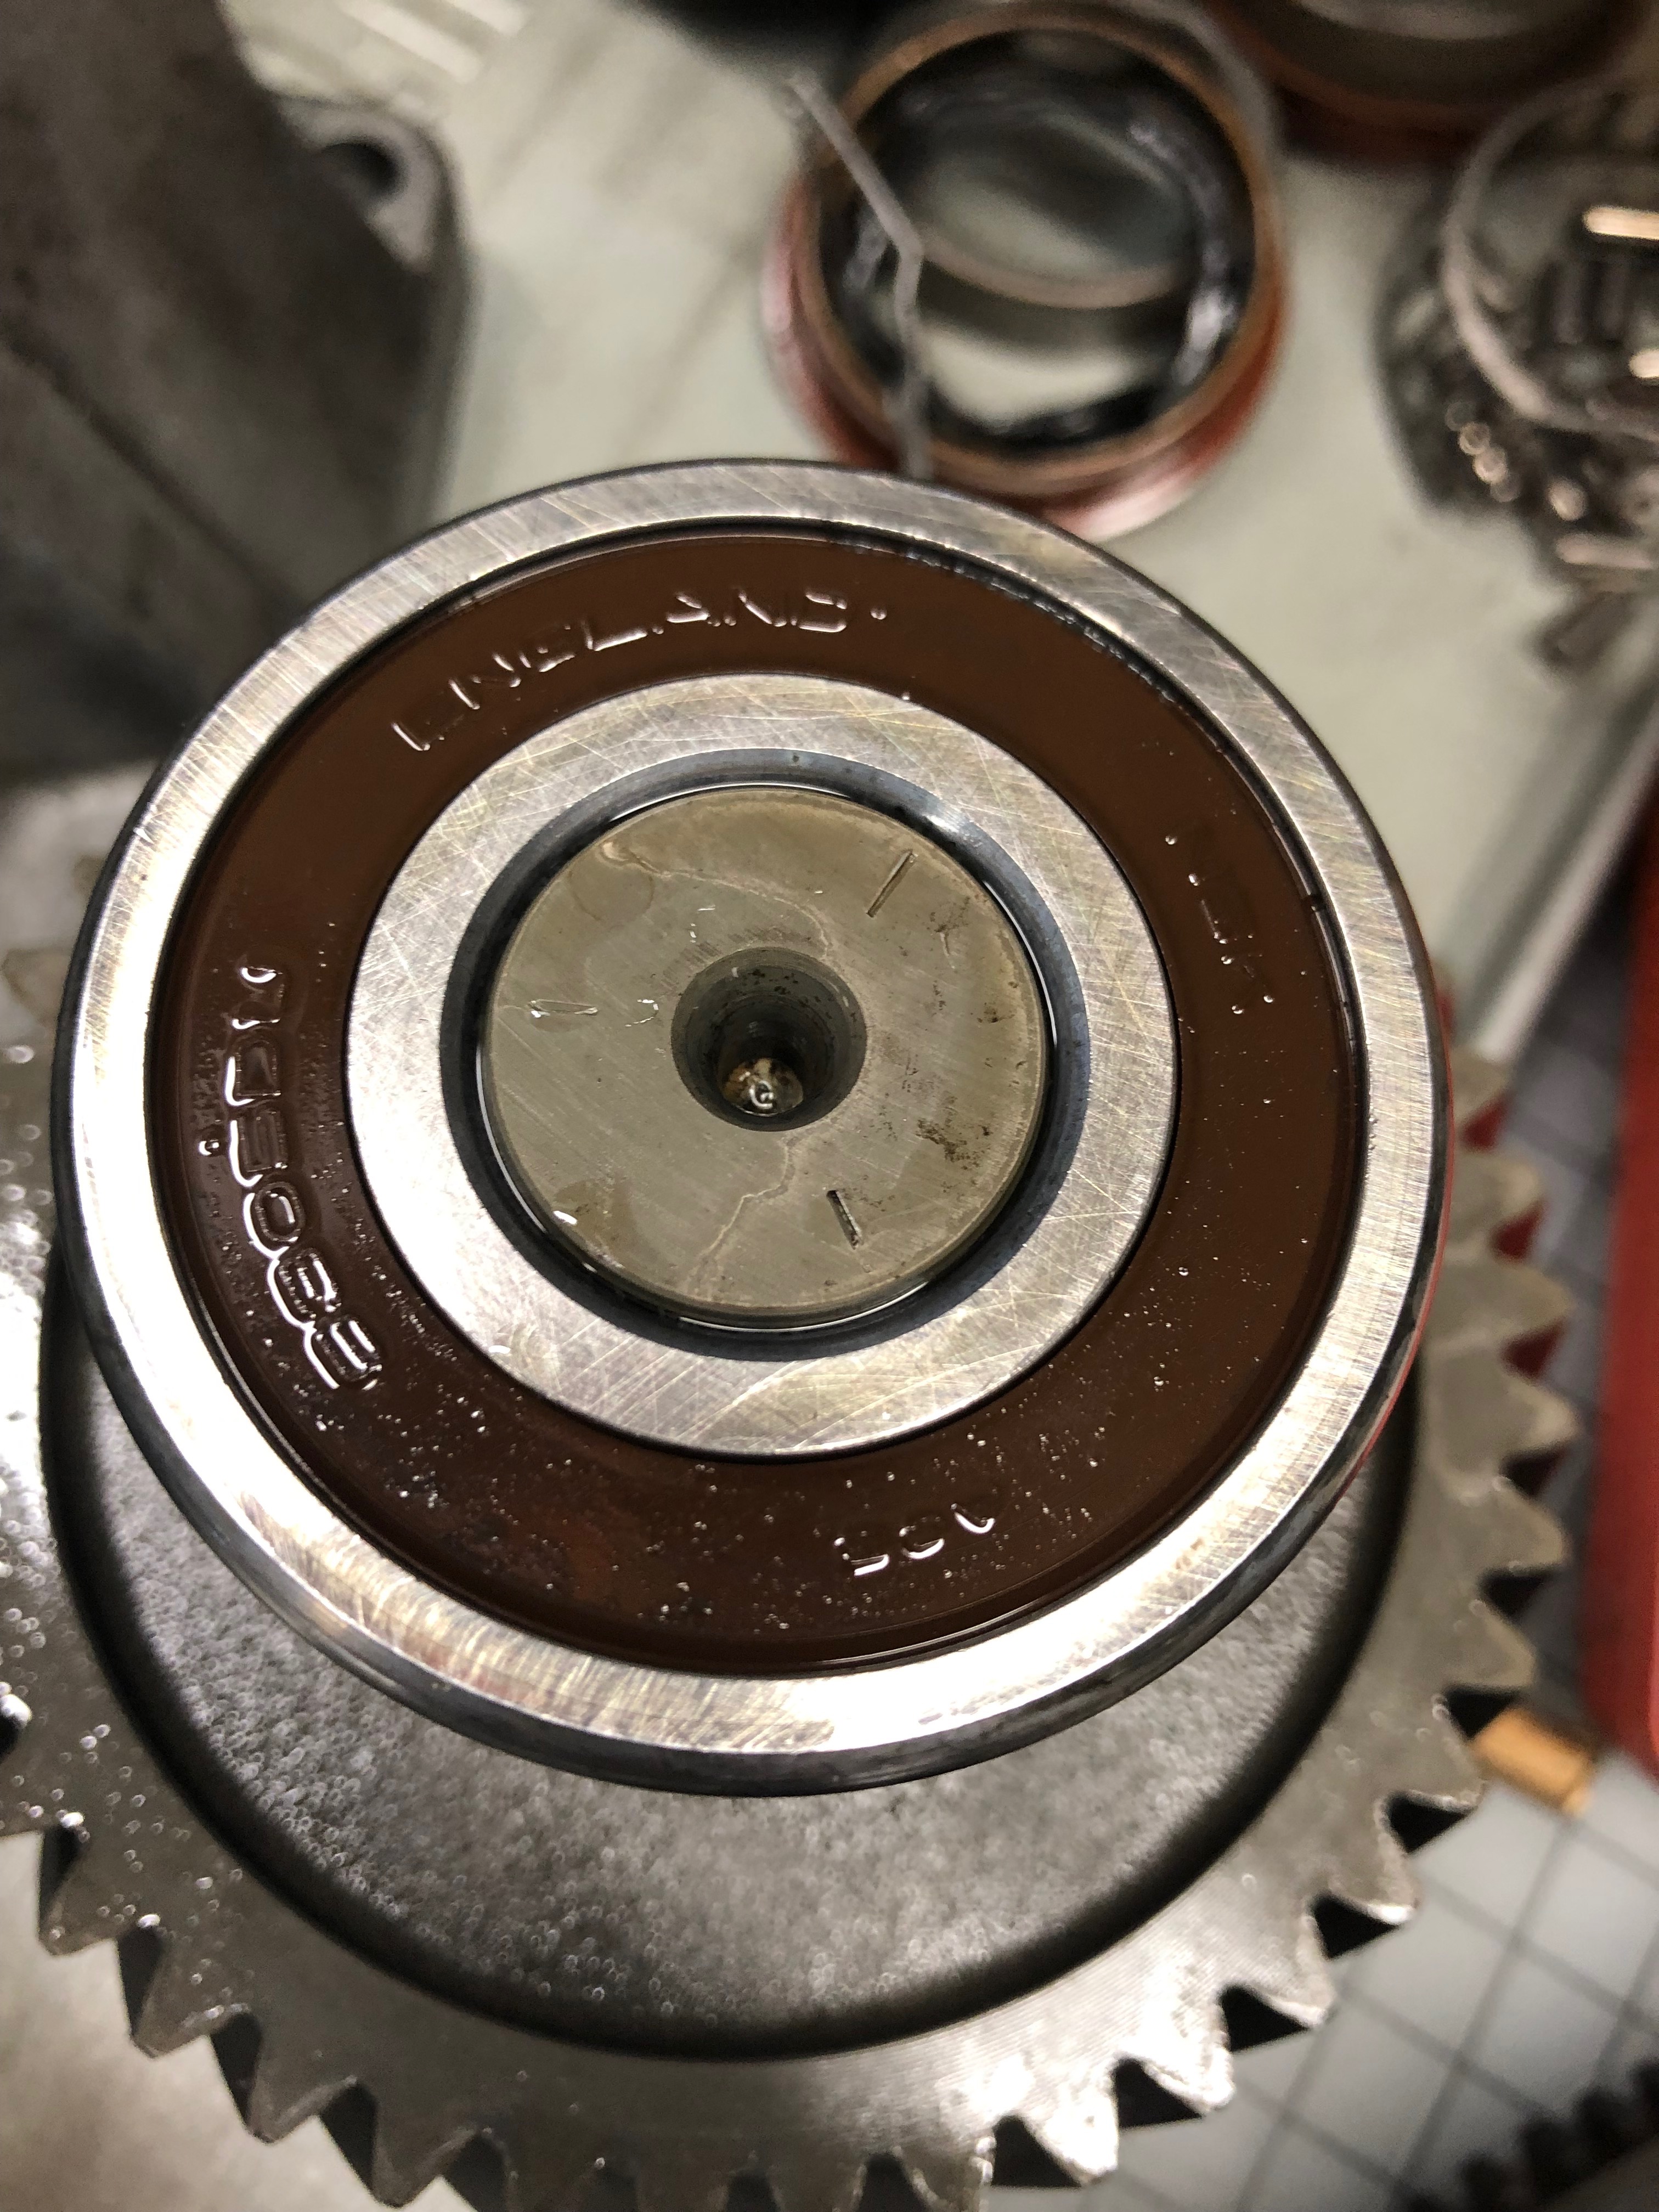
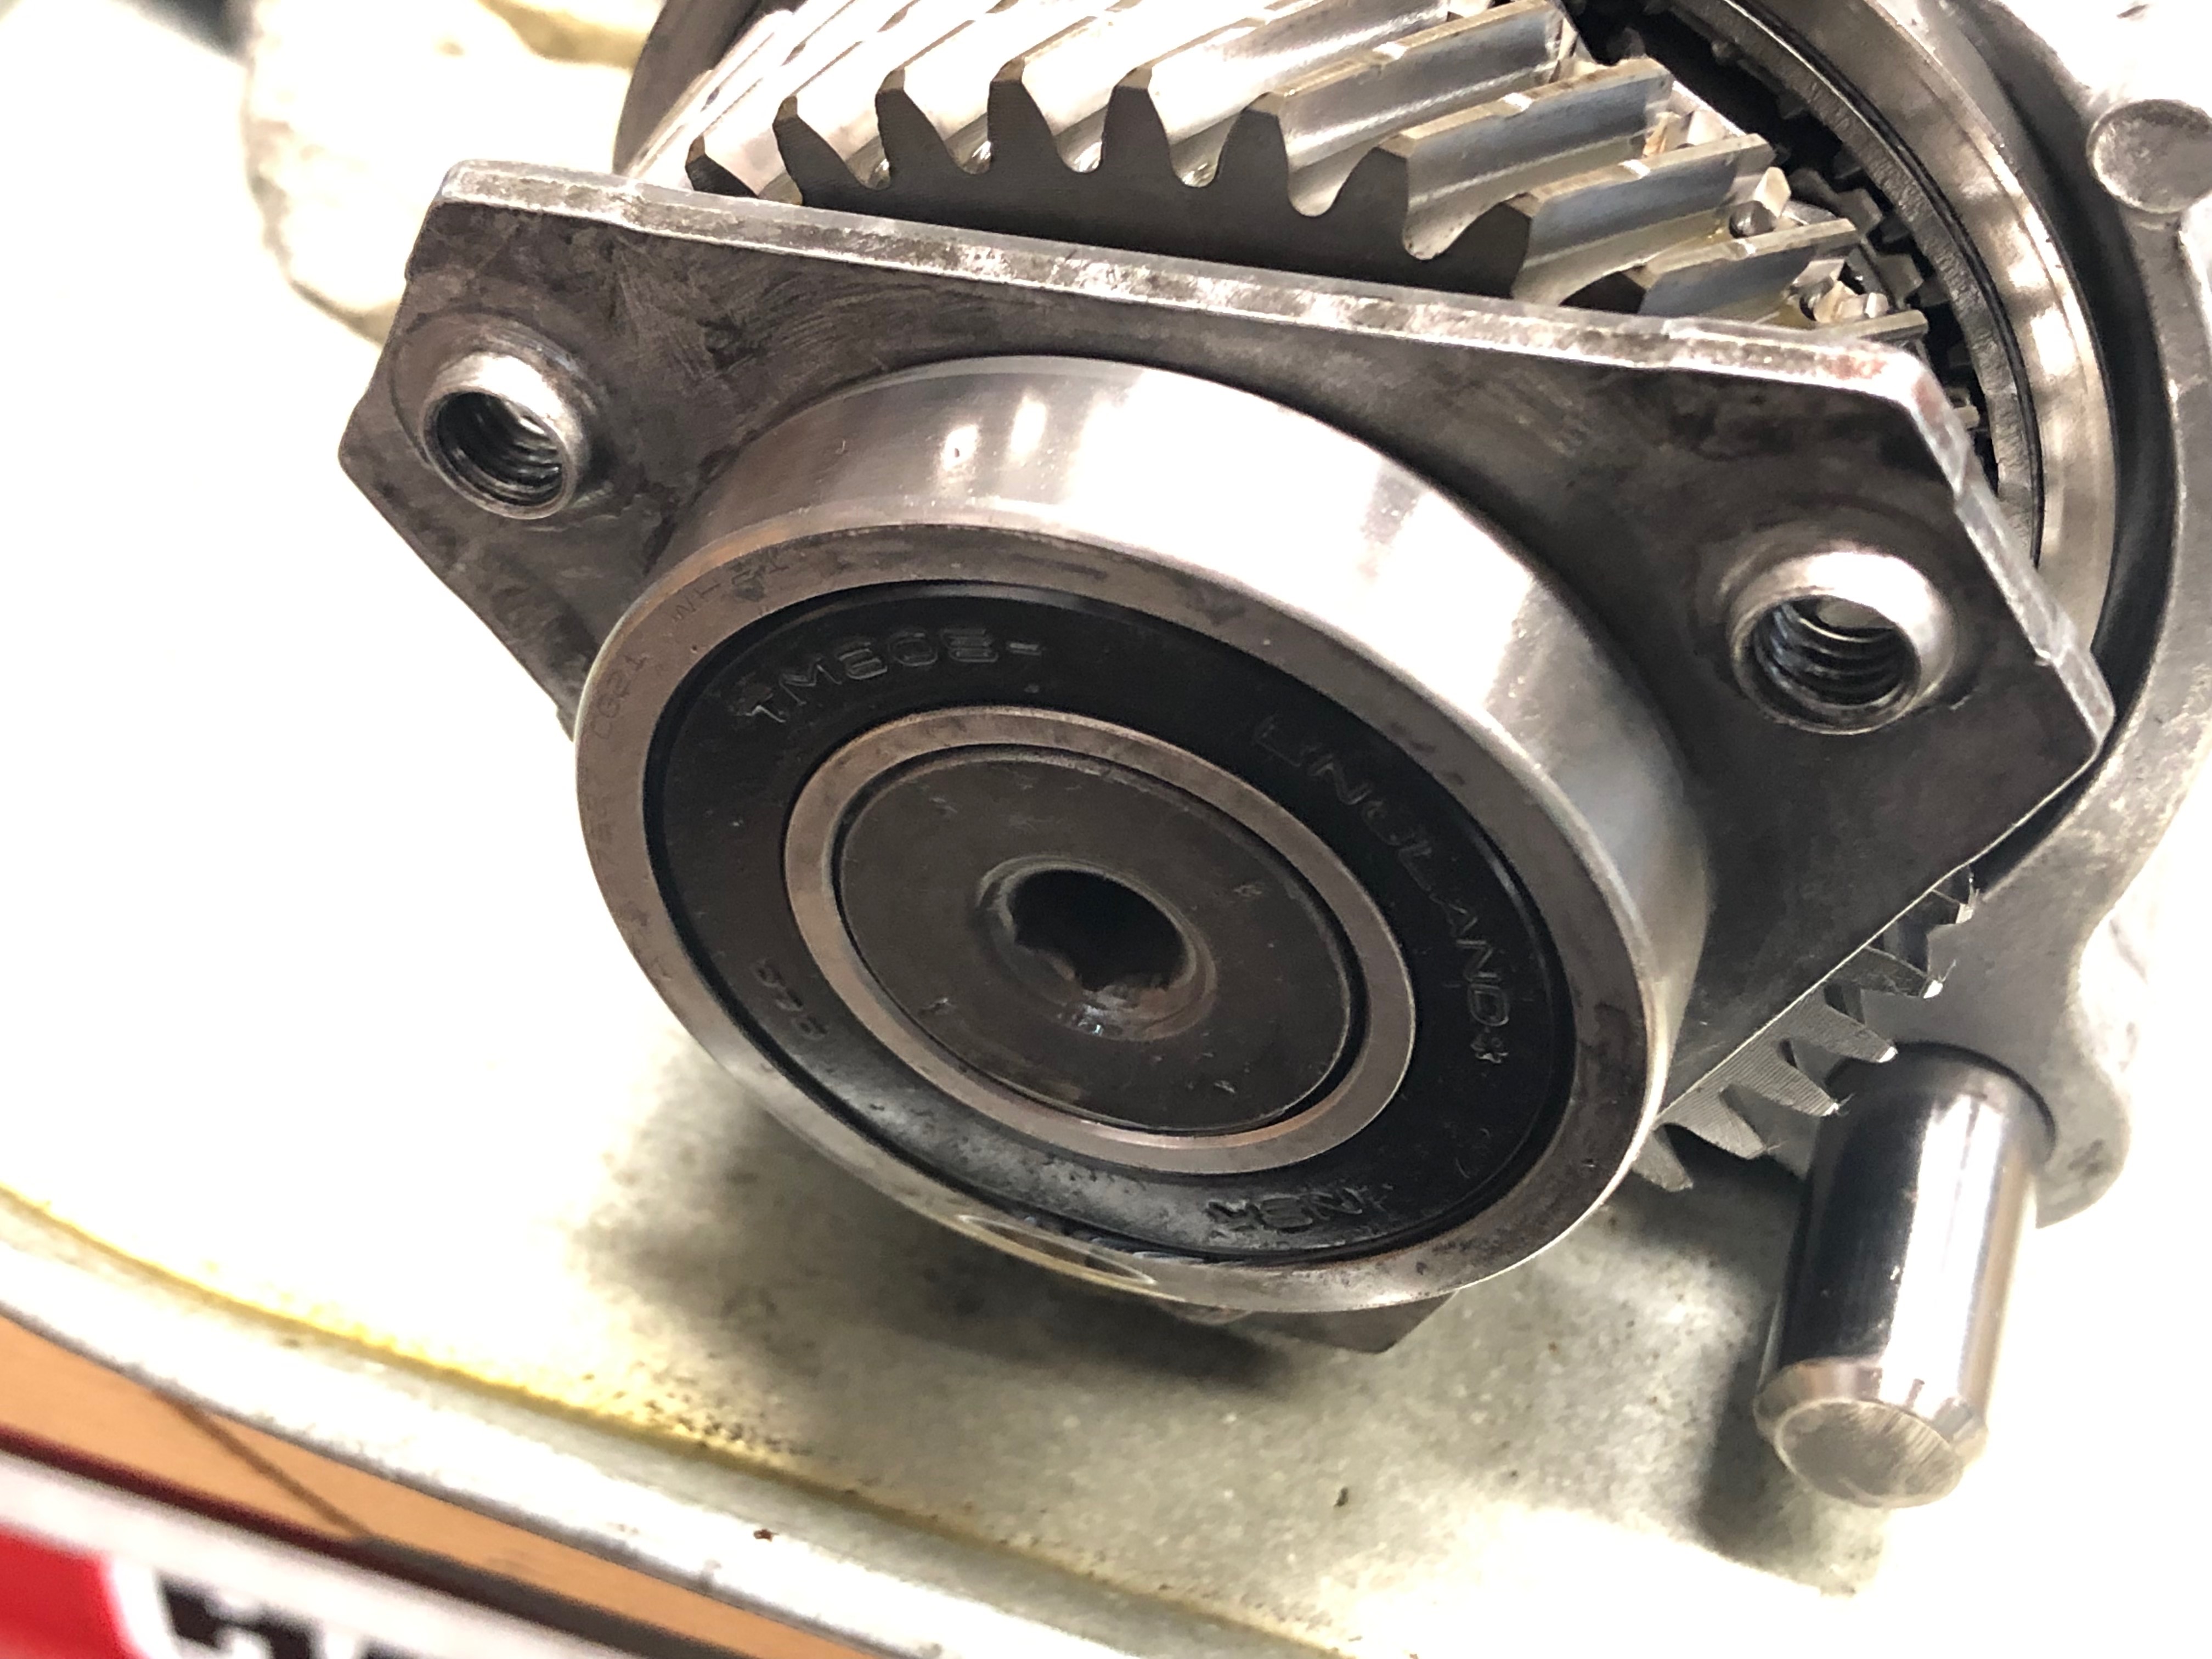
So I set out to replace the bearings that I felt were the most suspect. I also planned on replacing the clutch, flywheel, pressure plate, clutch slave/throw-out bearing, and nearly all of the bolts that the Ford manual dictated should be replaced during the procedures. This would include the “lower” input & output shaft bearings (note that I say “lower” and “upper.” These are designations I came up with for my own reference as I was doing the job. The reason being, when you split the trans case, and lay it on the bench, the two shafts (output and input) are standing upright. The “upper” bearings are attached to a plate that bolts to the trans case. The “lower” bearings are roller bearings; a race is attached to each shaft and a cage with rollers is installed into the trans case.) as the “upper” bearings seemed fine to me. (my second big mistake) I would also replace both differential bearings (conical roller bearings), the shift selector fork bushings (2x), shift selector shaft (roller bearing) and associated bolts.

One of the most challenging things throughout this process has been the sourcing of parts. Sometimes it’s easy. Sometimes it requires reaching out to one of seven dealerships in the nation that happens to have the one part you need. Sometimes the supplier delays your shipment for a month, waiting for something to come in. Sometimes the part arrives and it’s damaged. Sometimes you have to order parts from Europe. I have experienced the gamut; good and bad. I will never again wonder why the shop is taking a long time to fix my car when they say they are waiting on parts. Now I understand. Here is a list of the parts I purchased for the build. I included tools, fluids and other things I felt would be helpful. For those who are doing this on your own, I’m assuming you have a solid set of your own common tools, fluids, etc. so I’m not listing any of those.
I spent days poring over the Ford Parts website, the OEM shop manual, various forums, watching videos, studying photos, visiting 3rd party parts sites cross referencing part numbers and diagrams; what did I learn? It’s a complete shit show. There is no good one-stop-shop when it comes to parts. If you do a rebuild job like this, you will have to deal with shifting supplies, dead ends, great and terrible customer service. I found that some parts are easy to come by and will arrive in a matter of days. Generally, Ford dealerships rocked and were able to get parts in a day or three. 3rd party site, while cheaper, all seem to have the same problem – they’re at the mercy of Ford’s supply chain, which is mediocre at best. If there’s a delay, it gets passed on to you, and then some. Navigating the parts code system is a challenge. I found that I would often have the Ford Parts site open, with the OEM shop manual up, a few 3rd party sites AND Google for additional searching. With all of these sources I was able to pick out the parts I needed for my build and order them.
But then there were the availability issues. You see, Ford doesn’t get many requests for parts needed to rebuild the 6-speed manual transmission out of a 6th generation Fiesta ST. So, what happens. Supplies dwindle and become more scarce. Those that do exist languish on warehouse shelves and oxidize or corrode. In some situations they are on “LONG TERM BACKORDER-NO ETA” which basically means: “good luck, pal. Maybe Ford will restock some day, but otherwise, sorry!” It’s tough. Here’s where things got really tricky for me. When I placed my first order which included the bearings for the output shaft and the differential, all of my sources came back with the same backorder message. No stock anywhere. I called all over the place and came up empty. Backorder, no ETA. What to do? So I figured I could just pull the parts number off of the bearing and get it from Timken, INA, etc. Right? Sort of.
The problem is that over the years some of these bearings come and go. Parts numbers change or like with Ford, become more scarce. For the missing bearings, I searched and searched and searched. Most hits were random Eastern European websites that I could barely understand let alone trust with my credit card info. After reading bearing catalog after catalog and trying desperately to cross reference the numbers with dimensions I had taken off of the bearings I took using my digital calipers, I finally found what I thought were matches. I then started to home in on the parts numbers from Timken & INA. With a bit of luck I managed to find both elusive bearings available at 123Bearing.com. This French company has a great website with a nice selection of bearings and more. I ordered and had my bearings in hand (from FRANCE) only a few days later. This was literally ten times faster than the parts I ordered from a US 3rd party site. (a story for another day.)
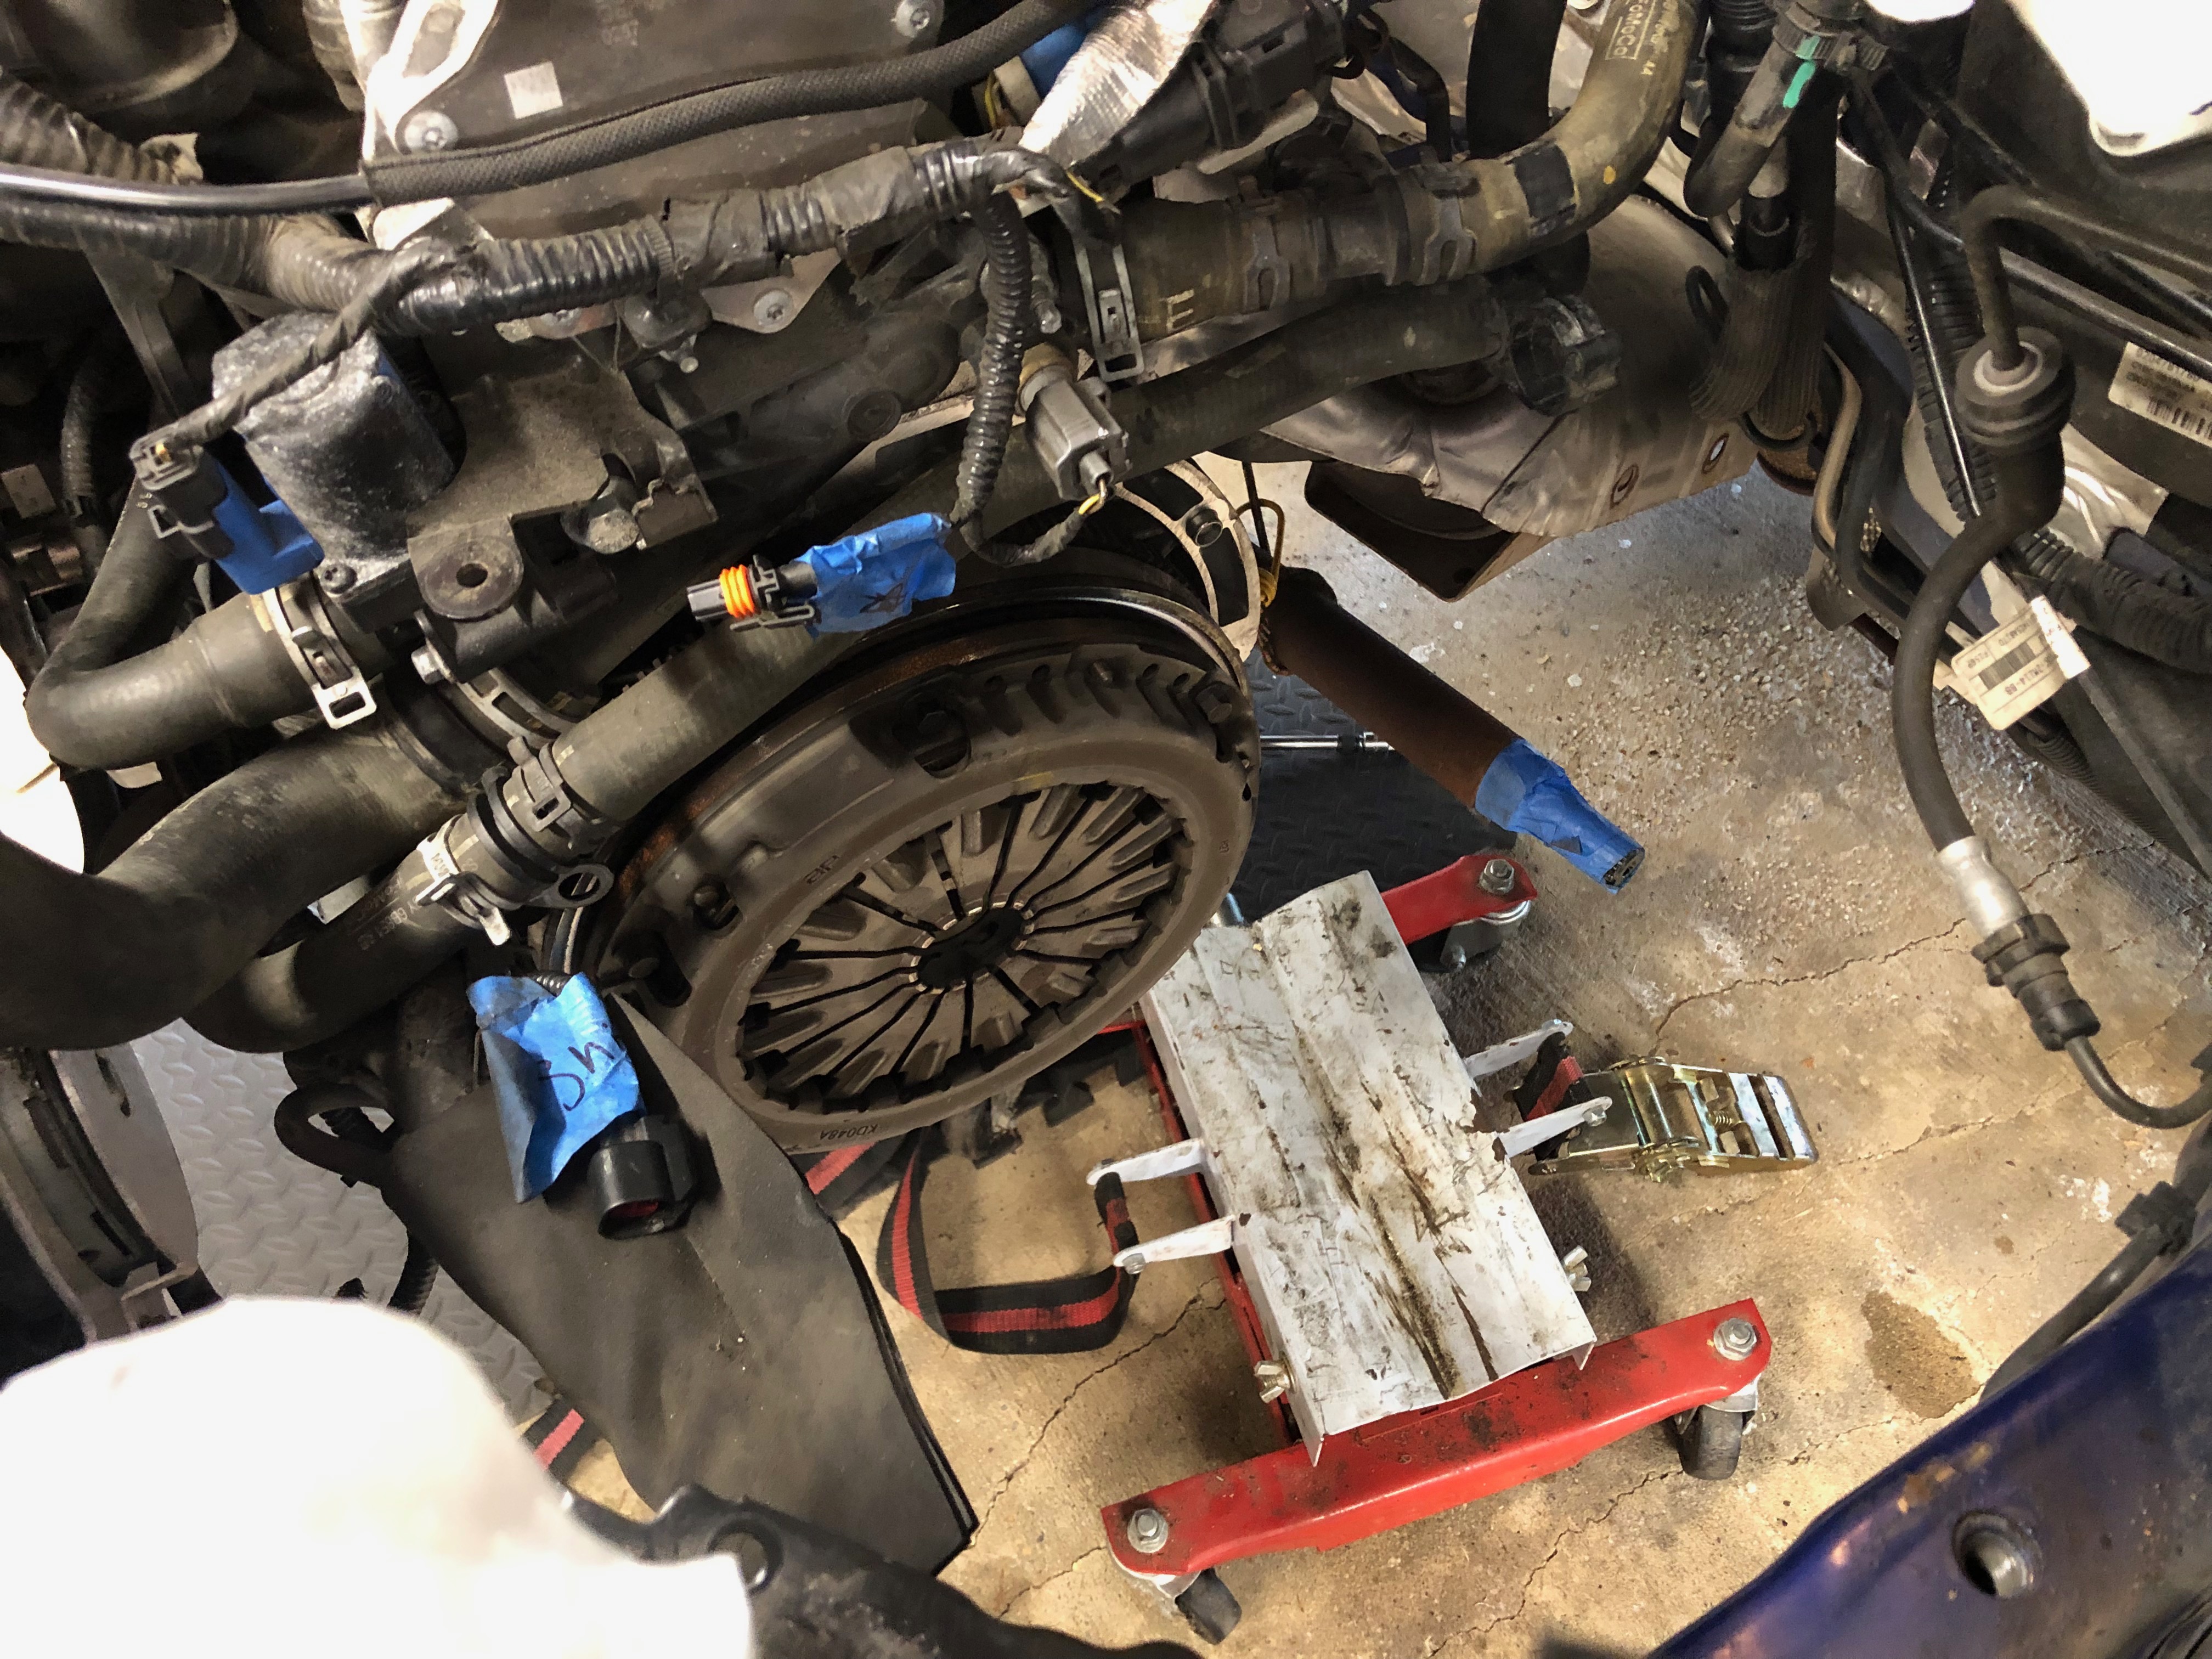
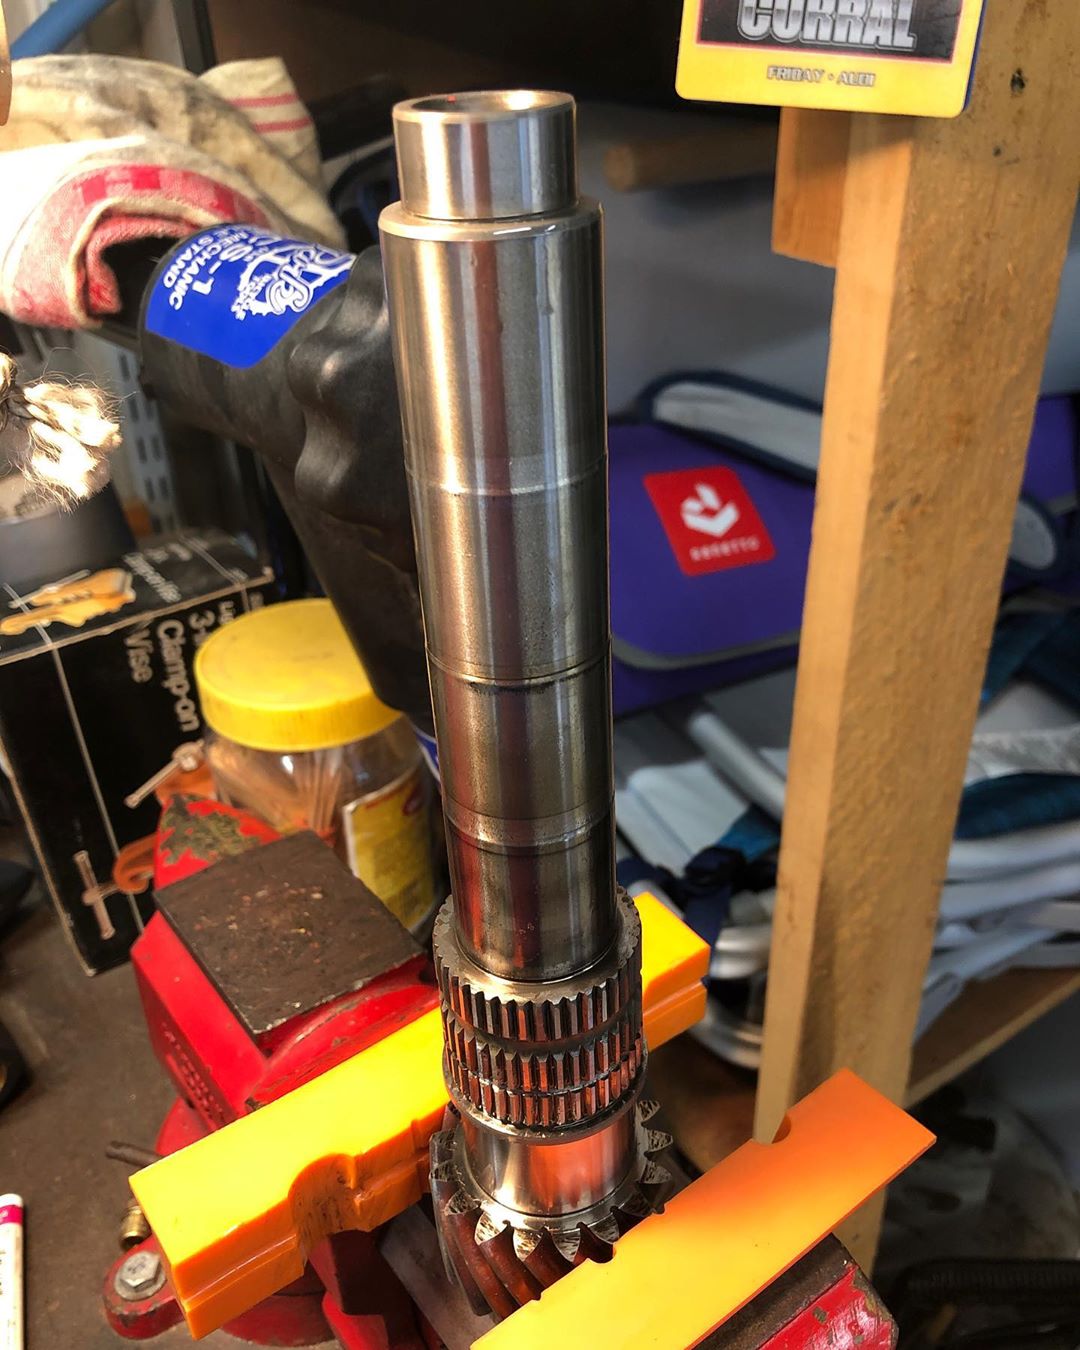
I started to remove the bearings from the transmission. Some were easy, some were a real challenge. I purchased a set of bearing separator/puller, pilot bearing pullers, a heat gun and more, all of which were crucial in the process. I also purchased a steering wheel puller set and some impact driver bits from Amazon. I had another pilot bearing puller set, some snap ring pliers, seal installer set and a few other tools on loan from friends. All of them were used. The two differential bearings were on pretty tight. For one side (the one close to the diff housing) I used a bearing separator to pull the race off. For the bearings in the trans housing, I used a punch (per the shop manual). For the two bushings, my friend Randy came up with the solution. We used a length of bicycle brake cable wrapped around the bushing and attached to a slide hammer. This made quick work of the small bushings which were otherwise elusive. (I spent about an hour trying to get them out in other ways.) Getting the bearings off of the output shaft was tricky and required using the Dremel to notch the race and pull it off with a separator. The input shaft was much easier and the bearing separator made quick work of it. (for both input & output, don’t forget to remove the snap ring inside the race first.)
Touching on what was my biggest mistake at this point, which was *not* replacing *all* of the bearings in the transmission at this point. I chose to replace the ones I thought were bad or suspect. In retrospect, I should have replaced all of them, and here’s why. Once I did get all of my parts in and installed all of them, put the whole transmission back together and reinstalled it into the car, put the sub-frame on and all of the associated parts I got to fire it up and see how I did. THE BIG MOMENT. Guess what? The problems were still there. All of them. The transmission still made the same rattling and whirring noise. Why? Well, remember those “upper” input and output shaft bearings? I chose not to replace them. And on the test drive, with the trans back in and the car up on jack stands, my friend and I put a small bit of load on the trans and could then hear specifically where the noise was coming from. Right on the side of the trans case, where the input and output shaft “upper” bearings are. So nothing for it, the trans had to come back out. This time I was going to replace all of the rest of the bearings, which is what I did.
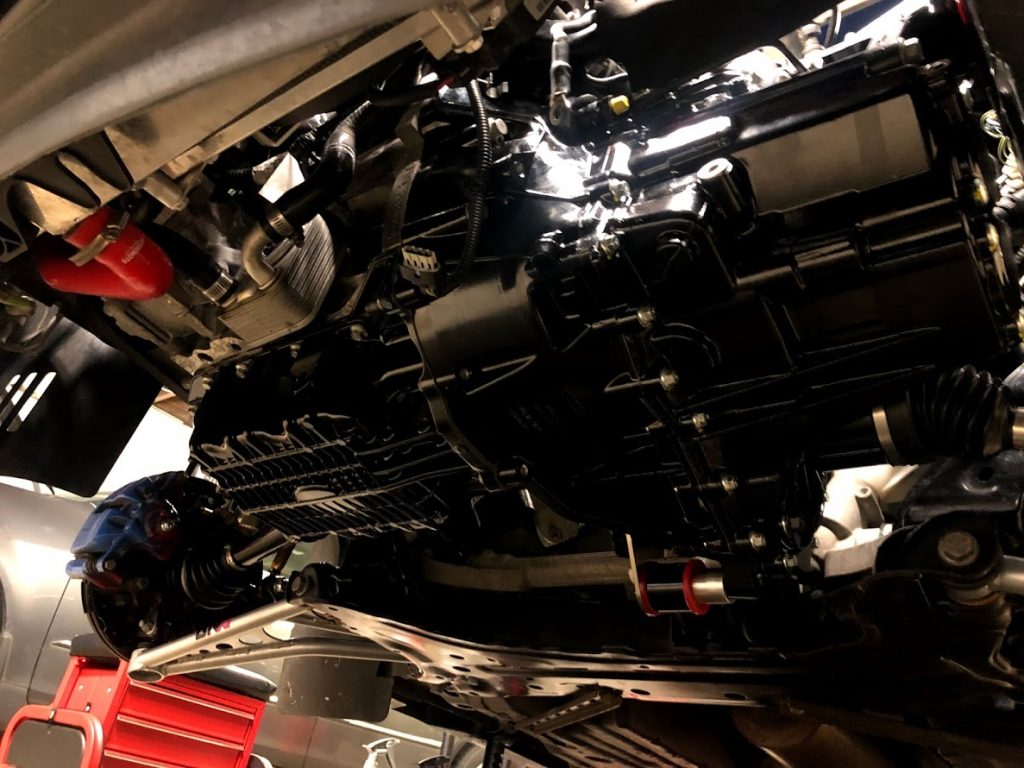
This time I was determined to replace every bearing in the trans. I was going to do the input and output shaft “upper” bearings, the needle bearings on the shafts, buried below the gears – everything. Removing the trans went quite a bit faster, AND I did not remove the sub-frame to get it out. That’s right, folks, you do not need to remove the sub-frame to get the trans out. It all went faster and sourcing parts was going smoothly except for a few bearings and some of the gears. Removing the gears from the Output shaft is tremendously difficult. I would recommend that you hire a capable shop and have them press the gears off. Nothing short of a 20 ton press, a very large bearing separator, an oxy acetylene torch and hammer. Especially the last two sets of gears that need to be pressed off – they are a bear!
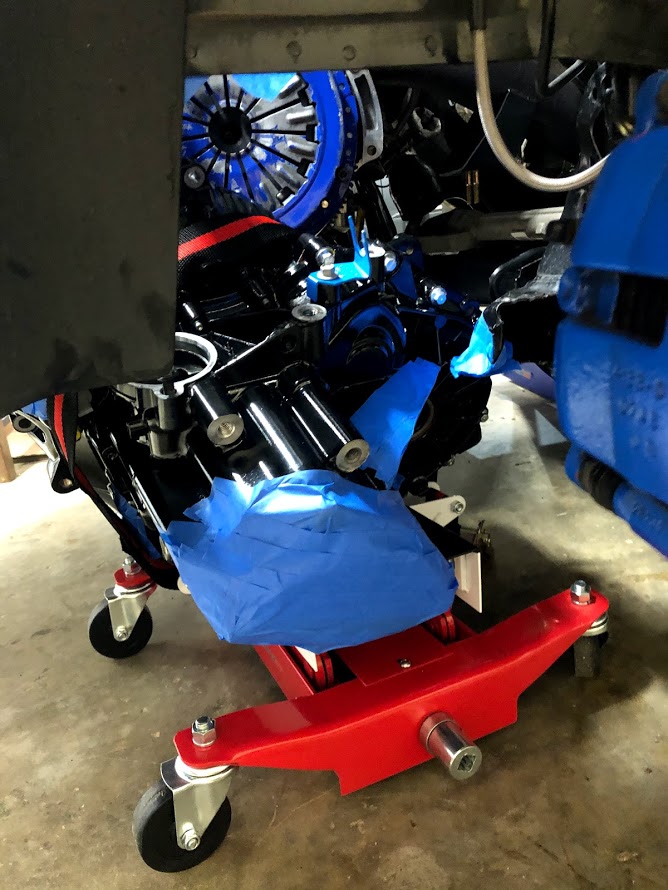
Following along with the OEM manual for the reassembly and reinstall is fairly straightforward especially having gone through it once before. So now, the big moment, part 2. Time to fire up the car for the first time, again. For me, it was a let down at first. I got the car all back together and called Randy to be there to assist and witness. We kept the front of the car up on jack stands so as to let the front end free wheel while we tested it out. When I fired up the car, disappointment. The front wheels spun with the car in neutral and clutch in! Letting the clutch out didn’t help. Only some resistance from the transmission. Putting it into gear made it worse, as it would stutter and stall out. I threw up my hands and was pretty upset. I figured I screwed something up. I hopped out of the car in a fit of despair and proceeded to begin clearing space to put the car on one side of the garage so my wife could finally have her parking space back. I was bummed.
But Randy was not moved. He is much more patient than me. He was pondering the shift linkages and other things and decided to give it another shot. This time, after a moment of the wheels spinning, they stopped, and in neutral, did not spin. Shifting into first gear, they spun. Second, spun. Third, spun. And so on. It seemed to be working! We took it out for a test drive and you know what?
IT VERKED
Hallelujah. We drove it around town, did a few mild pulls, it was perfect. No noise, shifted normally (although I suspect the linkage is a bit out of alignment and needs adjusting, as some of the gears are a little wonky going in & out – nothing major, just minor adjusting; I did not perform the OEM-recommended service procedure to adjust the linkages.) We figured that the reason things were so bad on first star was because oil had not found its way into all of those friction surfaces on the gears. They were probably binding and as the gearsets spun, oil worked its way into the various galleries and set stuff free. And the bearing that was bad? Yeah, it was the input shaft bearing. The top one. The one I didn’t think needed replacing. Well, you have to learn somehow.
I didn’t make any videos. I didn’t feel like documenting all the steps with photos. Most of the time in the garage, I was there to get shit done and would be focused on not screwing something up. That being said, I’m providing all the documentation here for you to use in the hopes that it helps someone tackle this job.
First up is my parts list. If you are looking for parts (and what tools and supplies you will need) here you go! (NOTE: UPDATED 7/9/23- Input Shaft Bearing part number update)
The following is a collection of files from the OEM manual that I have annotated with my comments on each step of the process. I highlighted areas where you need to pay particular attention and how I got the job done.
The following sections are not annotated, but are necessary as part of the project.
So I hope this helps you on your journey to rebuild the transmission. I learned a lot in this process on what works and what doesn’t. Lots of folks have asked if I’d do it again, and I think that I would provided I had the time and means to do so. But honestly, if I broke the transmission again, I may just replace it with a Clarke unit that has a warranty and is built to a much higher quality level. If you have any questions, comments, etc., please don’t hesitate to reach out to me! ben.sullivan75 *at* gmail.com
GOOD LUCK!
BONUS: 3D Printed Tools!
A generous reader, Foster B, purchased the necessary Rotunda tools and made 3D models of a few of them. He offered to share them so I’m posting the files here for anyone who’d like to give them a try. Dropbox link below which includes the STL files plus a few reference photos. Thanks, Foster!
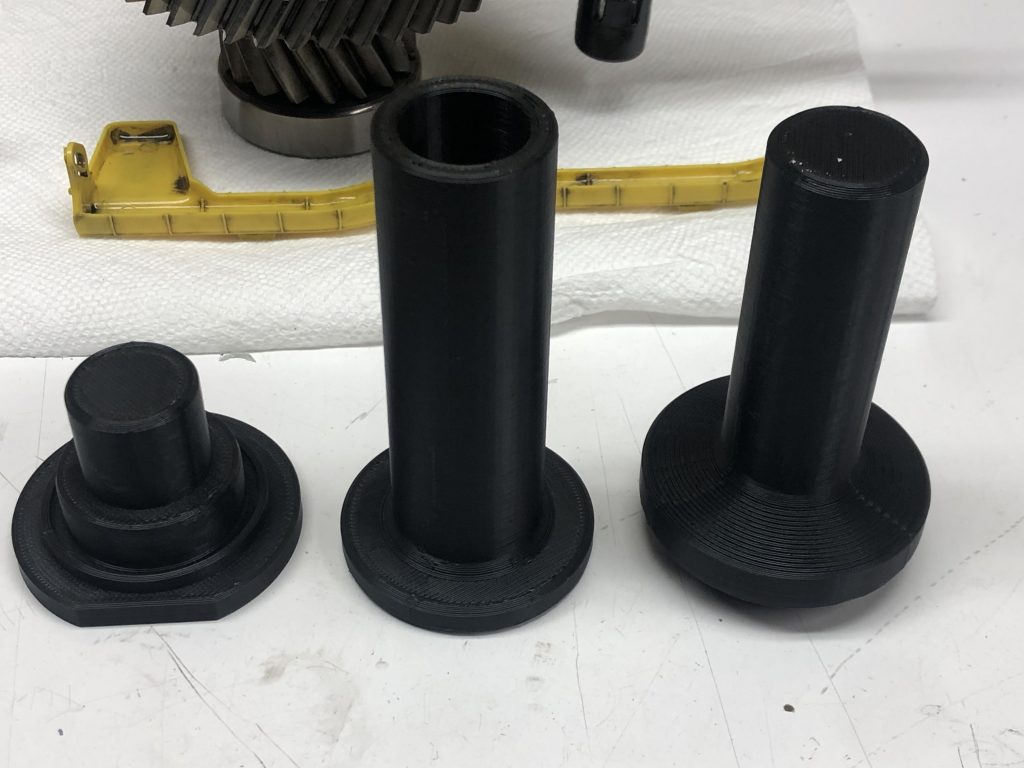
https://www.dropbox.com/sh/jpf00awrws66s8q/AAA0Vpdng_2pDyo0uw-7zSwWa?dl=0
UPDATE 5/21/22: Link updated. Including two NEW files for your rebuild project! From Foster B:
I don’t remember if I included the shift tower cover or the driveshaft seal cover last time. These are two models I made to help aid in;
a: keeping oil from leaking out when you pull the transmission and are moving it around
b: I like to get the transmission into place without the shift tower, as it gives you much more wiggle room, but I dropped a socket at the hole, and somehow it wedged itself in the case in such a way that I couldn’t get it out. That cover might save you from doing a bunch of extra work.
BONUS: Foster B. shared some photos from his epic rebuild. His project included 3D scanning the internals for an upgrade build, blasting and painting the case (looks great!) as well as an ARP hardware upgrade for the case bolts. He successfully rebuilt his trans, has many hard miles on it already, and has some really cool projects coming up! Thanks, Foster! Enjoy:

Mmm, LSD 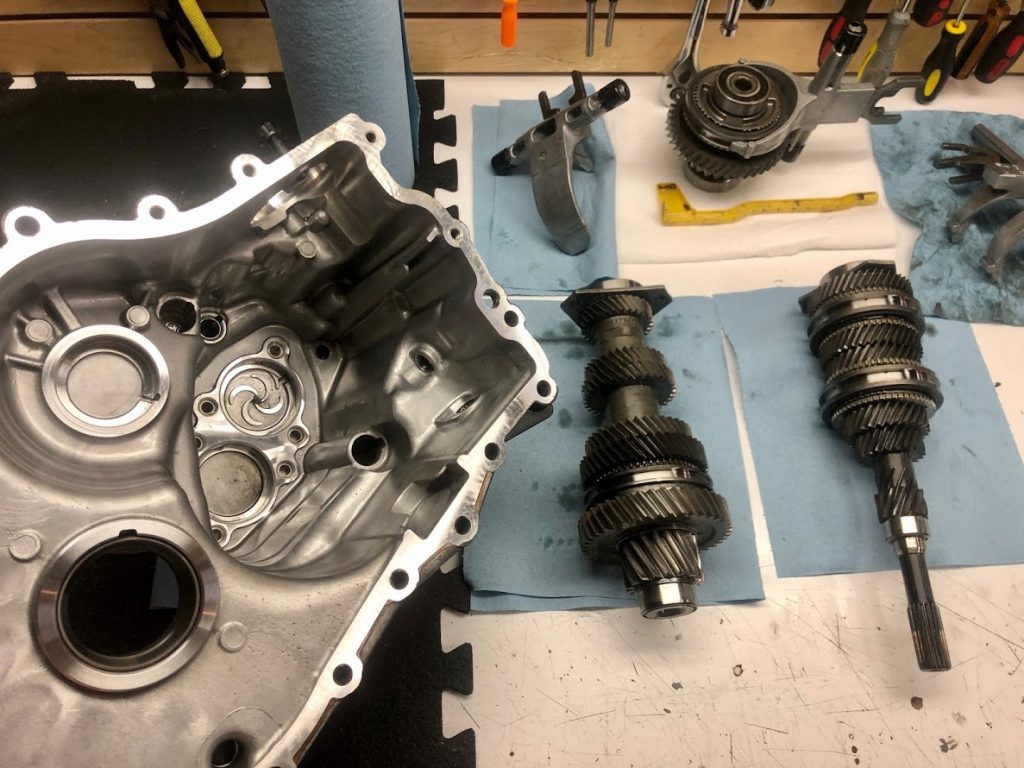

Pulling the notched race 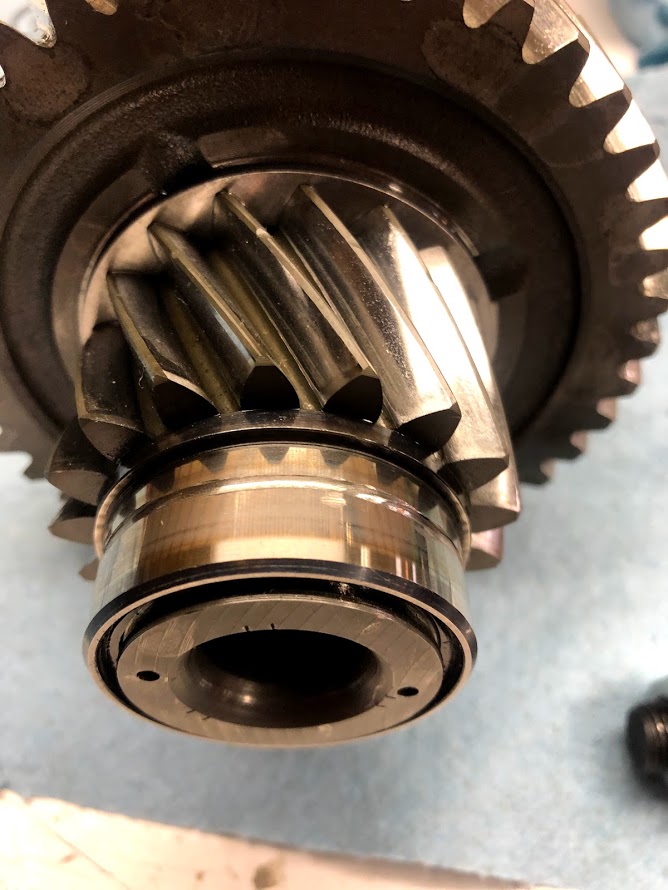
Dremel a notch in the race 
Measuring diff end float 
Blaaaaaaack! Looks hot. 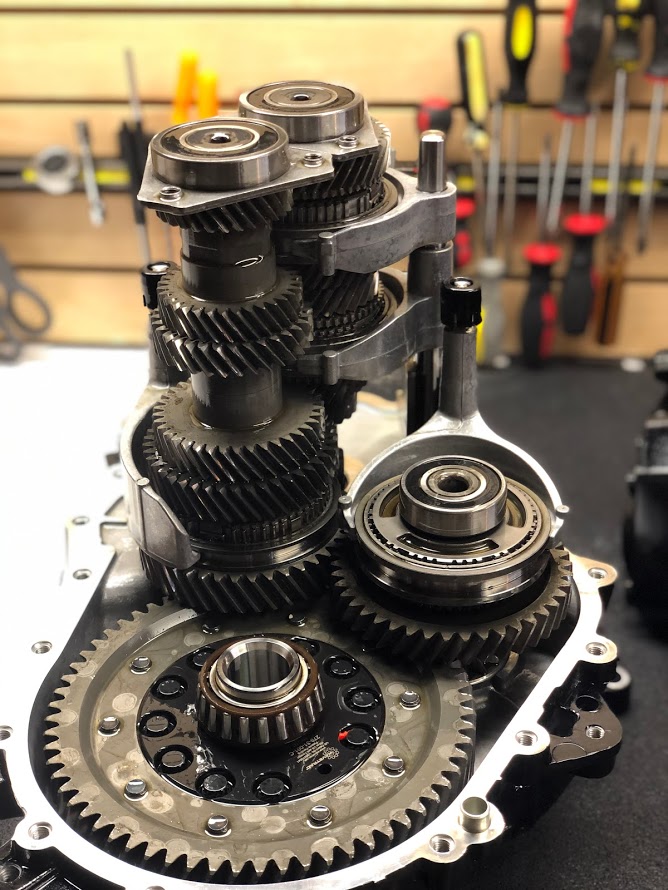
Reassembly 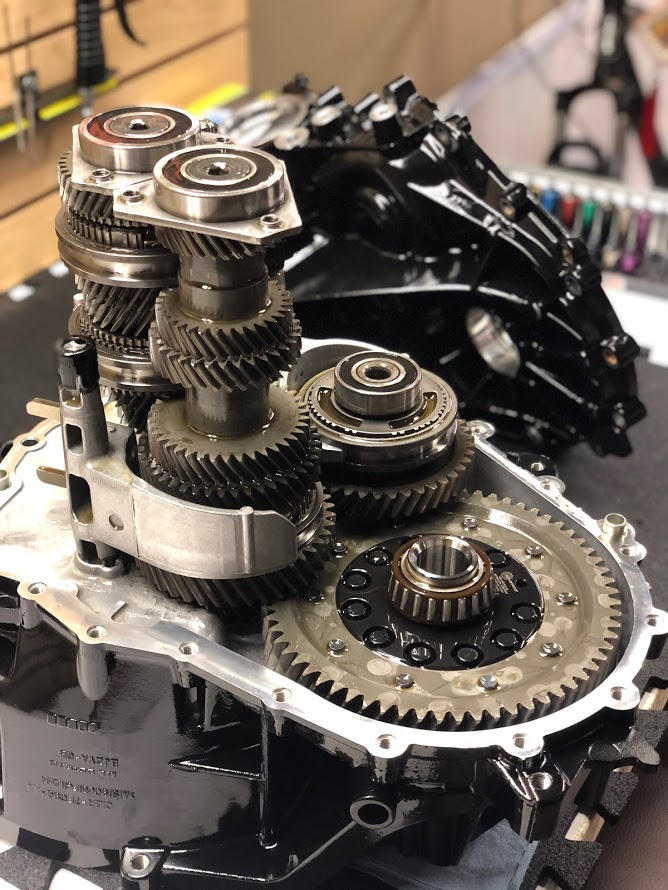
Reassembly 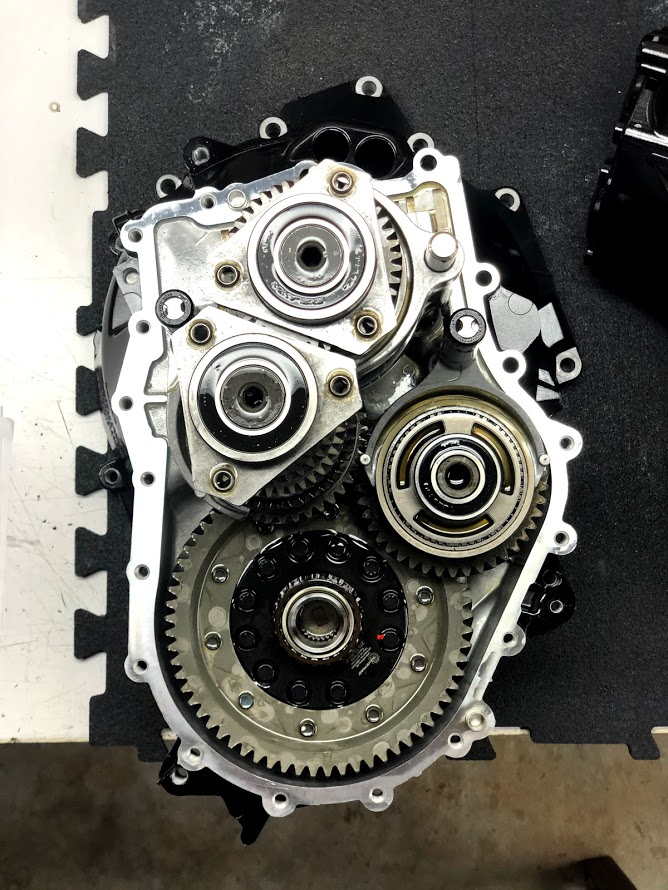
Reassembly 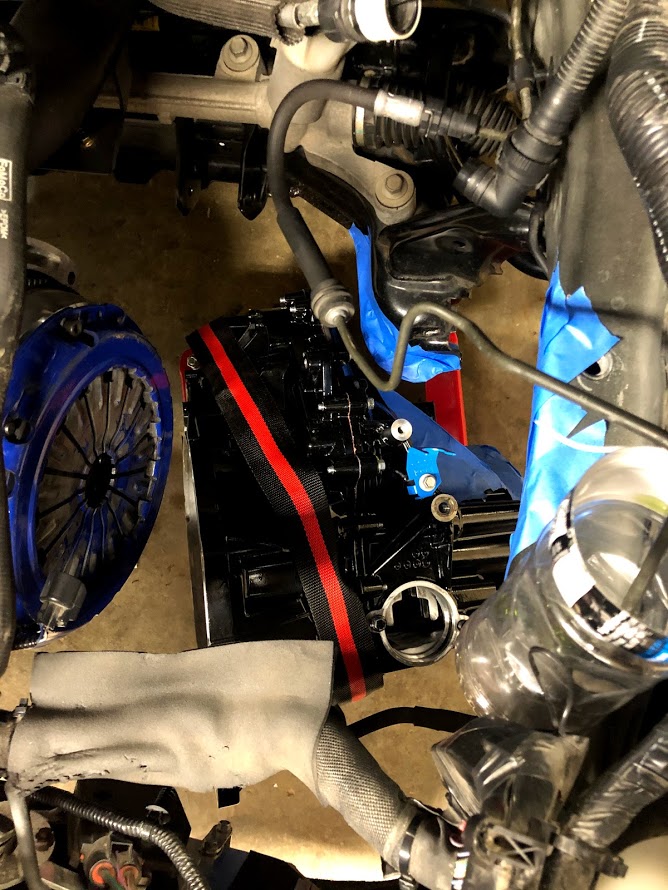


Sandblasting the case
ANOTHER BONUS – MORE TOOLS!
Man, this community is really cool. Another reader, Juan E., reached out and shared a couple 3D printed tools he designed and created to make the job easier. Enjoy!
Also, I designed a couple more 3d printed parts that I needed. That I will link if you want to add to your blog. One is for the differential bearing install tool and the other is a clutch alignment tool.