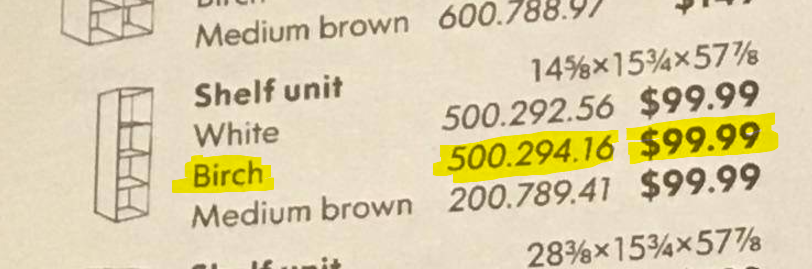
I decided to repurpose my old Ikea Bonde TV shelf and add-on unit to be less of a TV bench and more of a media center. I don’t have any before pictures, so this old Ikea catalog photo will have to do:
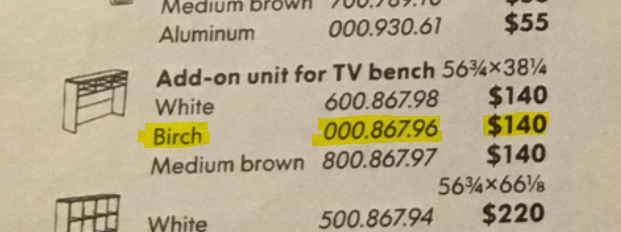
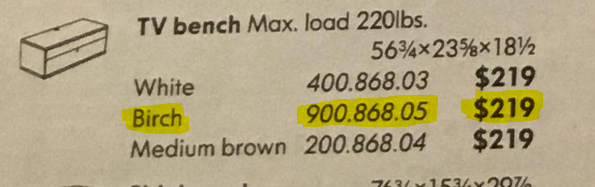
I previously used it with a Sony WEGA CRT television for ages, then, about 20 years ago, moving to a Vizio 40″ TV (just fit). Thanks to the magic of Reddit, I found the original part numbers/listings:
Now I plan on upgrading to a 55″+ TV so this can’t be used for its intended purpose. I still wanted to have a place for all of my stereo equipment, turntable, etc along with a myriad of old video game consoles. This unit has tons of spaces for such things, so I decided to reimagine it as just a media center.
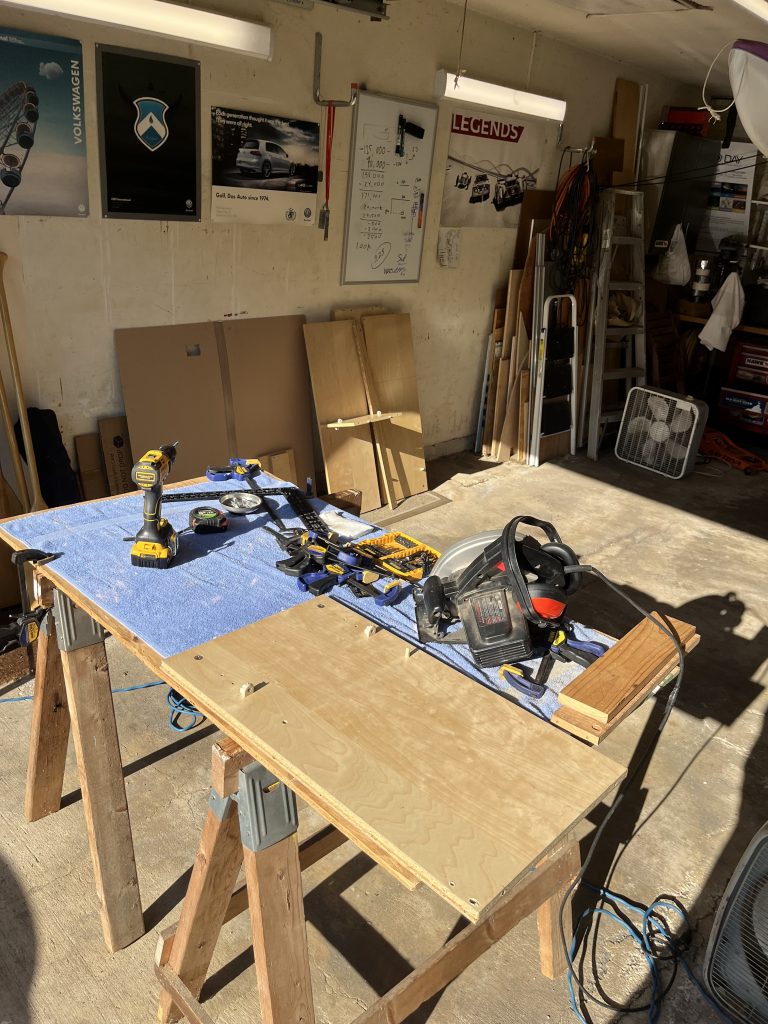
After disassembling the unit I carefully measured and cut the sides. I then transferred all of the various holes for the OEM hardware, being careful not to penetrate the sidewall of the unit with the drill and get the correct depth for each hole. I used an aluminum cutting guide as a straight edge to get a clean cut. A new Diablo fine finish blade in the saw made nice clean cuts. I did a test cut first to be sure. The whole job took about 4-5 hours including setup and cleanup.
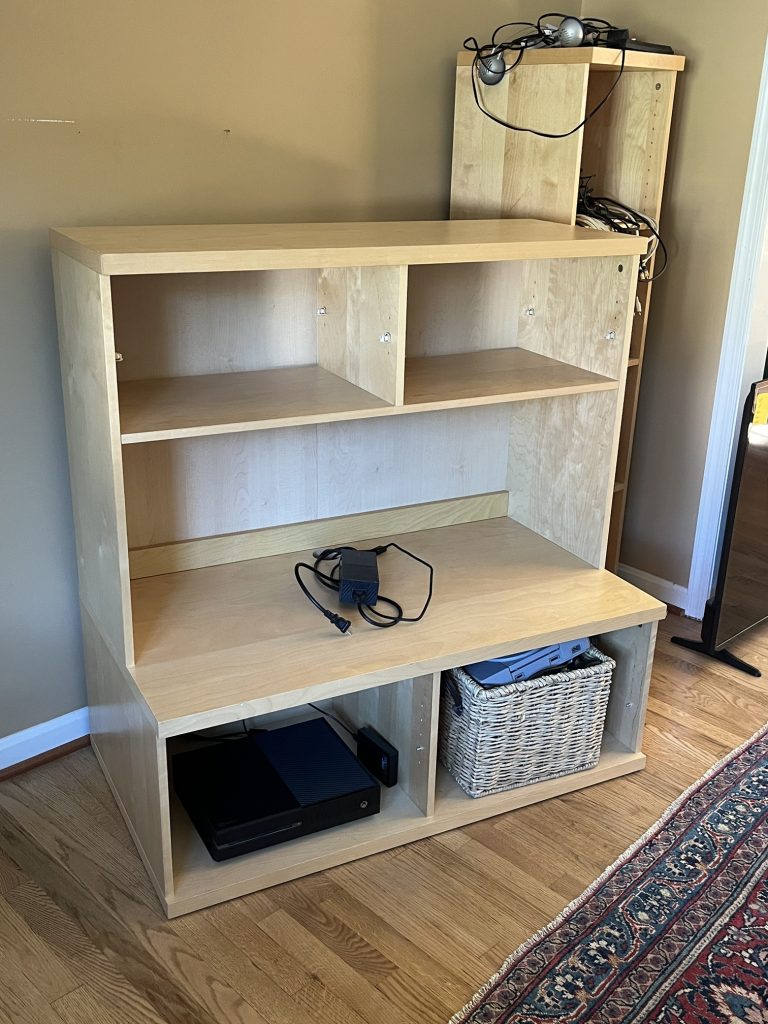
Here’s the finished unit. It’s not set up at all, just doing a test fit to be sure things work. And they do. It all lines up perfectly, sits nicely and will do the job. Now comes the fun part, hooking up all of those components! And out of curiosity, the shelves in the background are this part:
Quick note – this is a long, long post. I get it.. “GIMME THE TL:DR”. If you want the meat, go to the end sections where you’ll find downloads of my annotated shop manual snippets, parts list and other goodies. Hope you enjoy.
To say my journey in rebuilding this transmission was an odyssey is accurate. Merriam-Webster defines it as “a long wandering or voyage usually marked by many changes of fortune” or “an intellectual or spiritual wandering or quest.” Both of these definitions concurrently describe the entirety of this project and give hope to my own personal struggles as a result of such endeavor. As such, and with hope that it will help others on the same path (or considering it), I decided to write up some thoughts, a list of parts (as best I can), hints, pointers, war stories, the lot. So here goes.
Bought my 2014 Fiesta ST used with ~23k miles on the odometer in Jan 2015, replacing my beloved 2005 Audi B6 S4 Avant. (Beloved is just a word I used to describe my love-hate relationship with this V8 beast. Aside from the beautiful sound emitted by the Miltek exhaust, the most common thing I would hear, as I read the service manual: “Place the car in the Service Position.” B6 folks know what I am talking about.) I work 34 miles from home. I wanted something fun to drive, good gas mileage, cheap to operate and relatively utilitarian. I enjoy small cars (my first car was a 1981 VW Rabbit Diesel) and when my friend Nick found the FiST on a local car dealer site, I jumped on it.
Since owning the car, it has been fantastic. The odometer recently turned over 105k and since purchase the car has been fairly trouble-free. I replaced the throttle body after it failed a few years ago, but otherwise, nothing has gone wrong. I love this car. I had hoped to get a car that I could also take to HPDE/track days throughout the year with friends and the Fiesta has delivered. It’s been a total blast on the track and, again, performs wonderfully. Upgrades include a Mishimoto radiator and trunk brace, Boomba roll restrictor (rear motor mount), a mild Cobb stage 1 93 octane OTS tune, and when on-track; brake pads (Hawk DTC-60 front, HP+ rear) and tires (Yokohama Advan Neova AD08-R). Otherwise, the car is stock. And it’s tons of fun.
Which brings me to where I am now. The car does have a few random noises. The brakes grind a bit, and always have. Nothing bad, and I inspect them frequently, but I suspect it has to do with the somewhat aggressive OEM pads. The transmission had some whine to it. And many FiST folks complain of clunking when shifting. (I think that has more to do with a lower-end transmission than a big mechanical problem.) The whine in the trans is something that was nearly inaudible for the first couple years but got worse over time. But not bad, just worse. It was an ever-so-slight whirring noise. Sounded like faint gear noise to me. It never really bothered me and the car drove great. Over the years I did about 10-14 track days, daily drove the car, and never had any issue.
In early May I went out to PittRace with the Audi/Porsche clubs for a 3-day HPDE. This was my first time out there and I was very excited. I first noticed the transmission noise getting a bit more audible on the trip out there from home in Maryland. But, again, no real issues driving it. At the track, things progressively got worse. The first day there wasn’t that much change but on the second day it got louder and by the third day, I bailed out after only two sessions because I was worried I wouldn’t be able to drive the car home. (Spoiler alert: I made it.) The noise at this point was really loud. It was a sort of whirring/grinding/spinning noise and it was *only* under load. If I coasted, it made no sound. If I coasted where I was able to have some load on it, it would appear briefly, quieter. I also noticed another sound – a sort of rattle. The rattle was only evident when I depressed the clutch pedal (taking pressure off of the clutch) and it was different than the whirring/whine. It would be evident at idle. As you will see, in the end, I believe the two are related. Here is a video that shows what the car was doing:
Video of the noise the transmission was making.
I had to make a decision. Do I:
Take the car to Ford and ask them to diagnose and fix it. Would it be a warranty claim? The 2014 FiST has a 3 yr/36,000 mi basic, 5 yr/60,000 mi powertrain warranty. I did not buy an extended warranty. There were some folks on forums and YouTube who had mentioned that Ford repaired their trans due to faulty output/input shaft bearings, and it was a “common” problem. This seemed iffy to me and I worried about dealing with the dealer on things like modifications I’d done to the car, the labor cost and the potential down time. (as we will see, this wouldn’t have been an issue.)
Take the car to an independent shop and have them repair it? I struggled with this, as it was hard for me to find a shop that I would trust and felt comfortable with. Fewer and fewer shops nowadays specialize. Most are “total car care” because they need to be to survive. As such, much of the technical work (like rebuilding a modern manual transmission) is outsourced. I have the means to remove the transmission; why pay someone to do it?
Have the transmission rebuilt by a shop? I figured the cost would be about the same or more than buying a used transmission IF I could find a shop that would even do it. They are not easy to find.
Buy a used trans from a wrecking/recycling/junk yard? This option crossed my mind and I shopped around a bit. Prices range from $800-$1,300 and there are units available all over the country. I figured “why not spend the money on my own parts and tools to get the job done myself?”
Buy a rebuilt, race-ready transmission from a place like Clarke Transmissions? This was my dream choice. I’d LOVE to have something like this in my FiST and maybe some day I will! But at prices around $3,600+, it’s outside of the scope of the car build right now. Maybe some day!
Sell the car? No.
Pull the trans myself, rebuild it, and see if I can fix it?I have wanted to rebuild a transmission for a very long time. It’s on my bucket list. I figured this was a good chance for me to get my hands dirty and do the job myself. I do have a copy of the OEM manual, a good selection of tools, friends with more tools, a nearby Harbor Freight, a garage, and a third car that I could use in the interim. Why not?
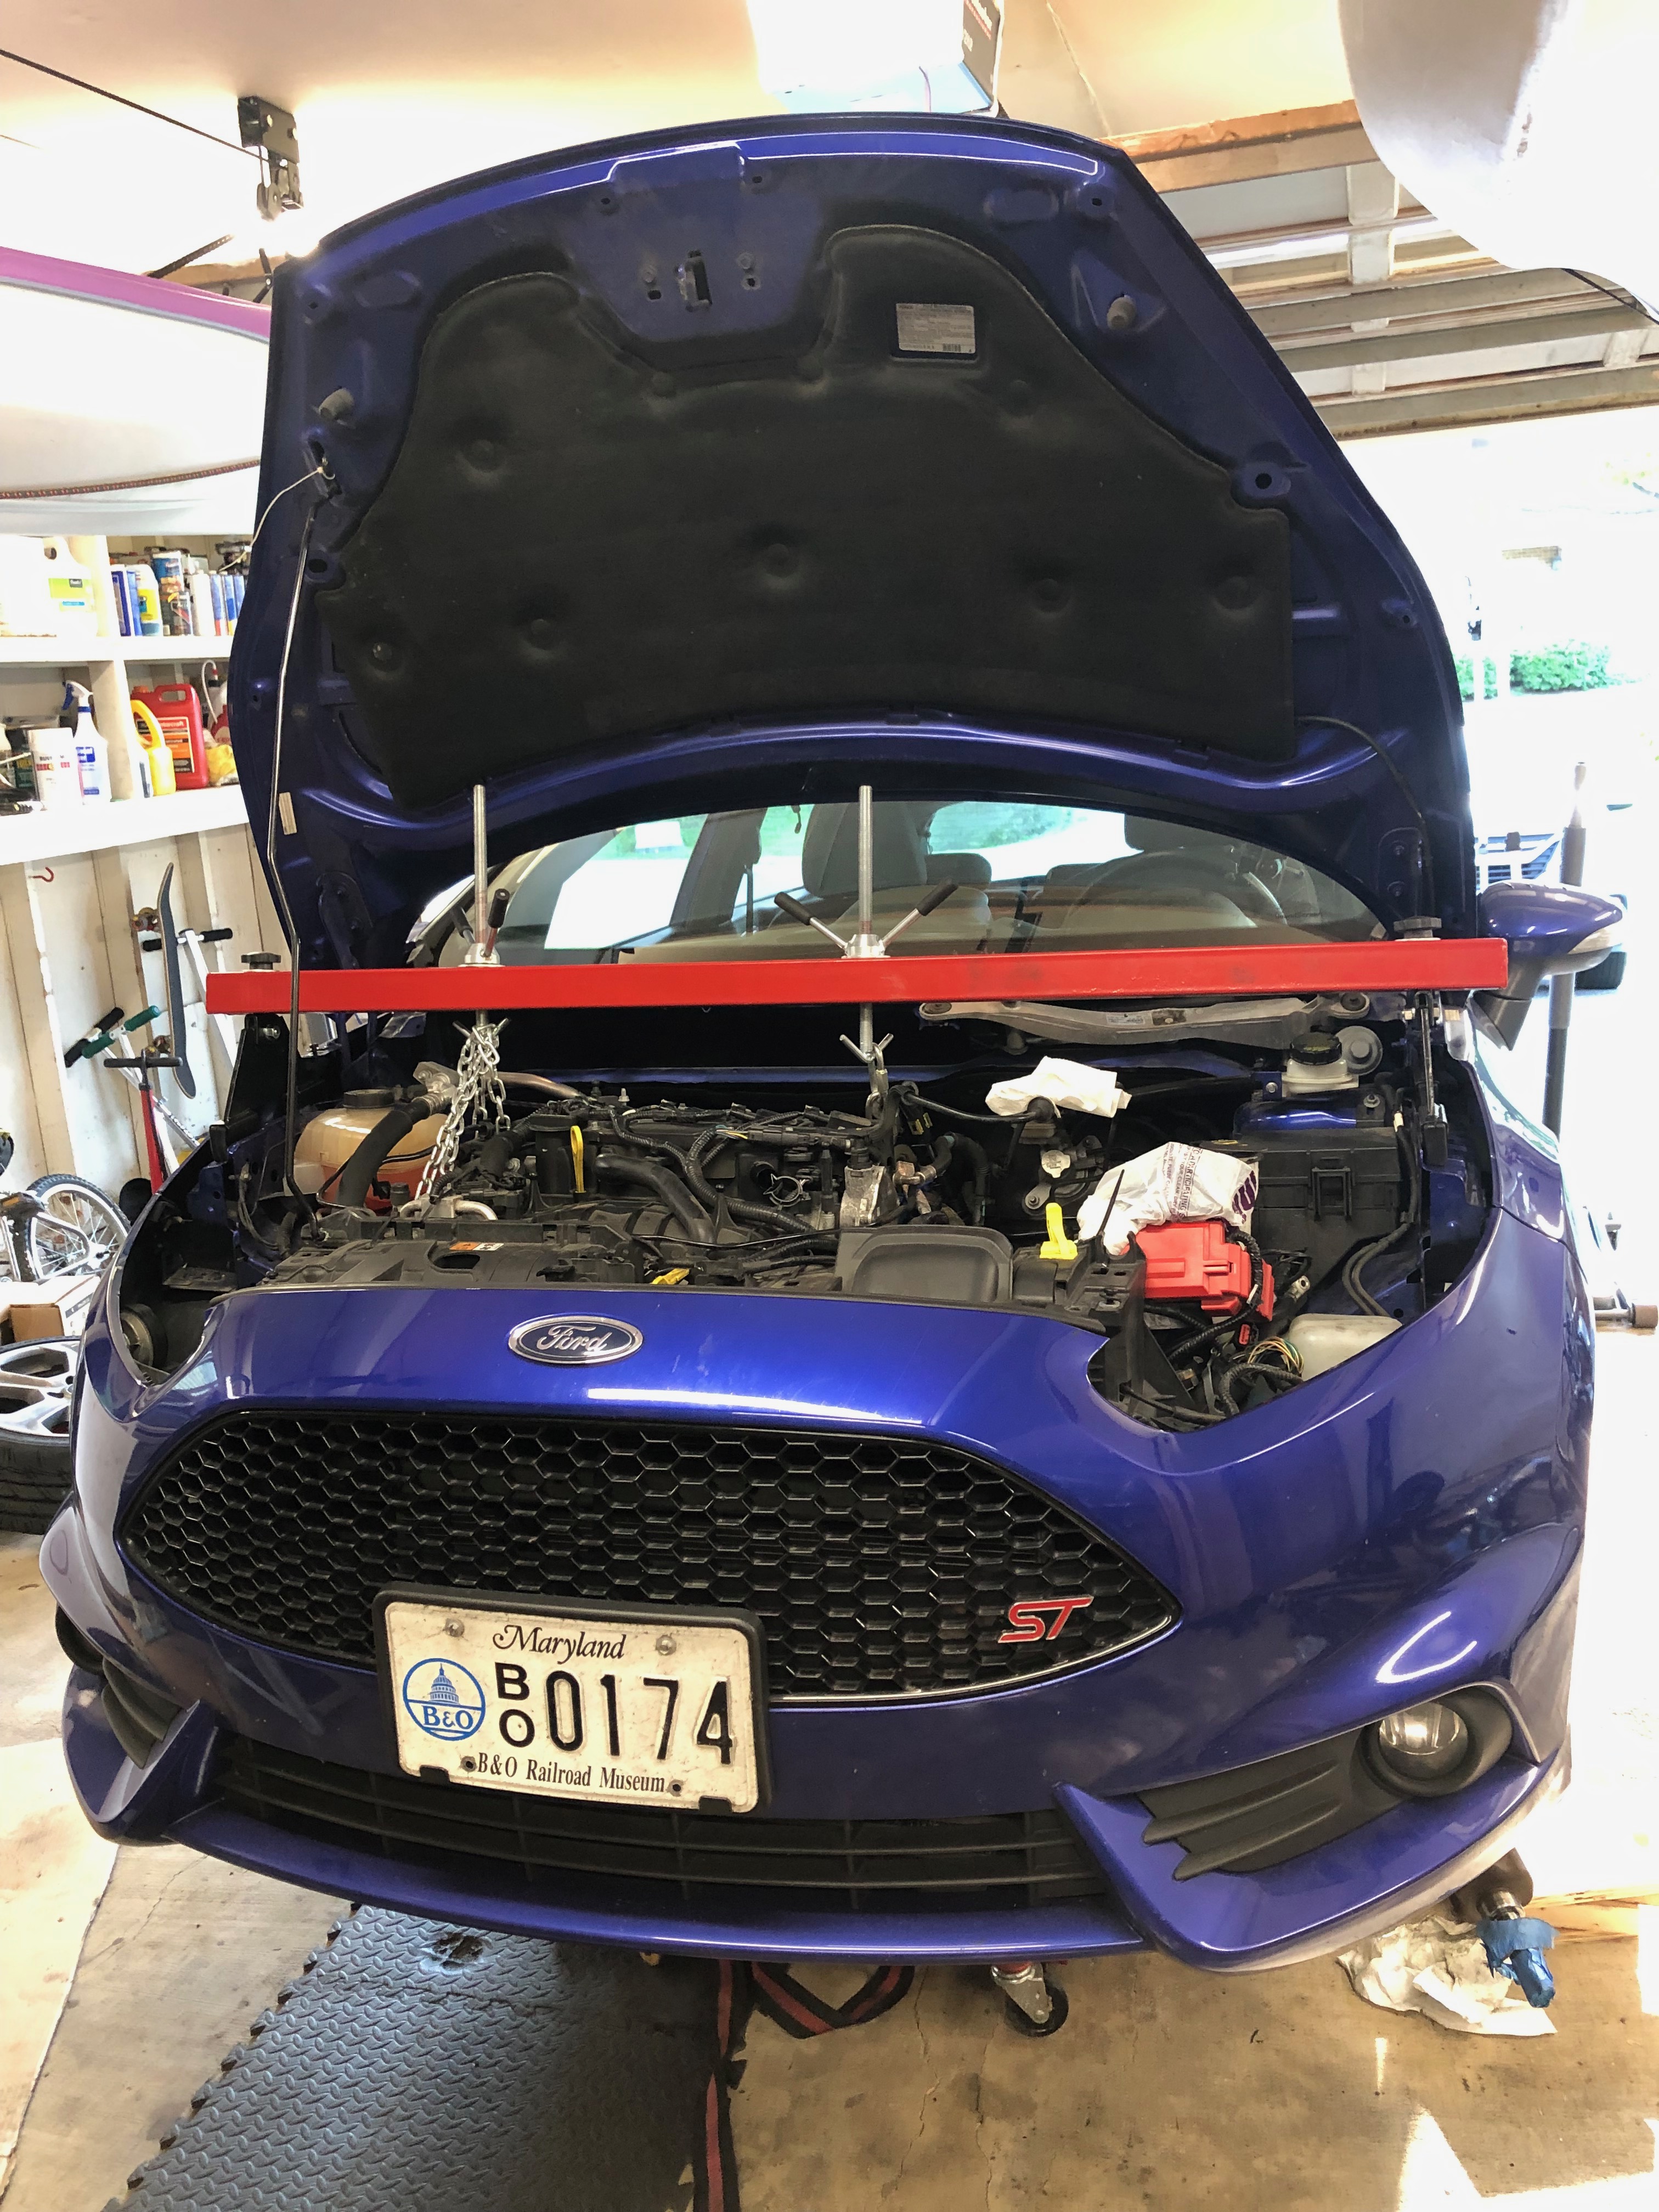
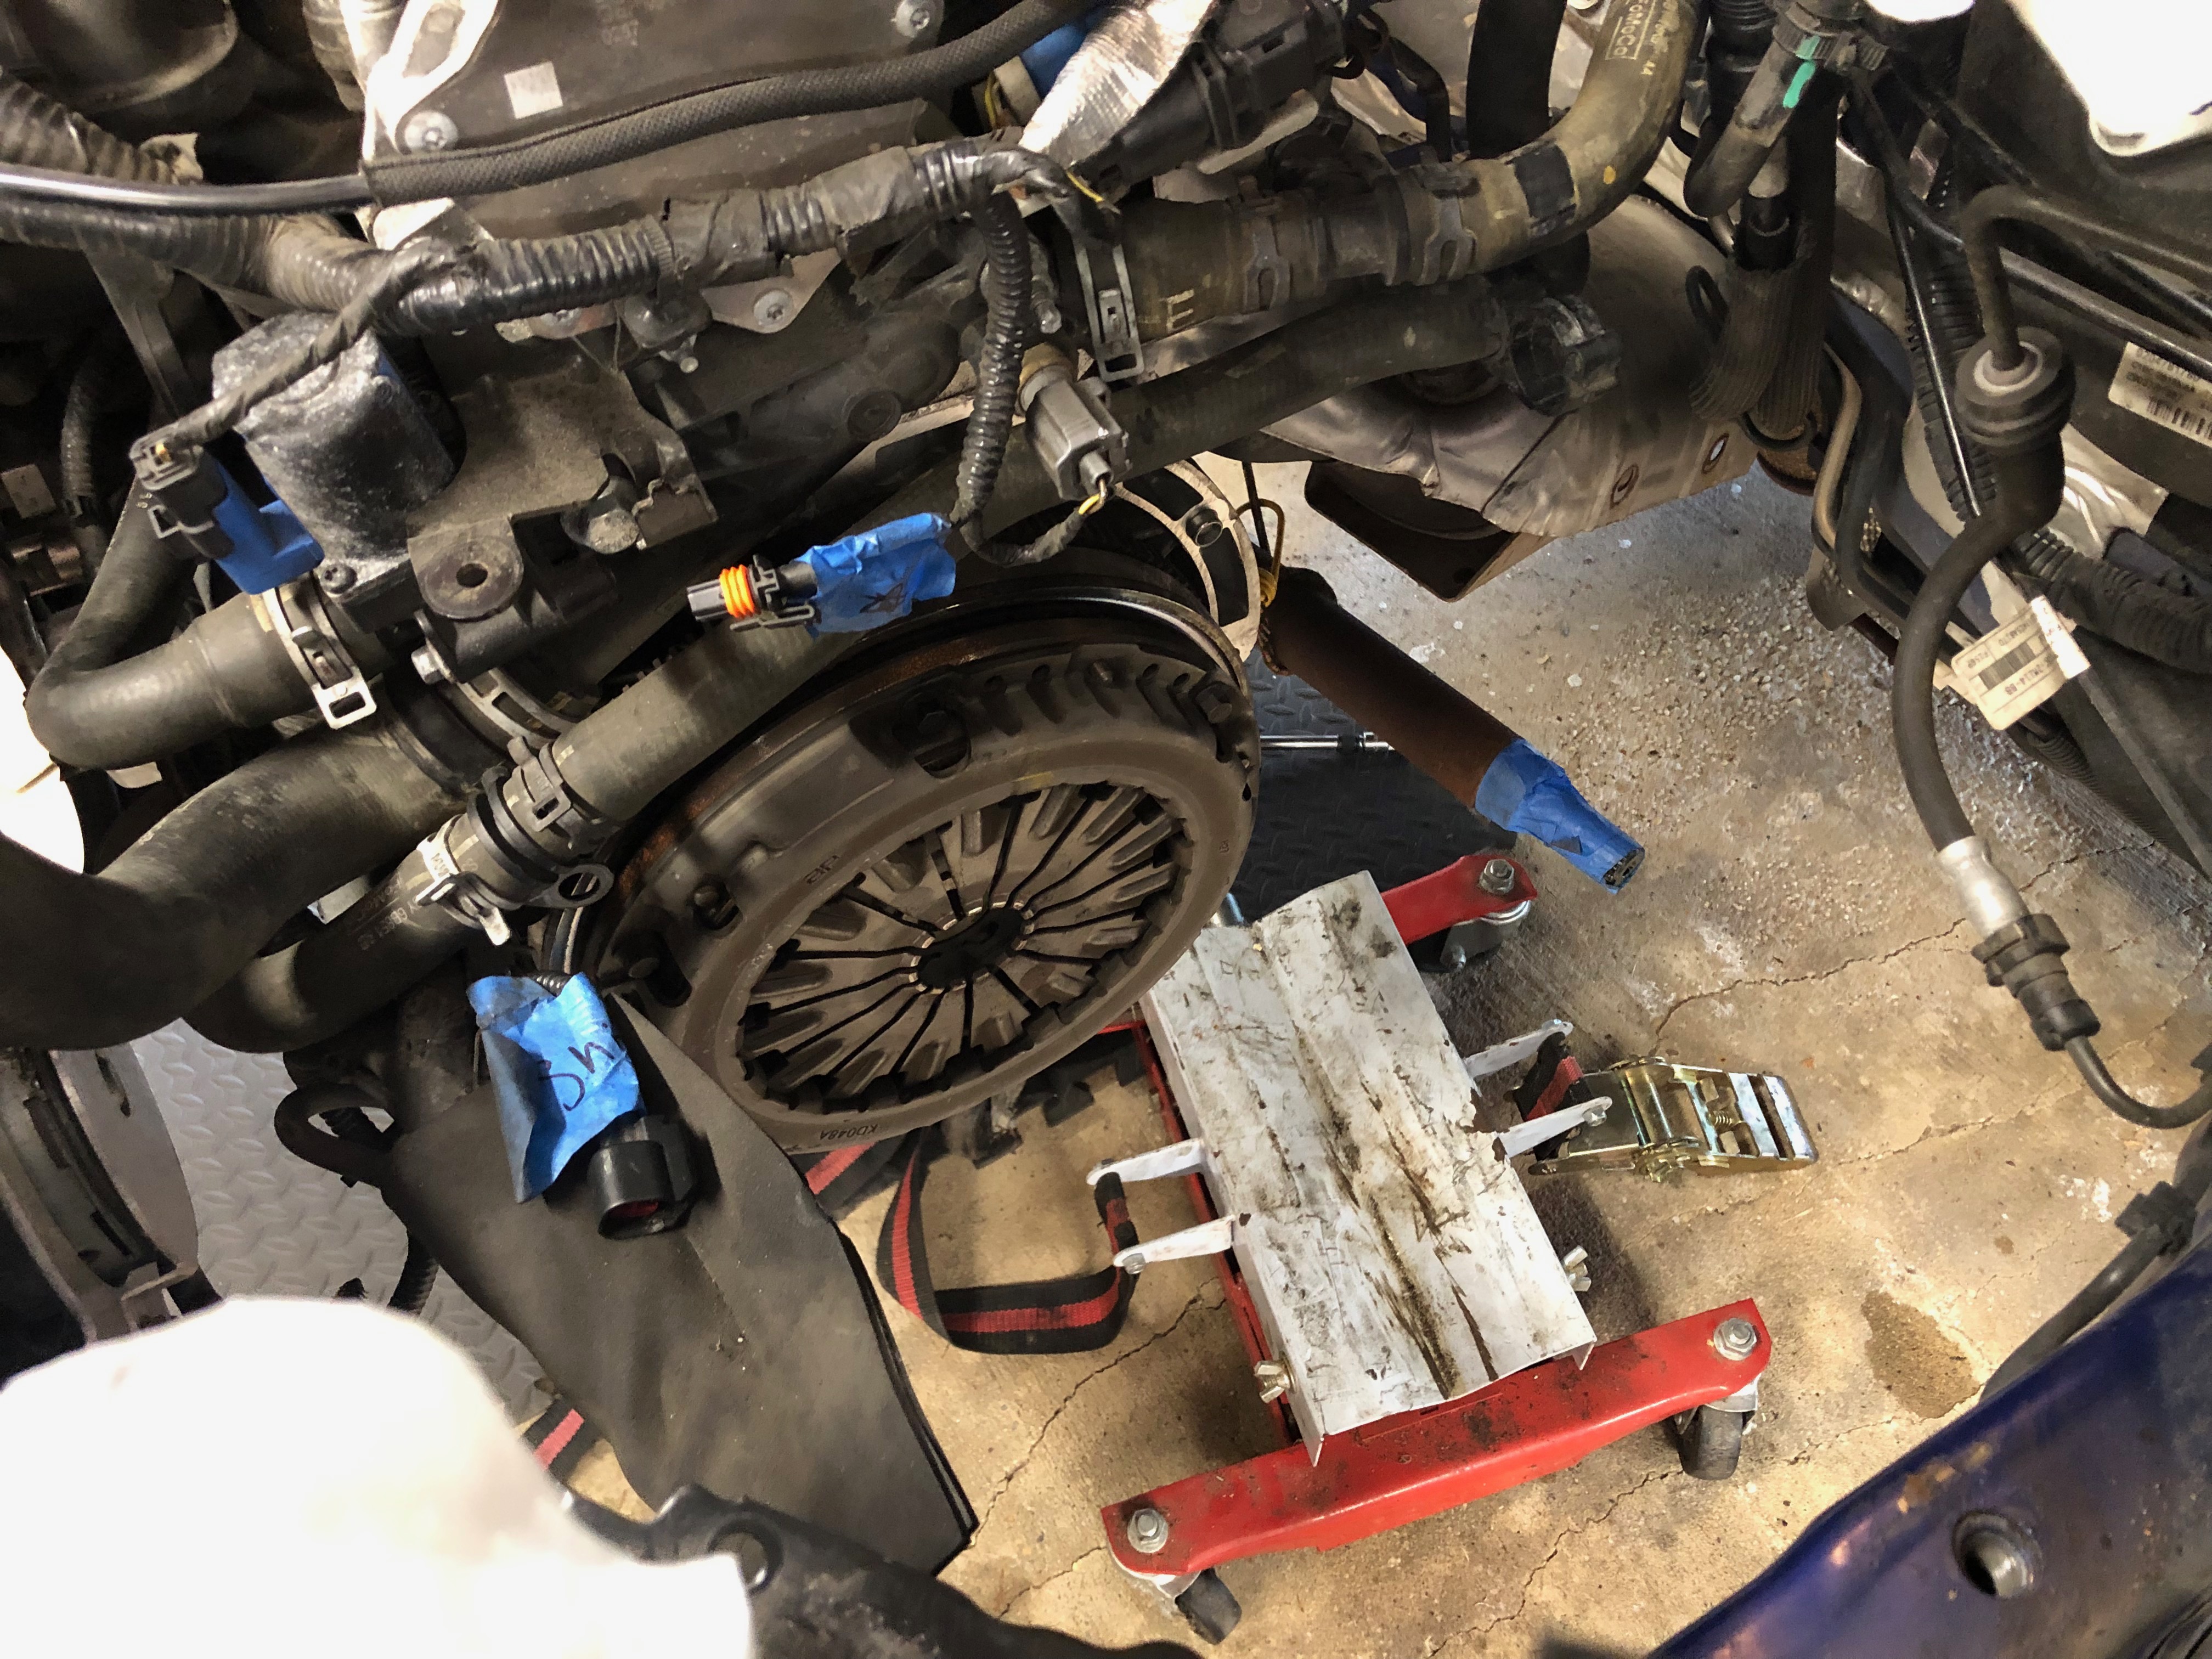
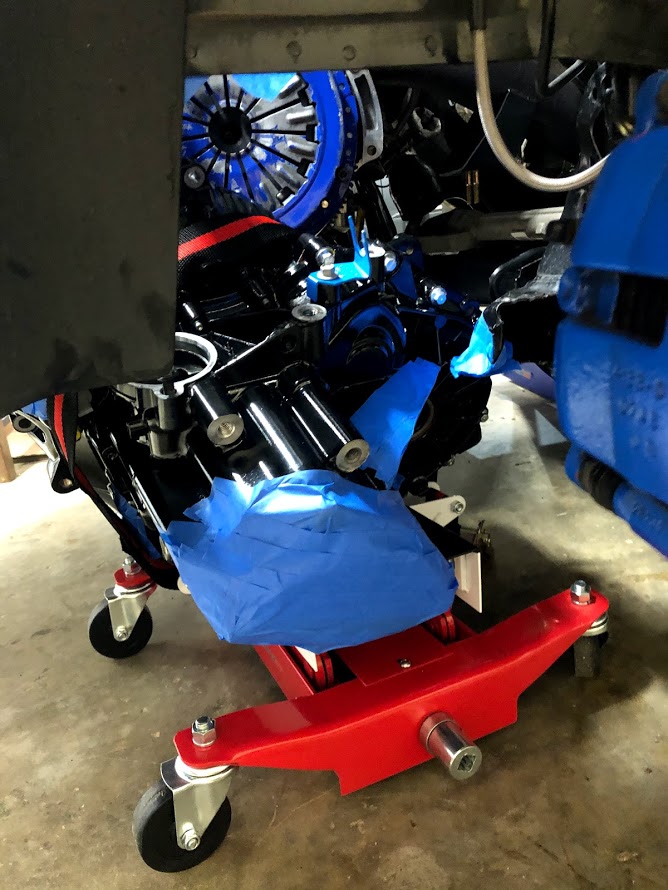
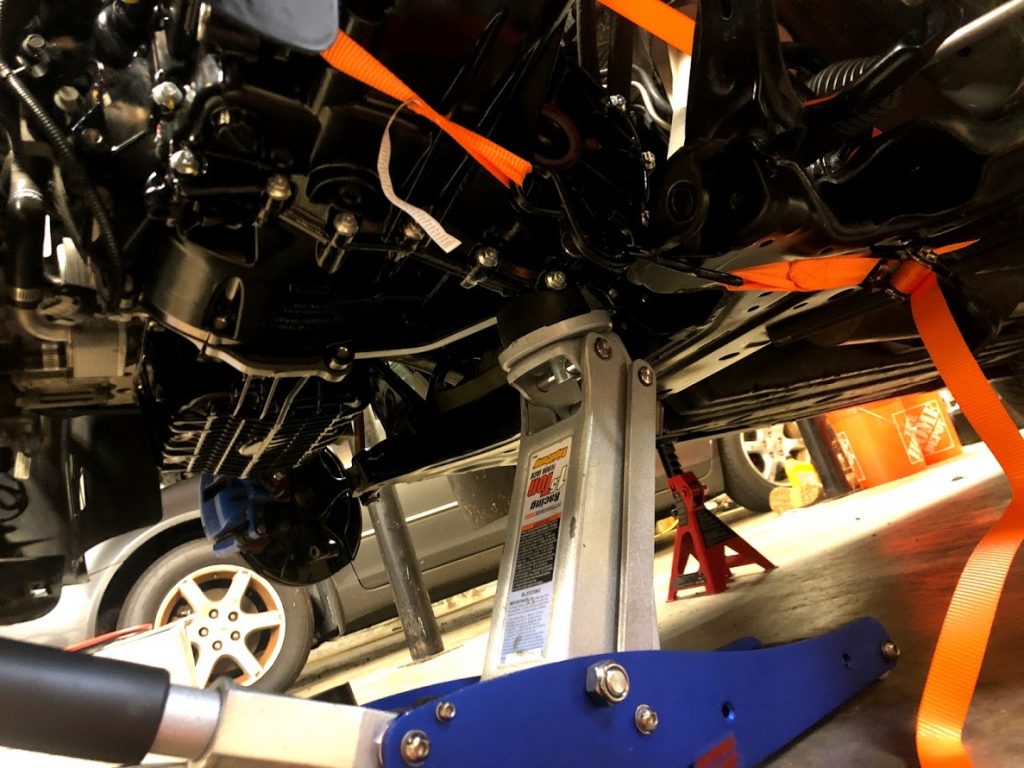
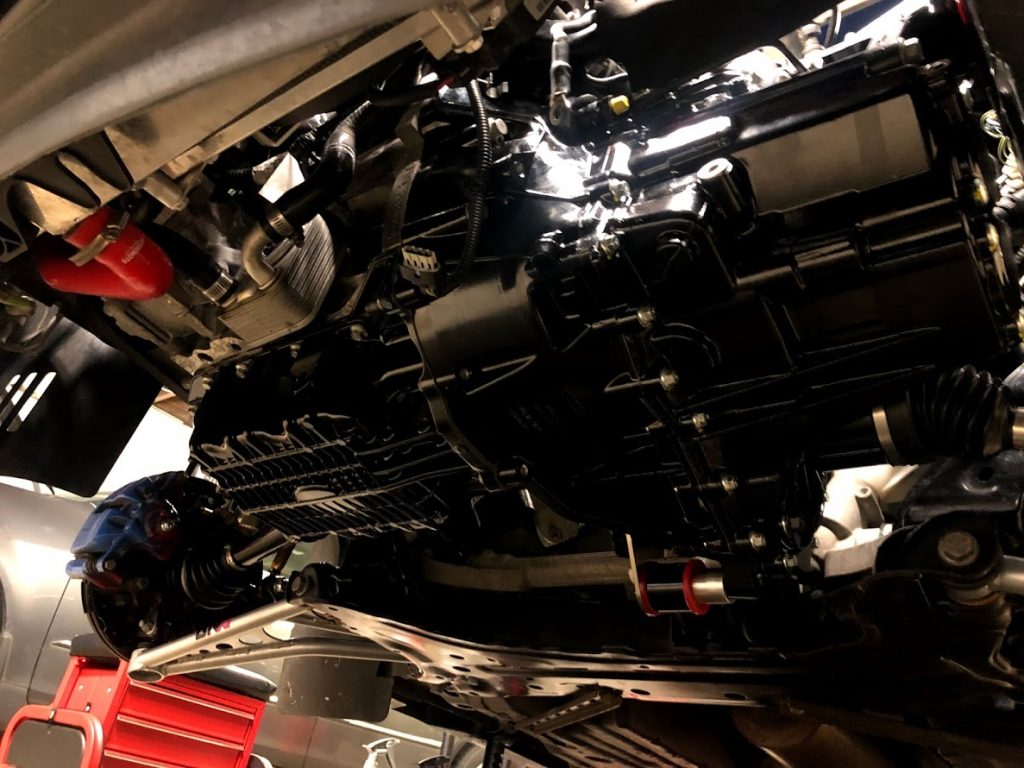
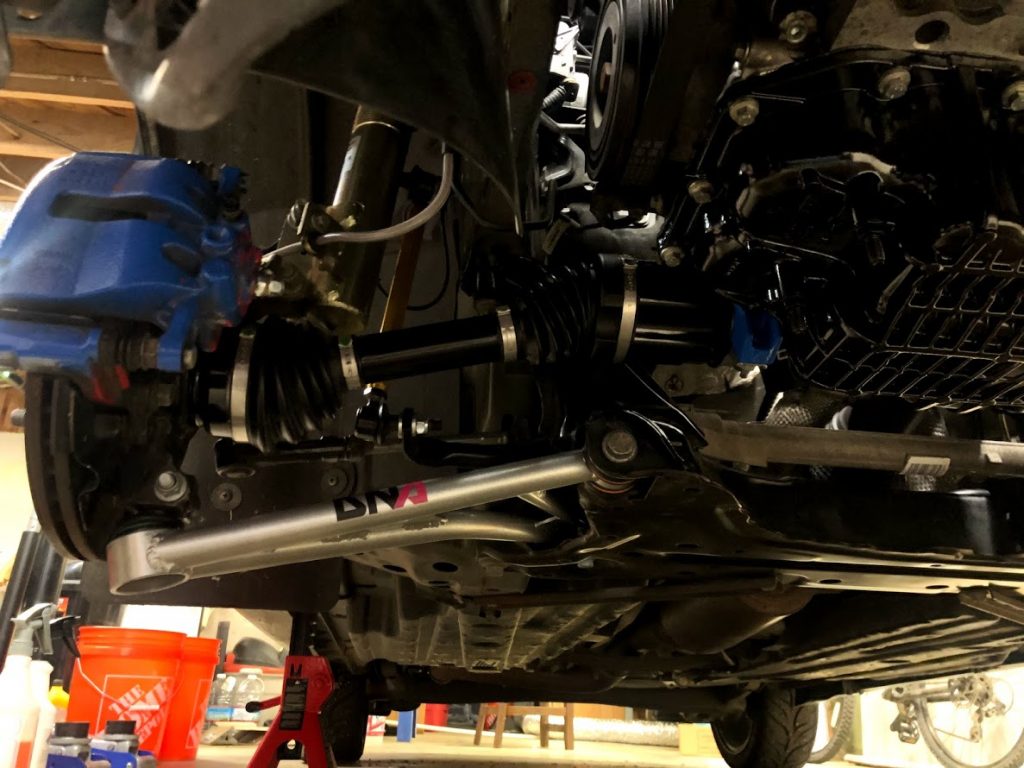
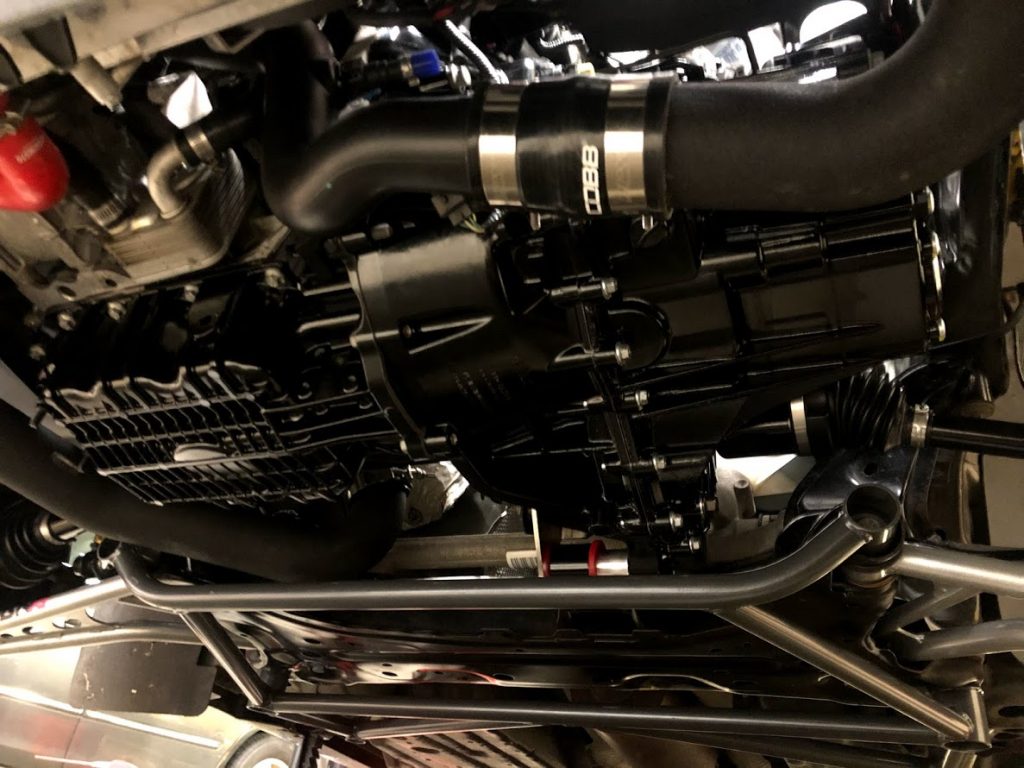
I chose #7. I figured I would recruit as much help as I could, I could source parts online and at local dealerships, buy tools I needed as I went along and if I failed completely, the worst case scenario is that I would need to buy a replacement transmission. So on I went. The first real work day wasn’t until June 9th when a couple friends came over to start the tear-down. The Ford manual tells you to remove the sub-frame, so we followed along. (Spoiler alert: the sub-frame does not need to come out in order to remove the transmission, but it does make it significantly easier. You might say “how would you know? You already said you removed the sub-frame to take the trans out!” A-HA – yes – well, see, spoiler alert #2, I had to take the transmission out a SECOND TIME. More on this later.) Jason lent me his trans jack, Randy brought some air tools, pry bars and large socket set, Ryan brought an engine support, pullers and other specialized tools (he had recently rebuild his trans). On this first day, parts were flying off the car. We got the trans out and called it a day.
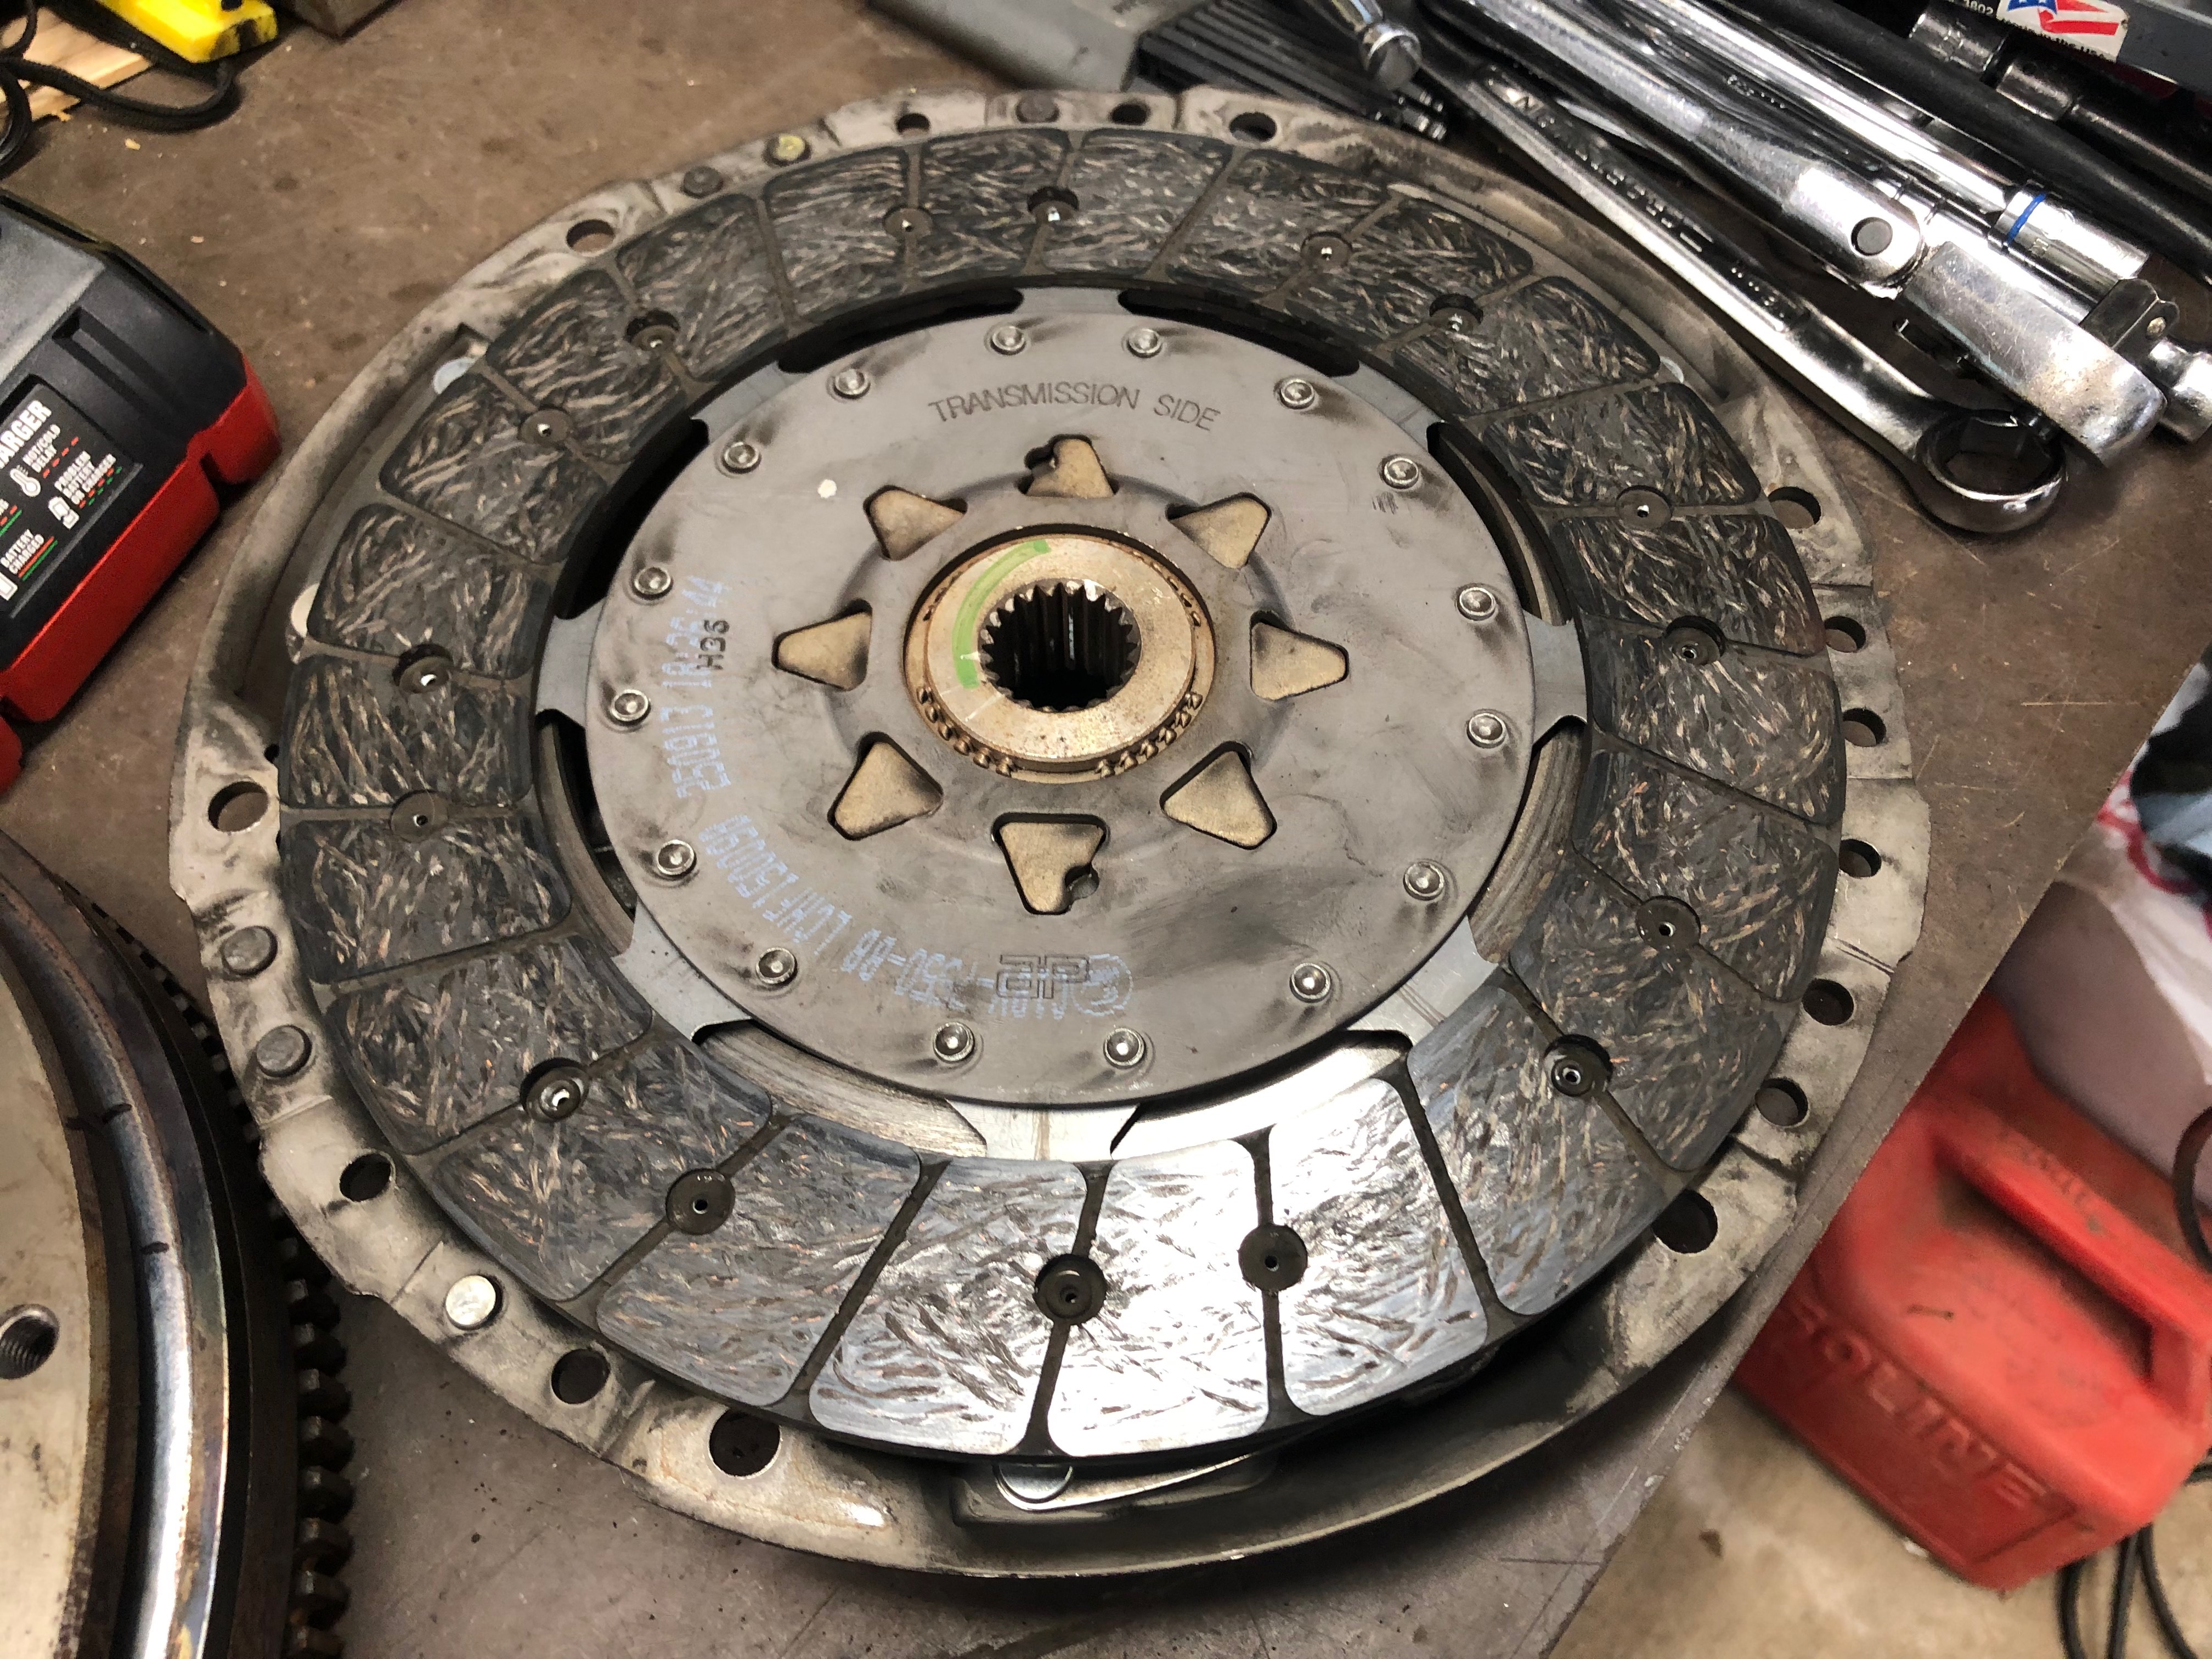
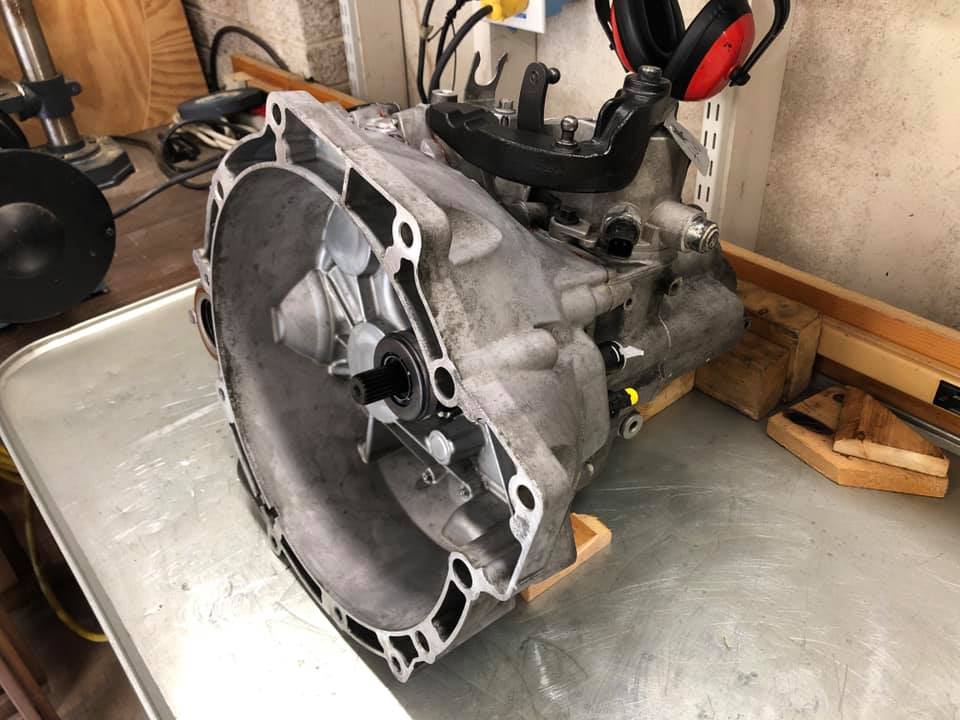
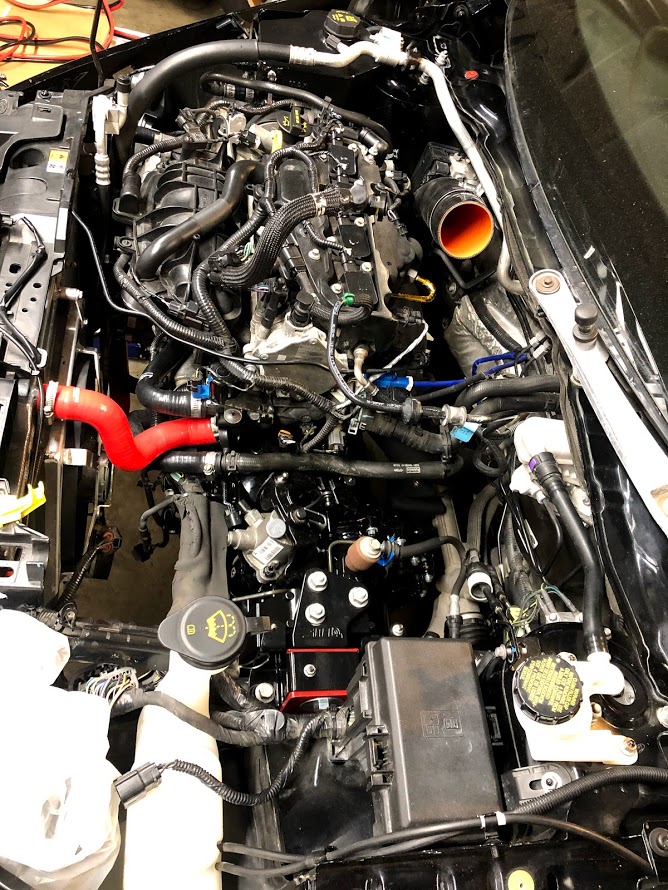
Step one, jack the car up and put it on jack stands.Because the left side trans/engine mount is removed, supporting the engine is necessary.View from below with sub-frame removed.From up top. Trans is out, view of the pressure plate.Old Clutch and pressure plate. Clutch has a tiny bit of play at the center spline.
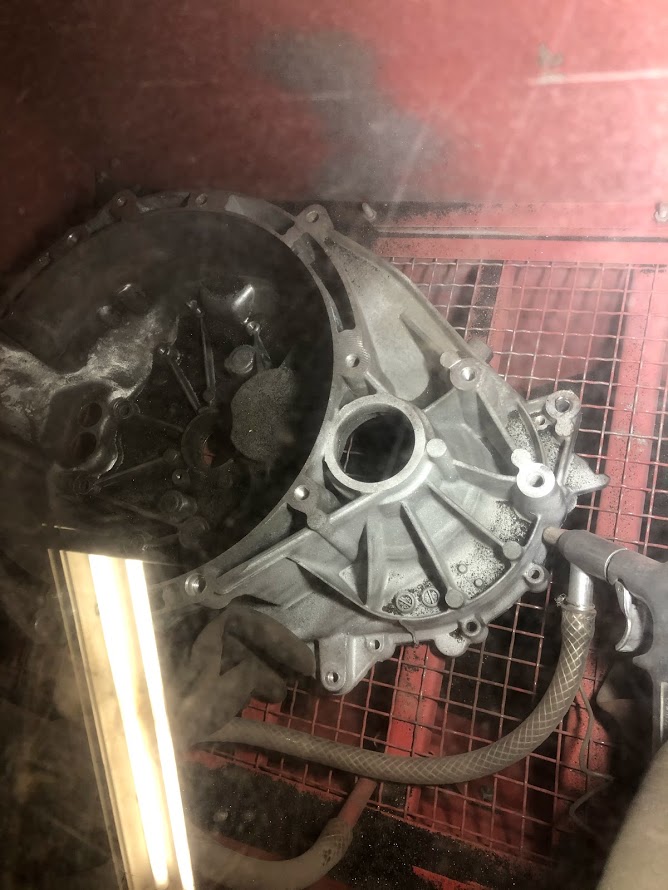
Over the next week or two I opened up the trans for an inspection.
My prize.
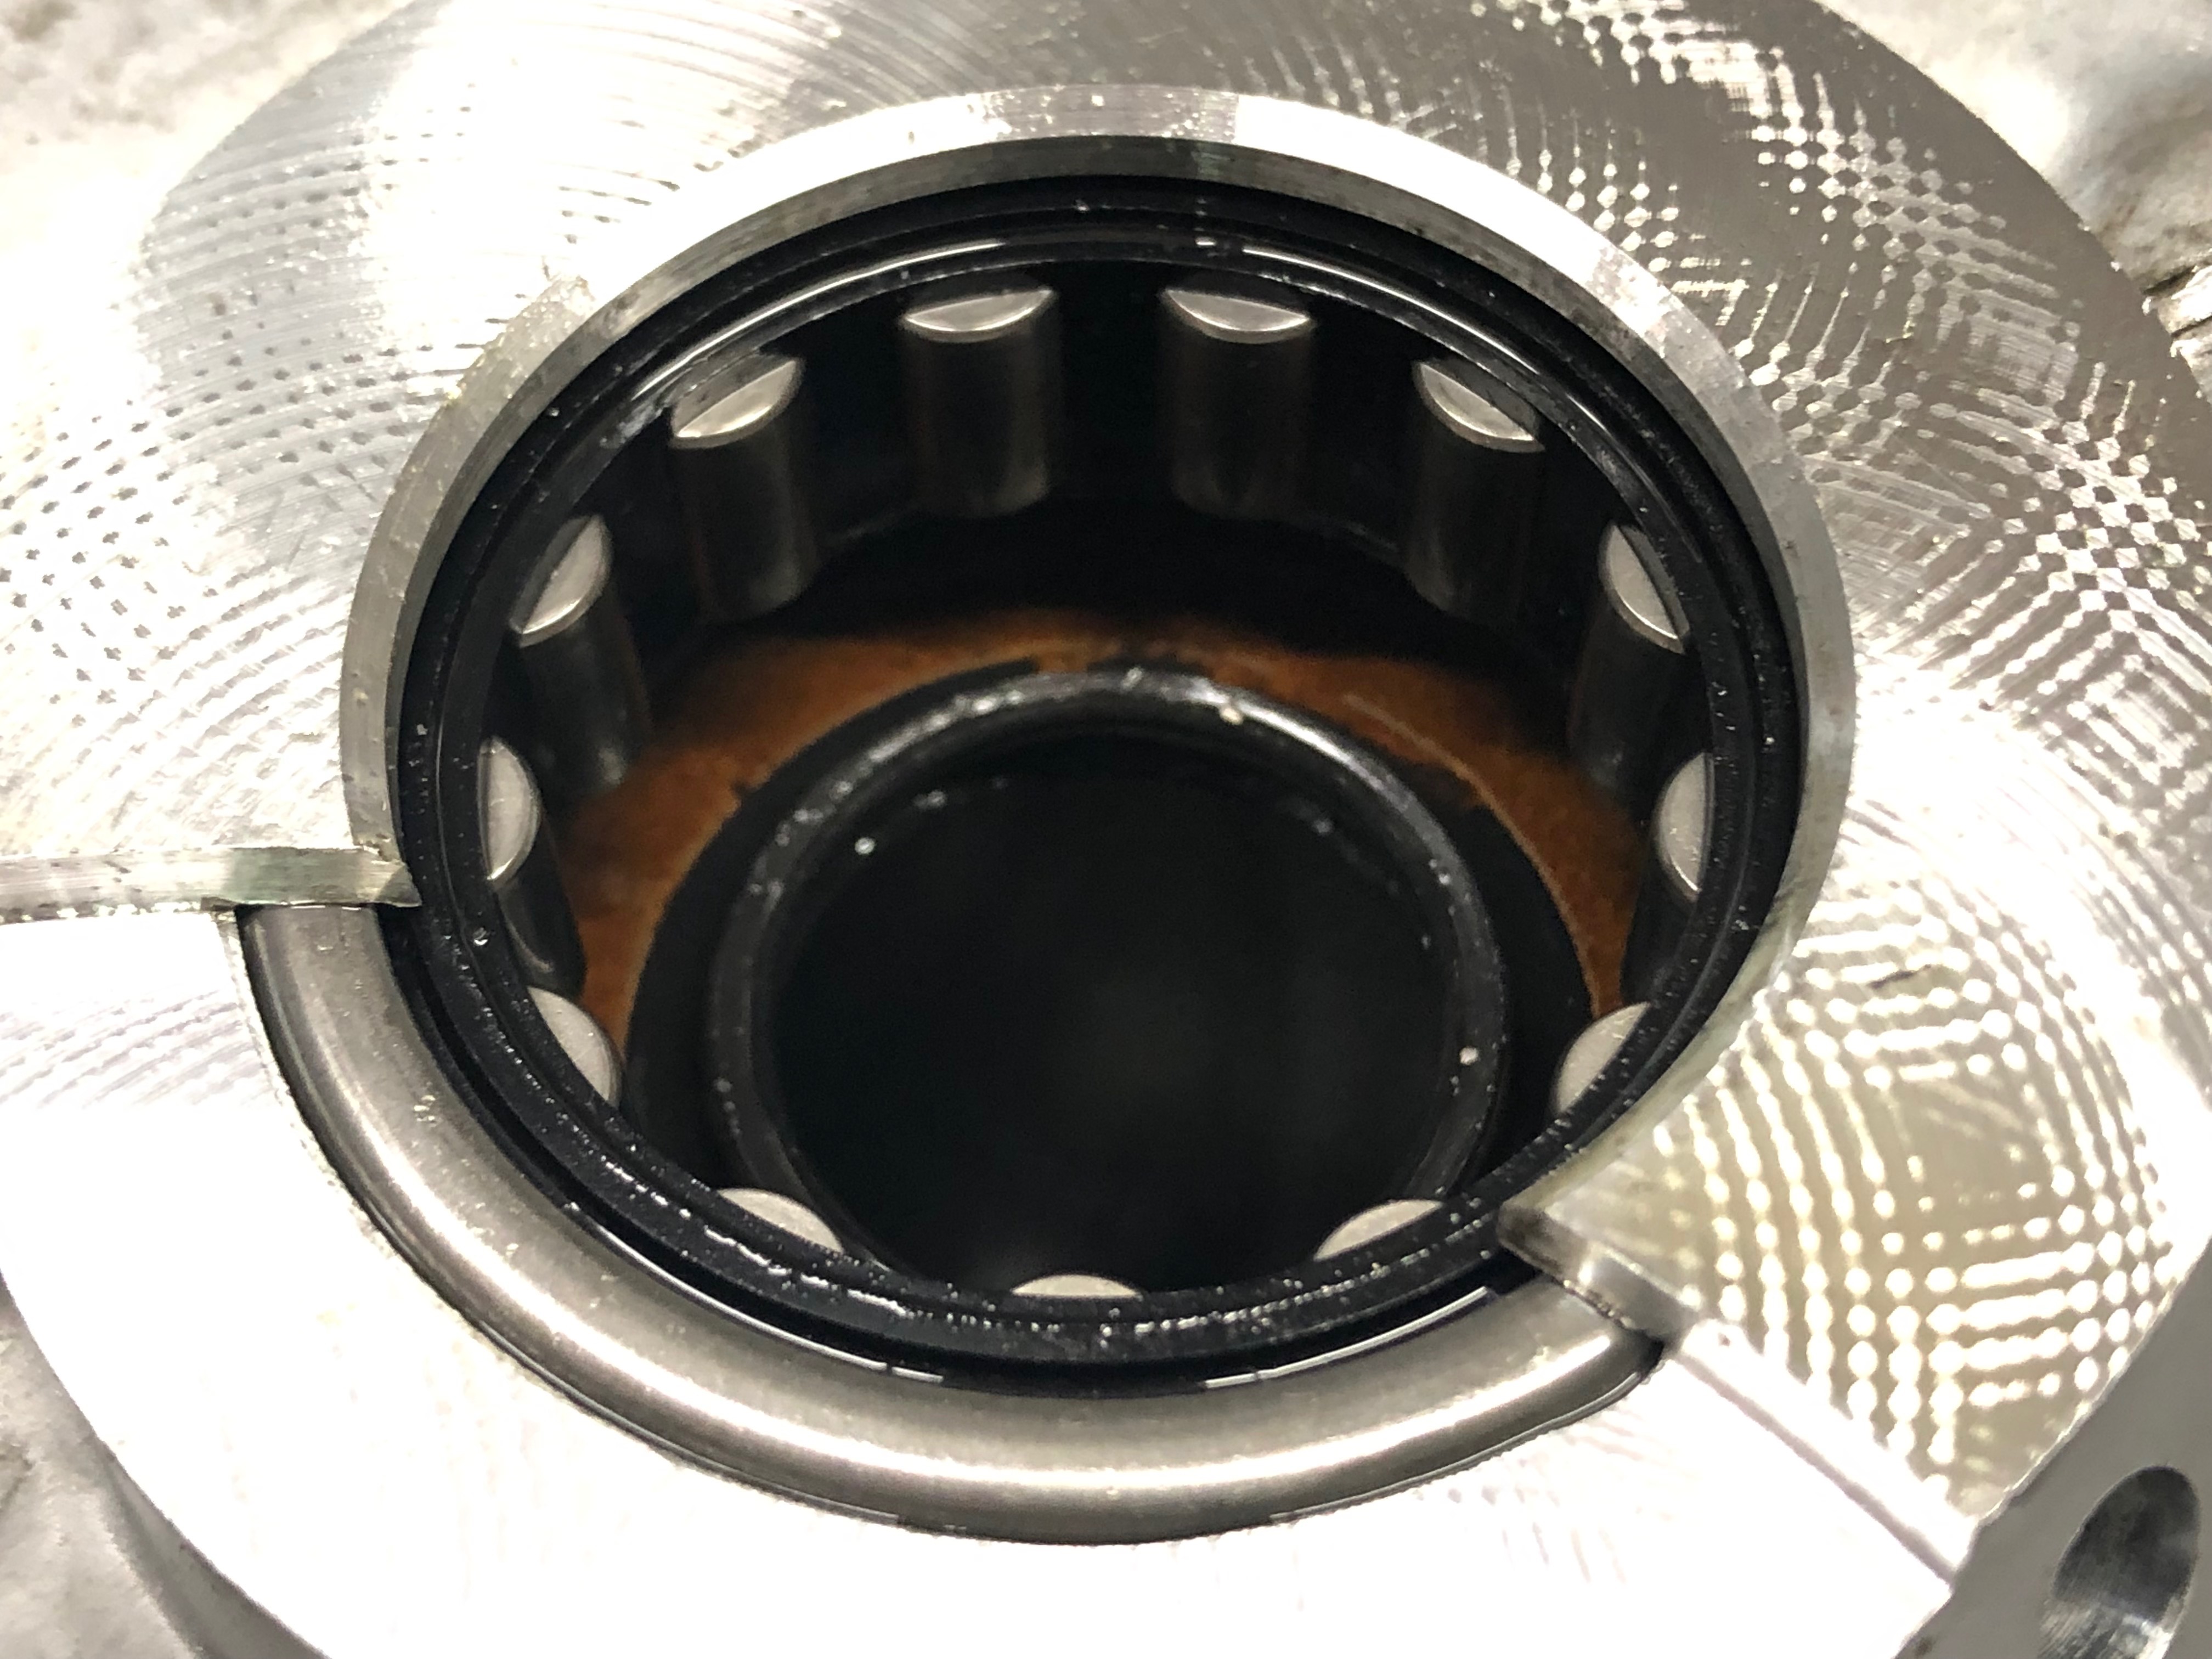
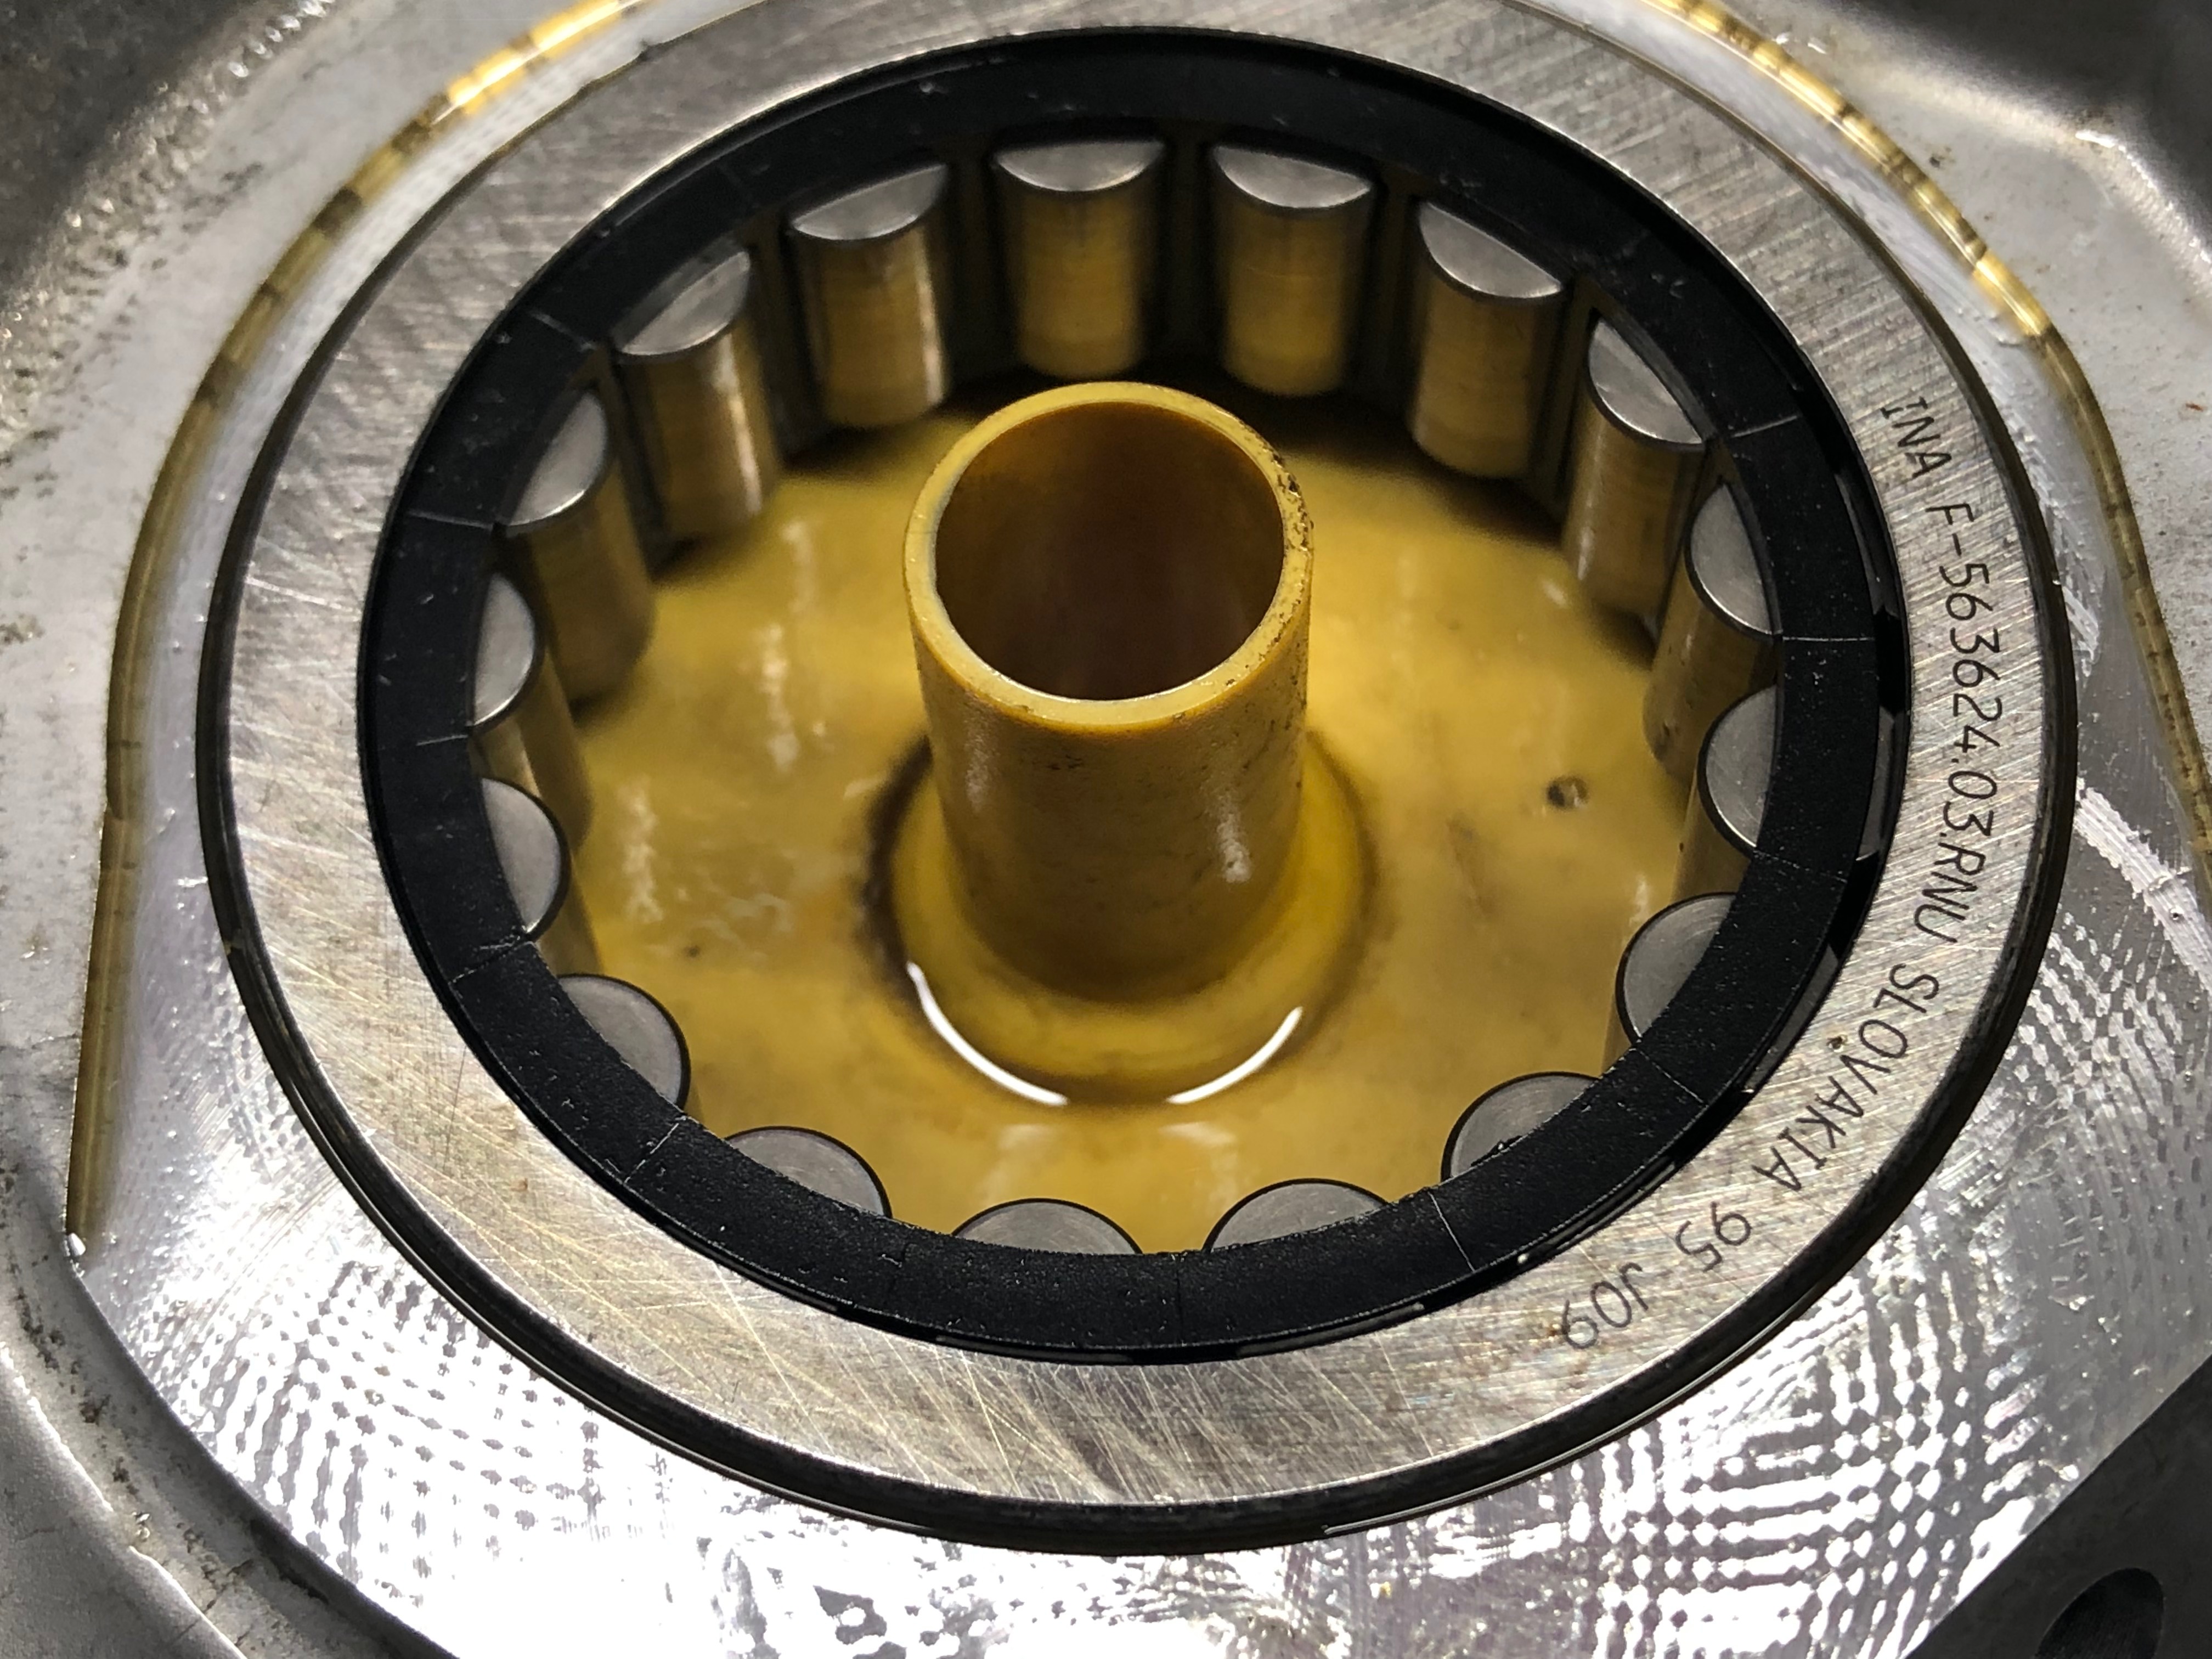
I had been hoping that once I opened the trans case I would be met with an “AH-HA” moment; something like a bearing that was obviously failed, or something loose and rattling around. I was let down. To my semi-trained ears, the bearings all seemed “fine”. Nothing glaring. Some of the bearings showed signs of wear; what I could consider normal.
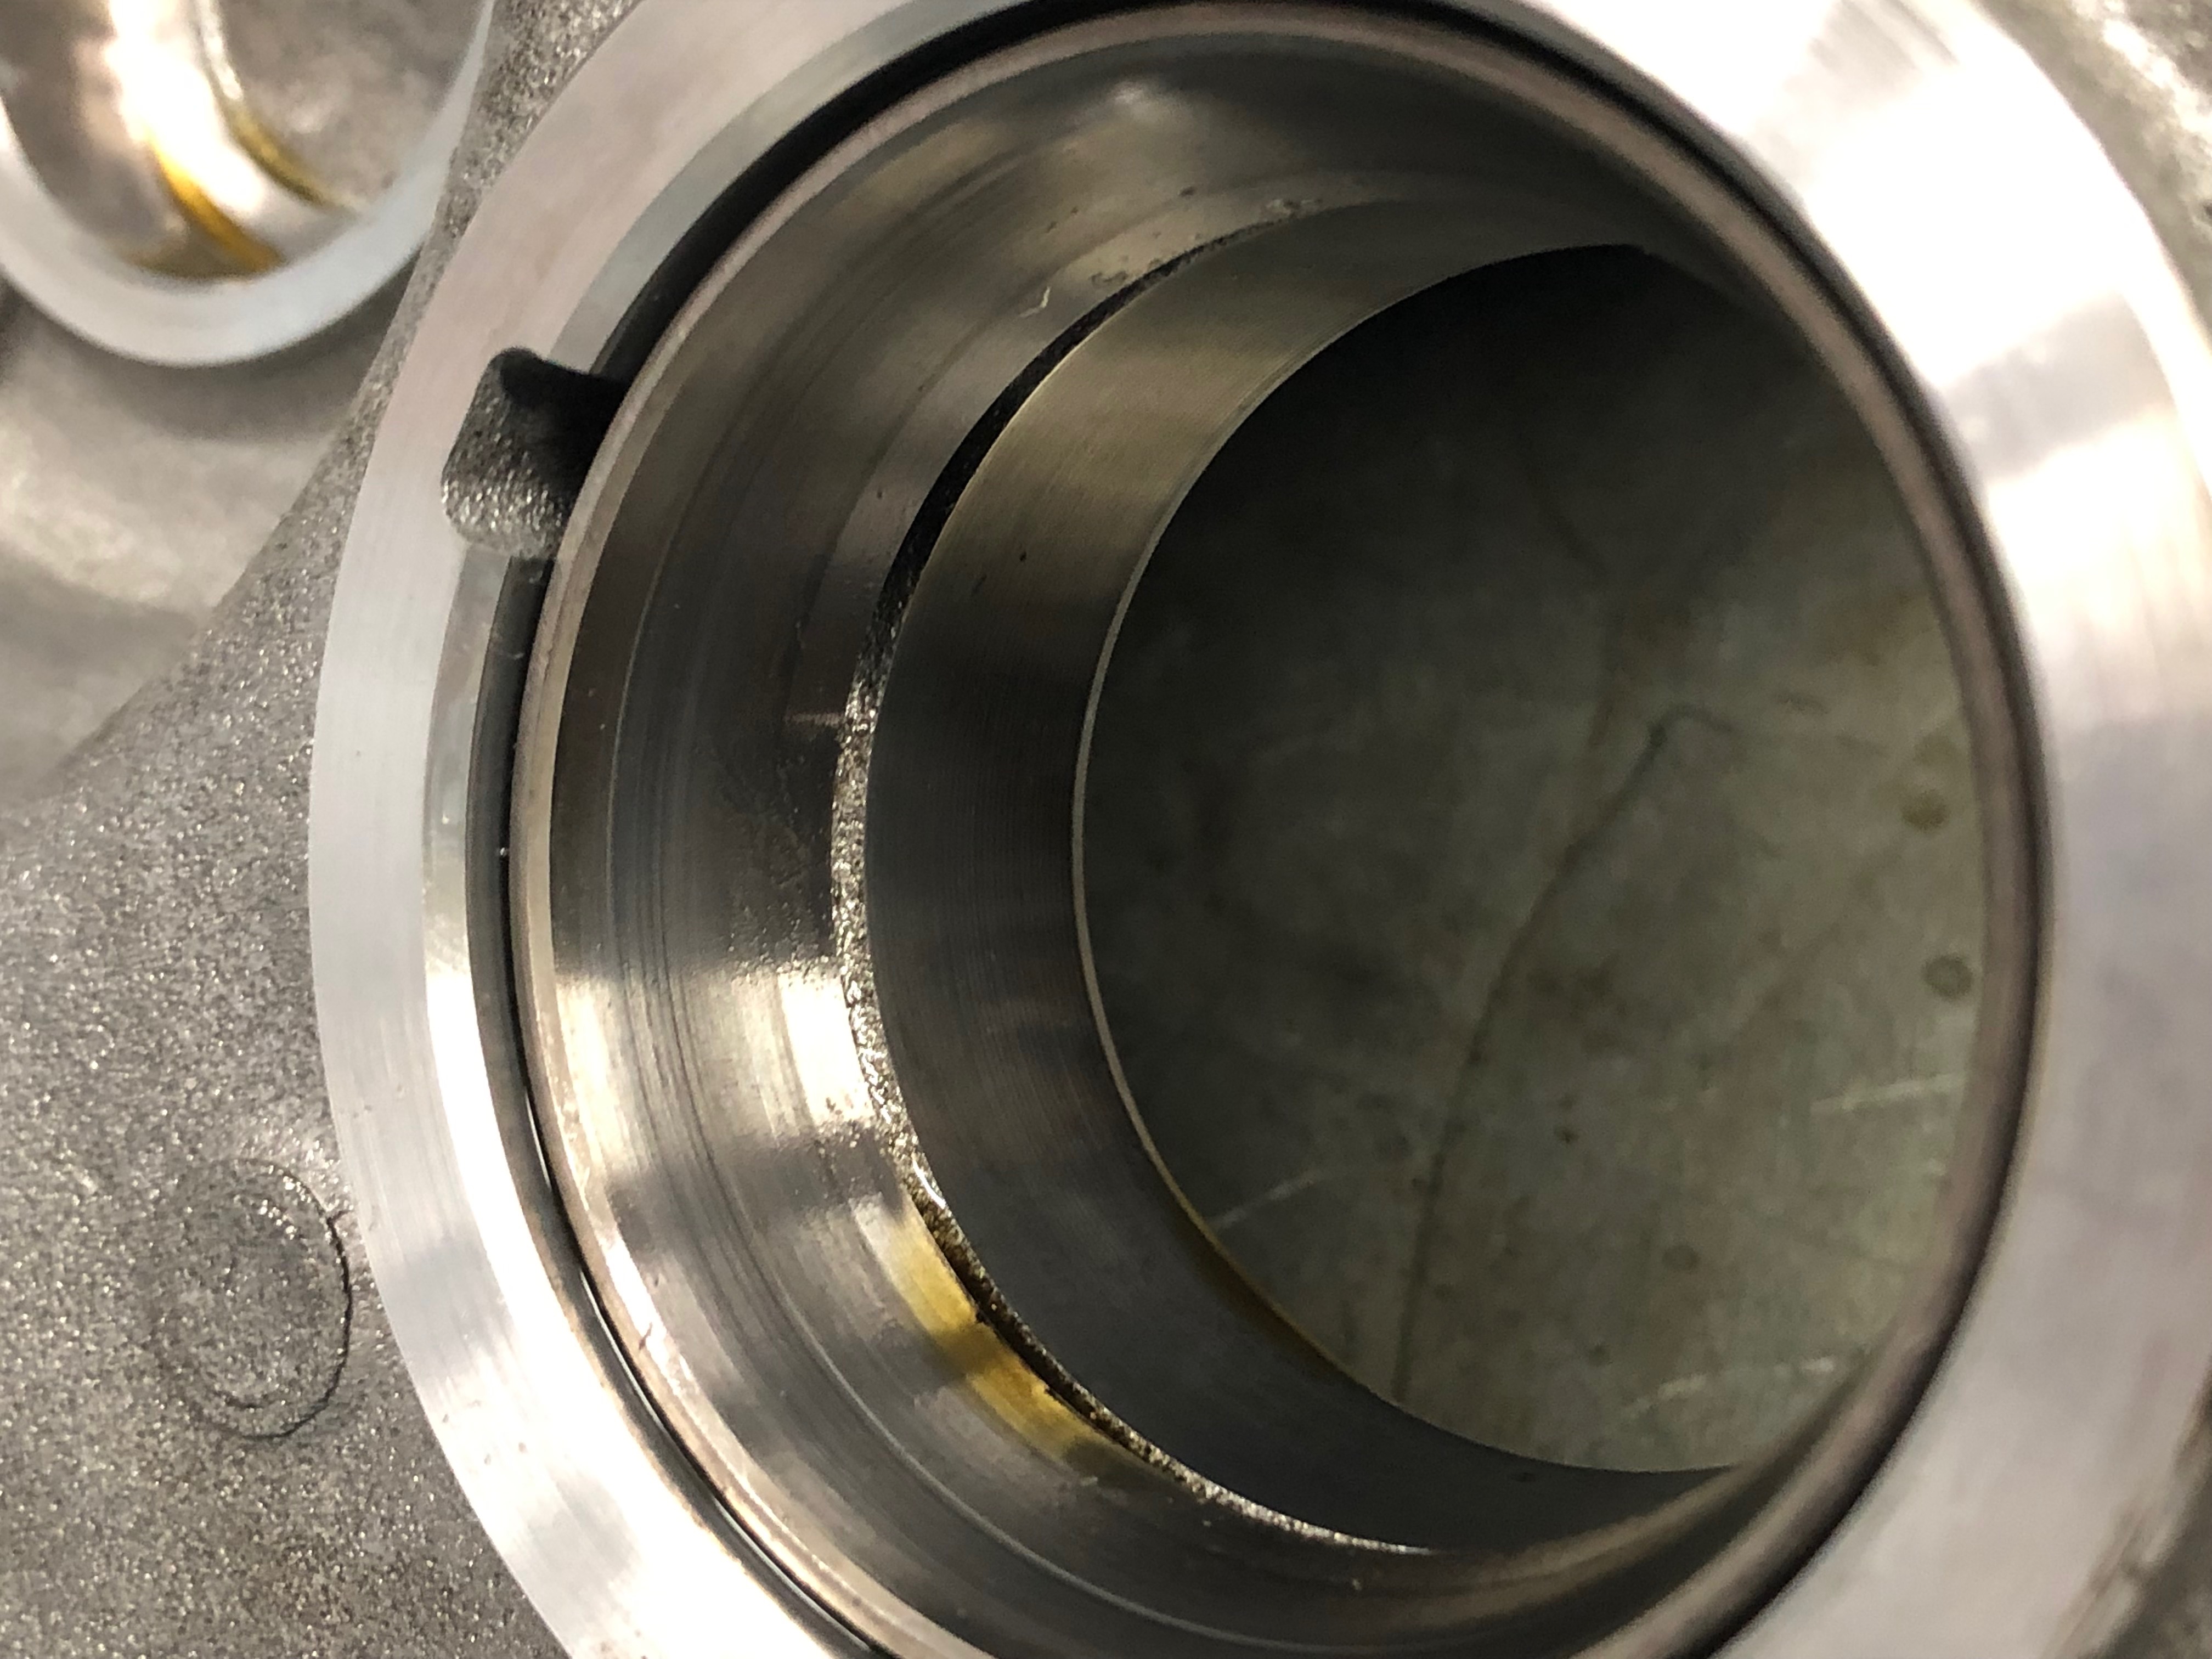
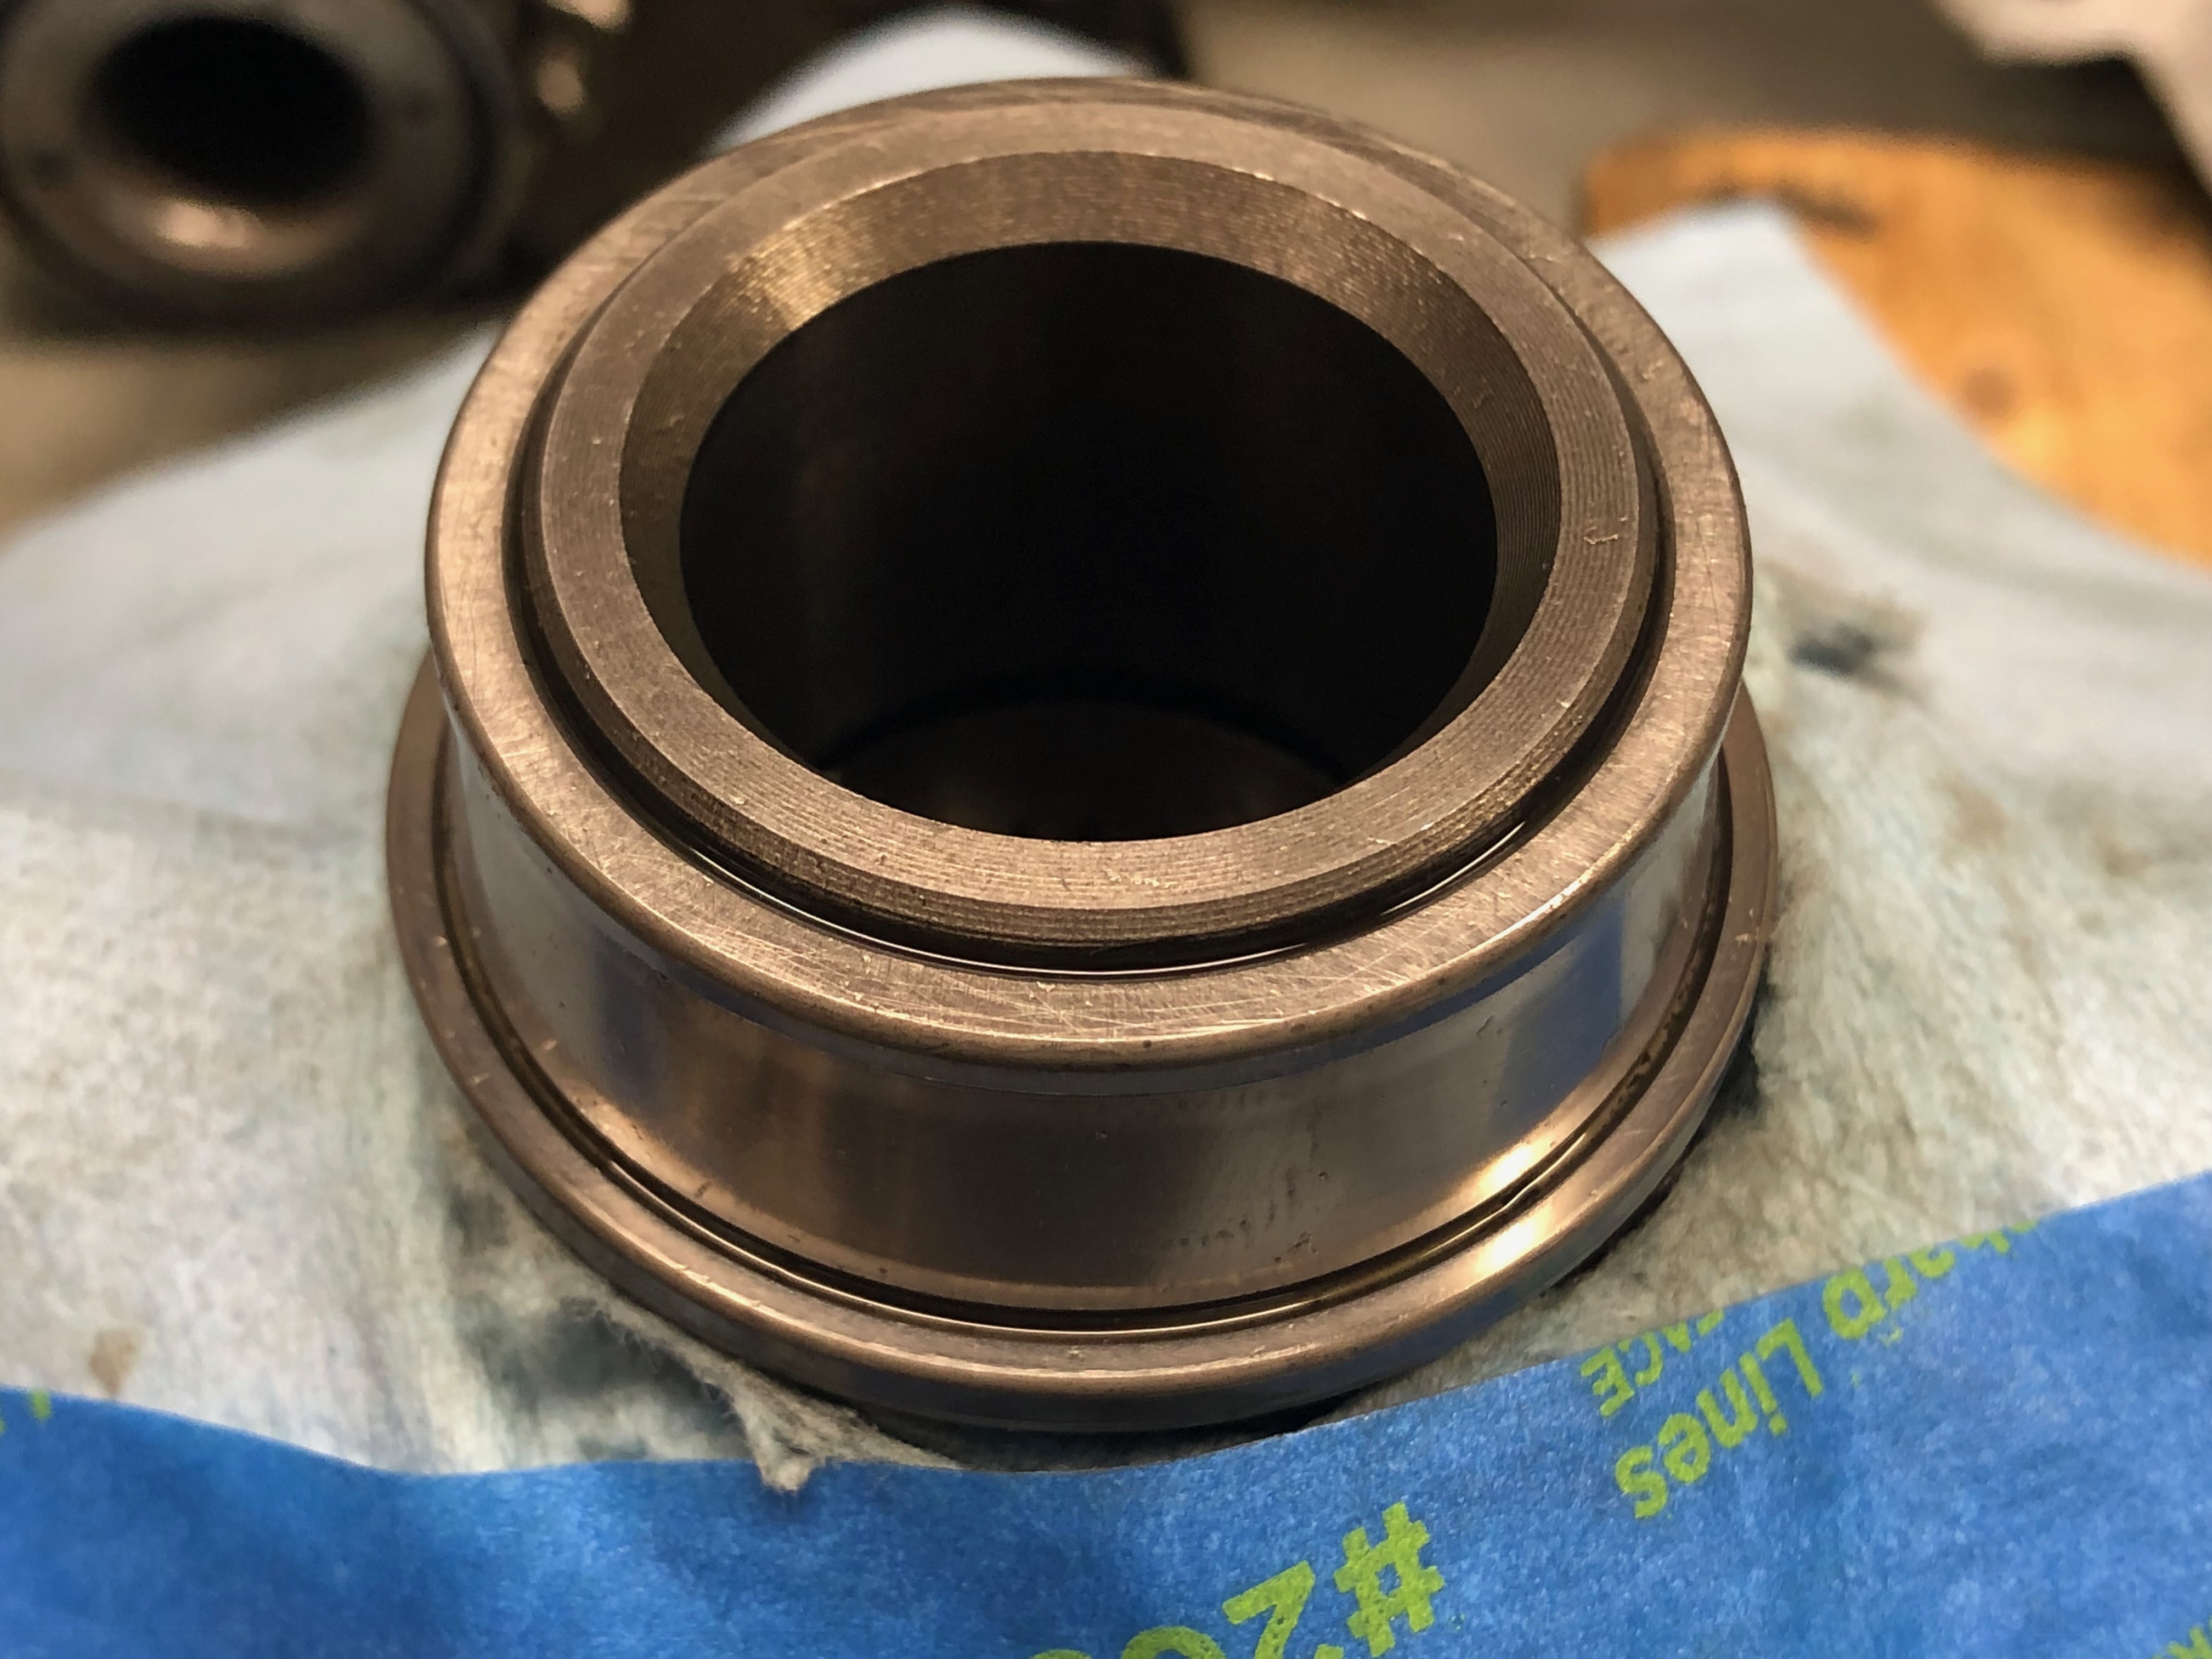
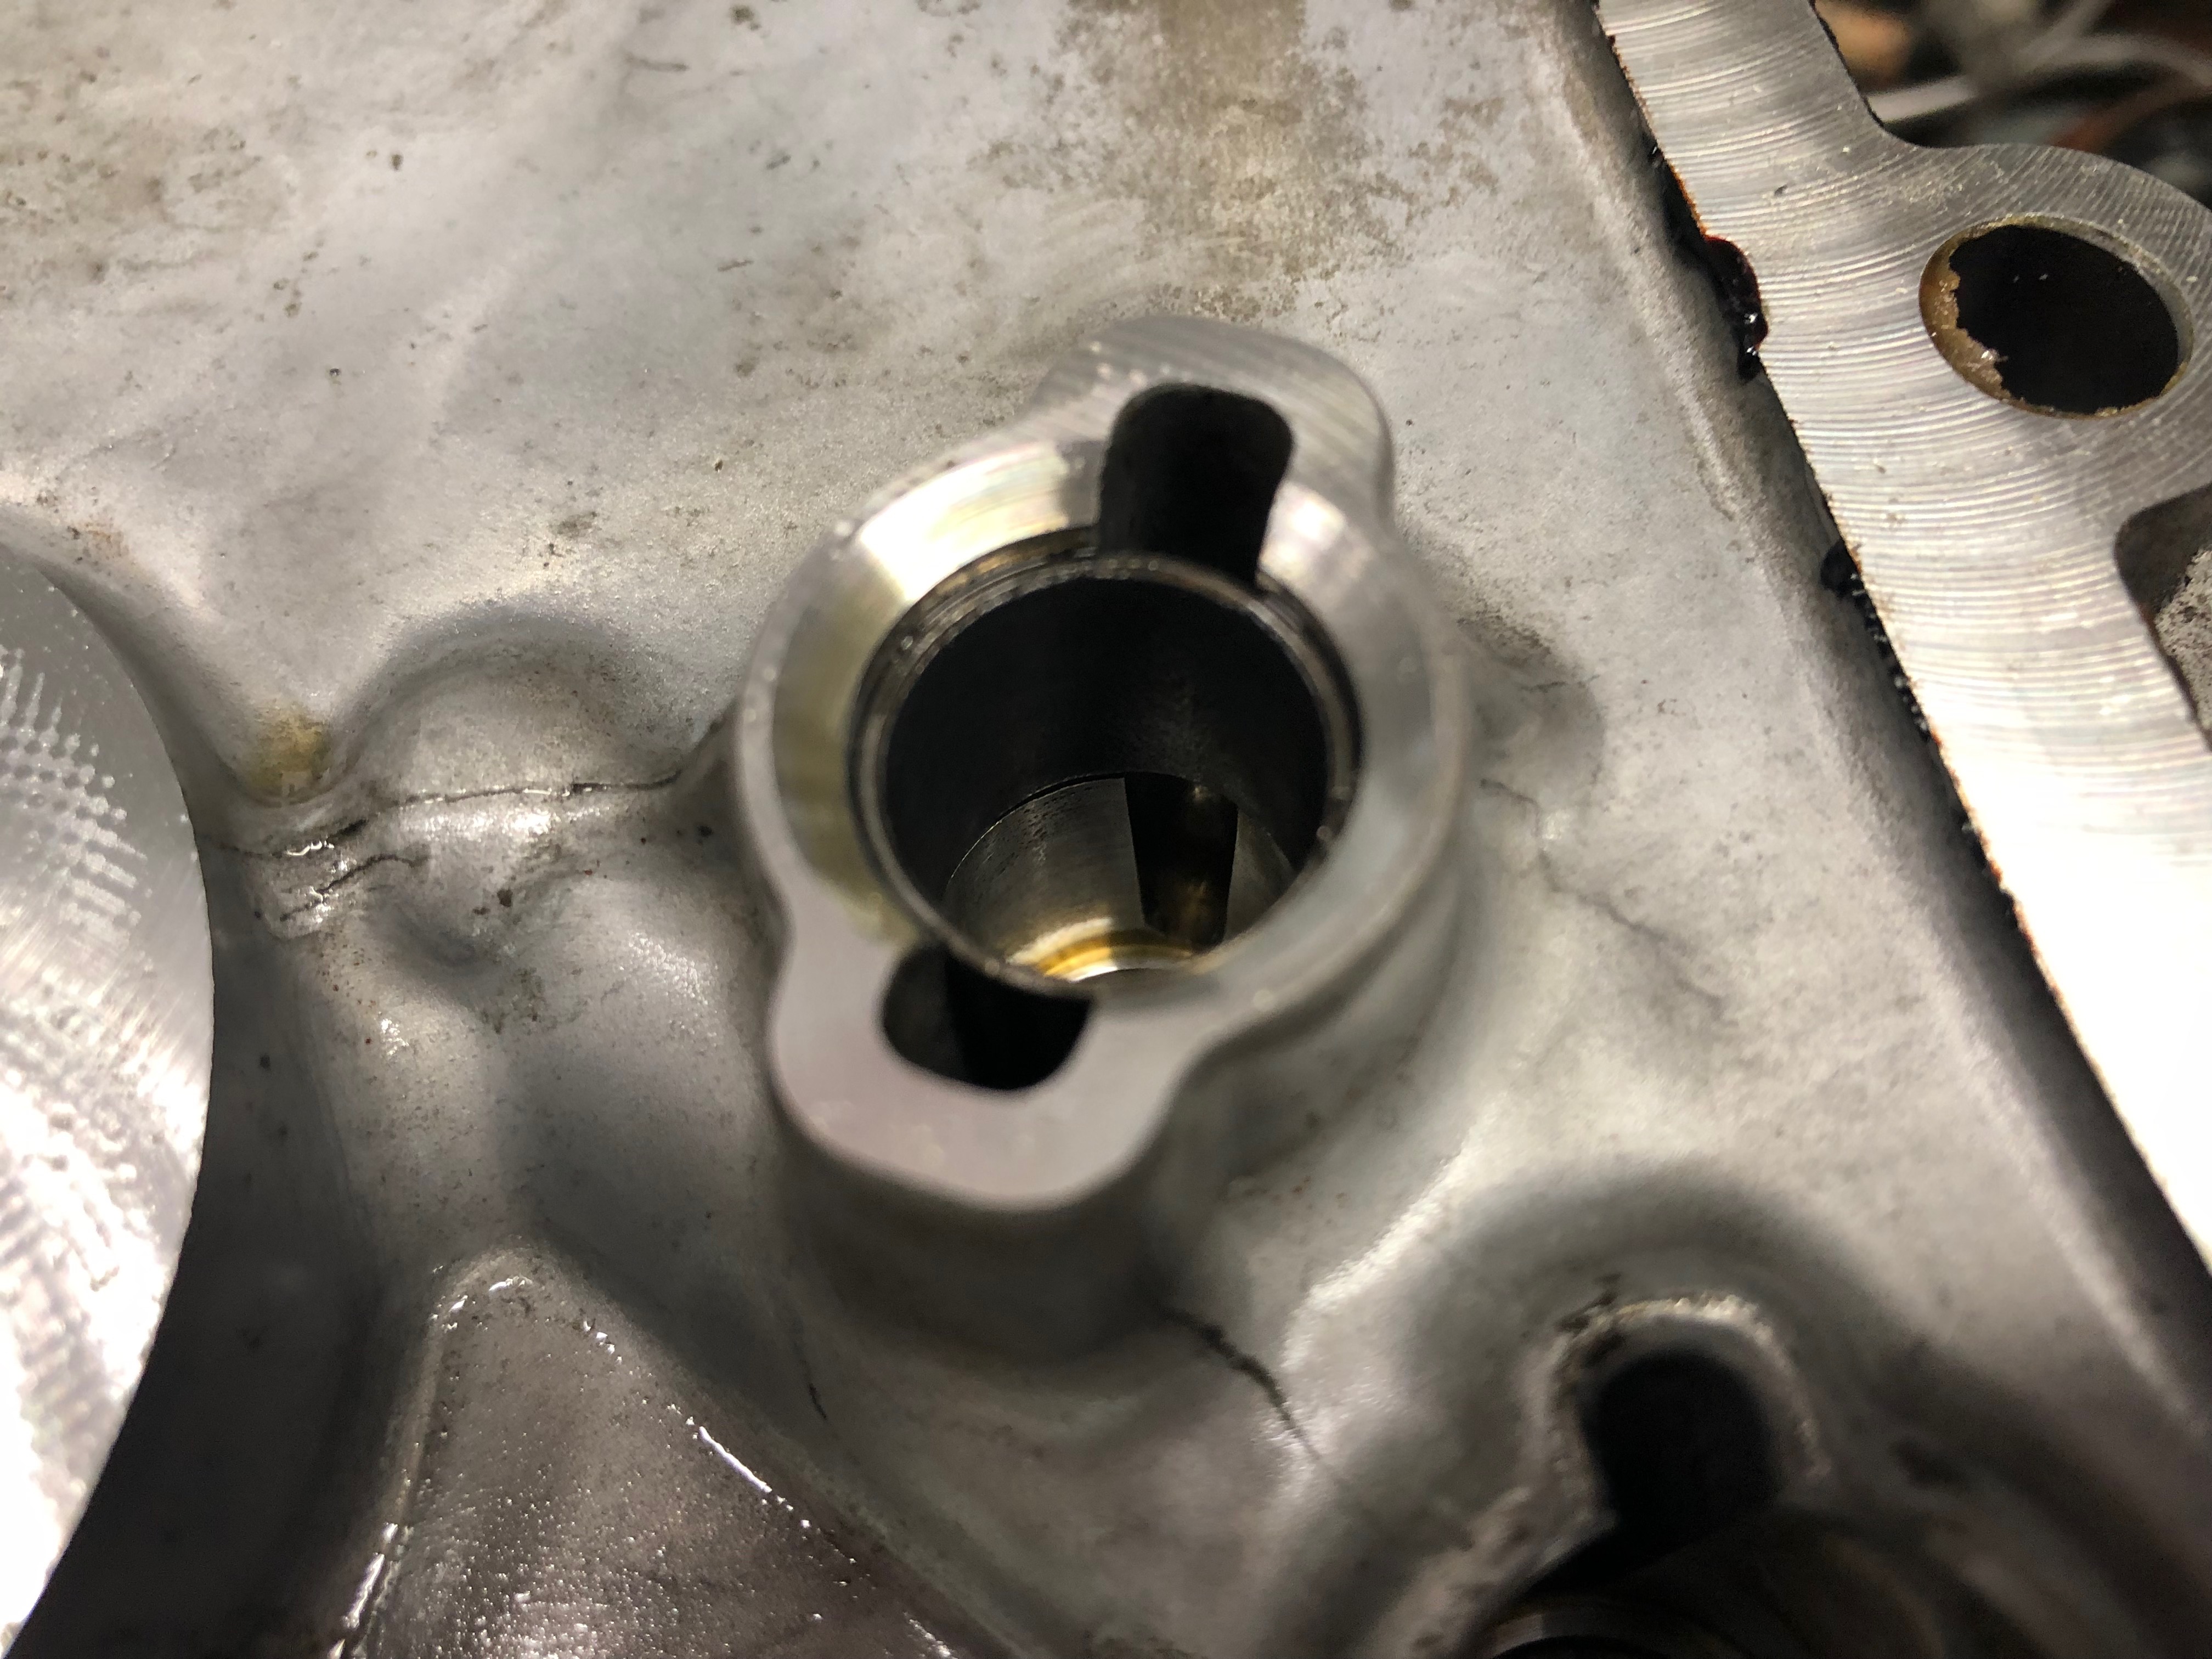
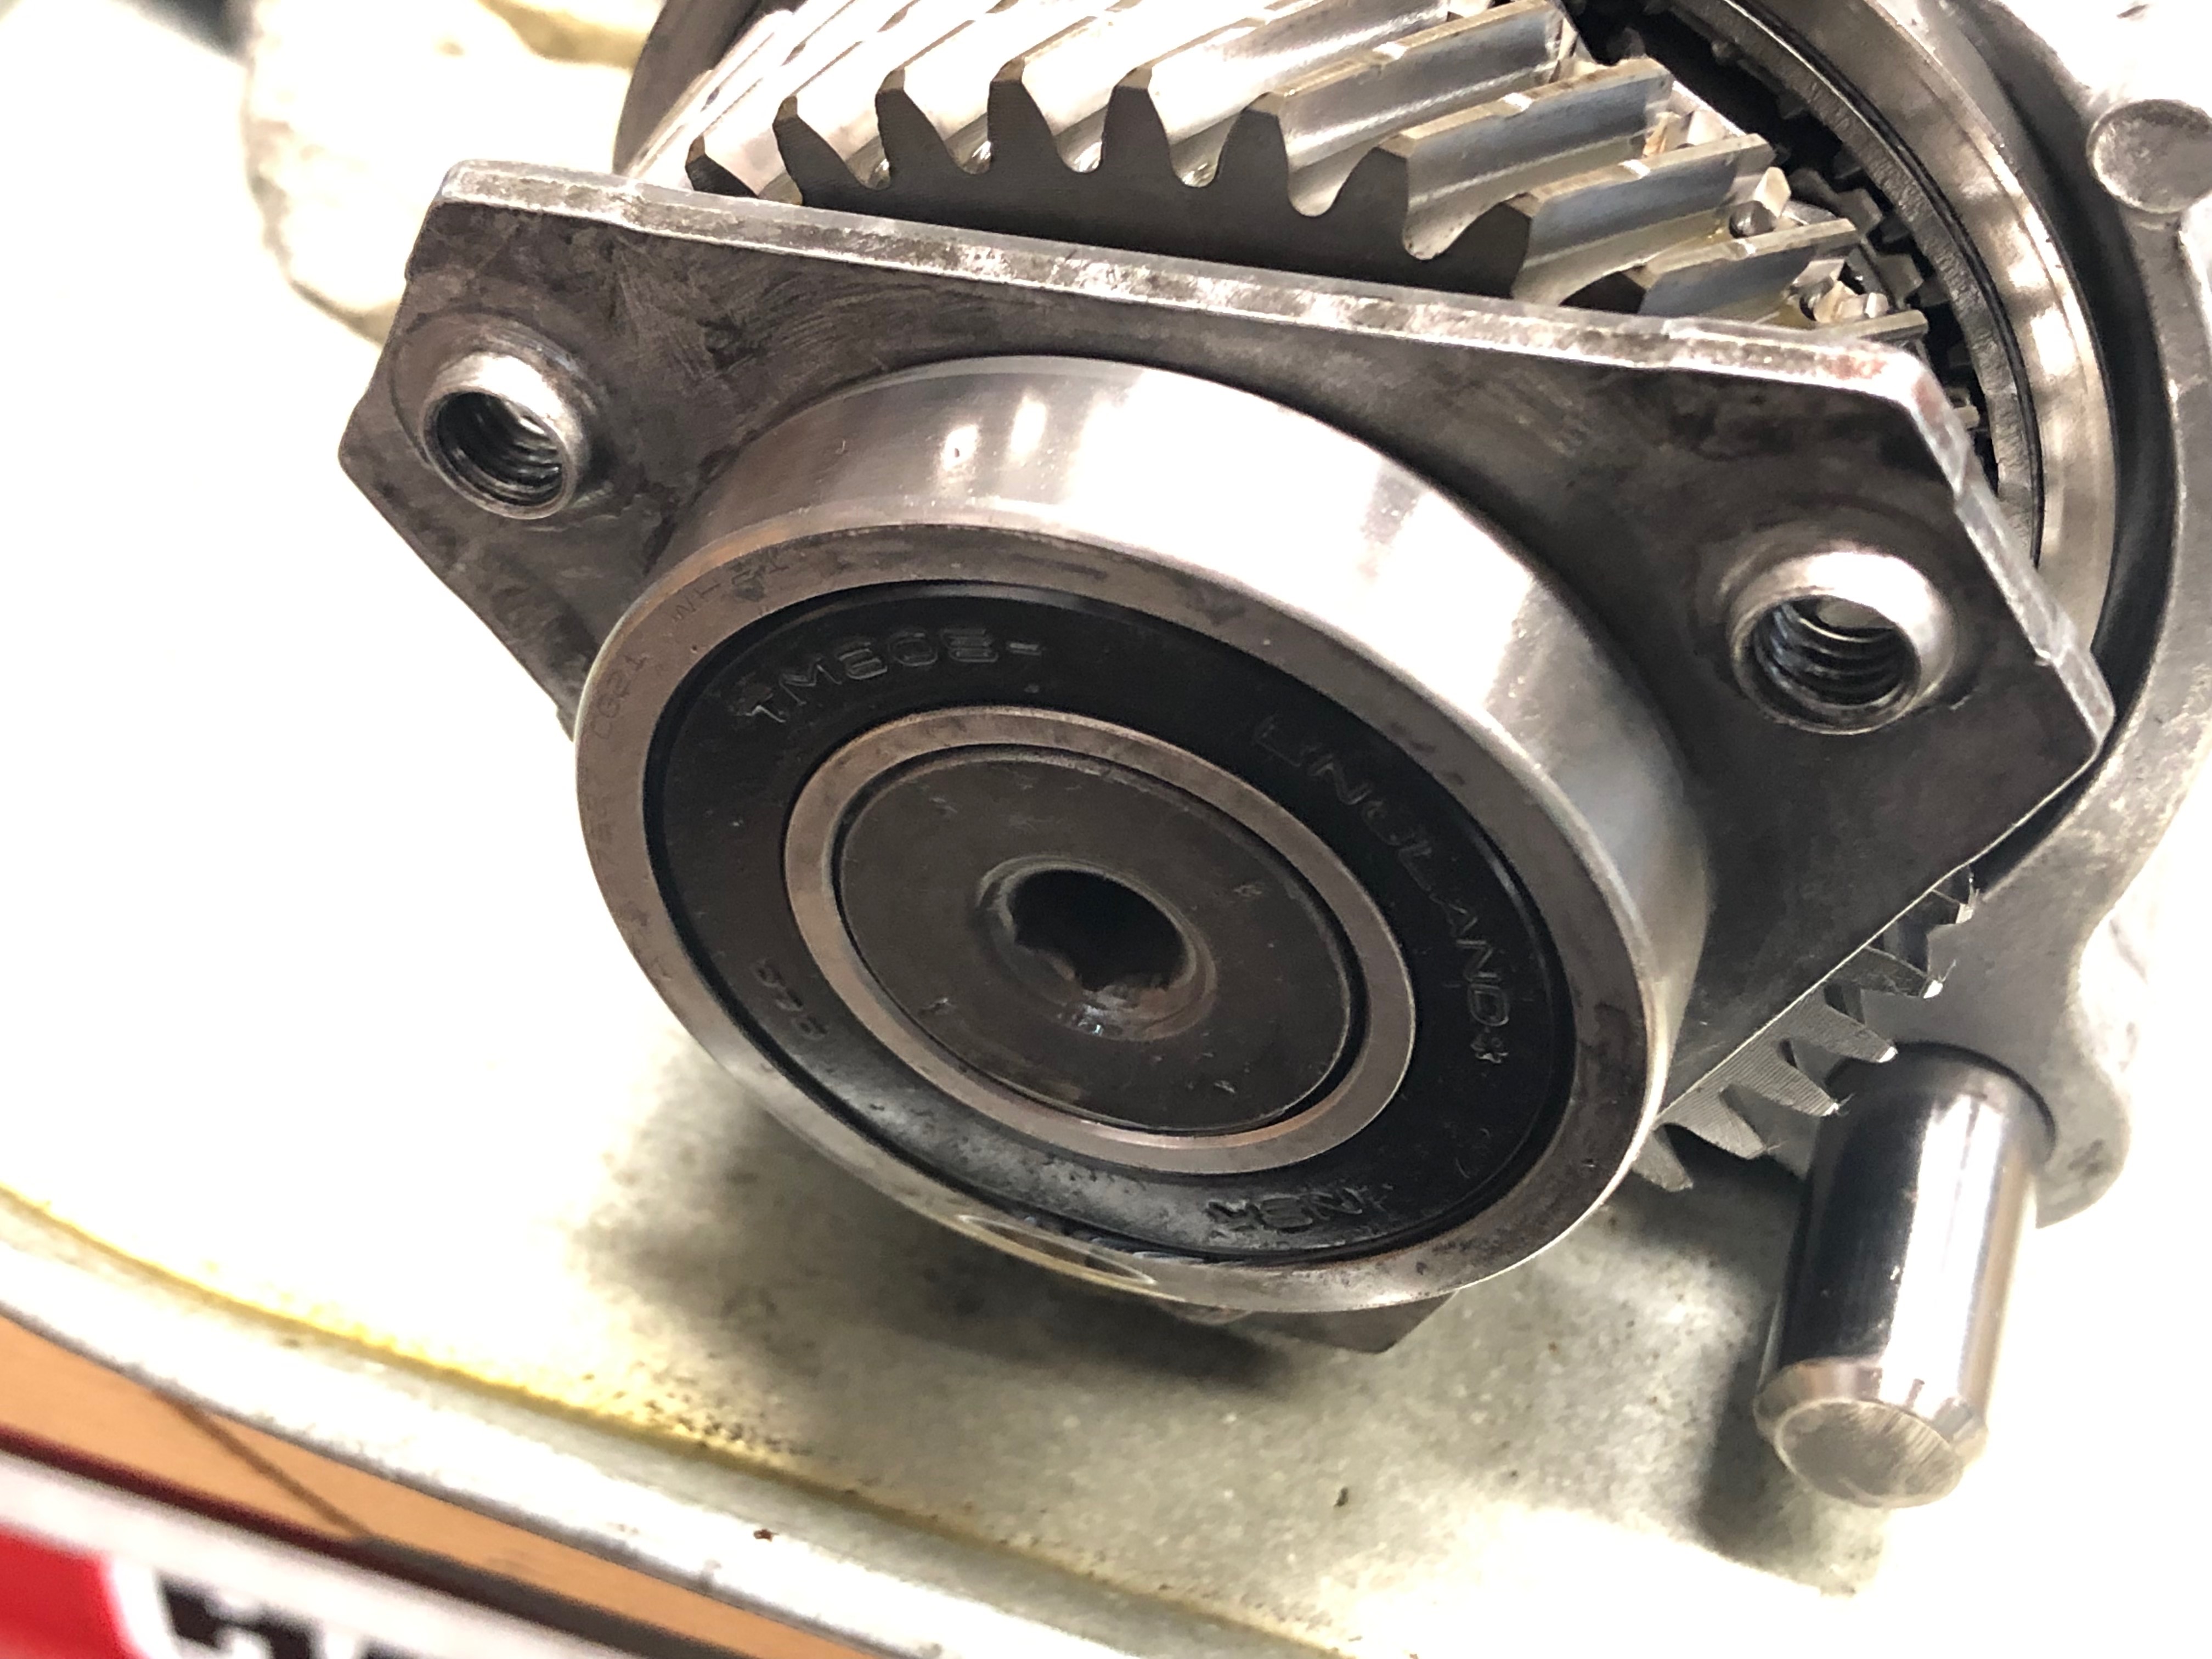
One of the differential bearing races. Note the wear on the face of it.The other side of the differential bearing race, with the roller bearings & cage already removed. Output shaft “lower” bearing race.Input shaft, “lower” bearing race.Shift selector shaft needle bearing.Input shaft, “lower” bearing. The brown/black piece in the center is the oil seal on the opposite side.Output shaft “lower” bearing. Yellow piece is the “funnel” which channels oil to appropriate galleries.One of the two bushings for the gear shift forks shafts.Output shaft and selector fork.Input shaft and selector.Throwout bearing and clutch slave cylinder.One side of the secondary output shaft.And the other side of the secondary output shaft.
I’m not an expert by any means, but I consider myself proficient with mechanics and processes. I’ve replaced plenty of items on my vehicles over the years from timing belts, water pumps, alternators, starters, AC compressors, throttle bodies, mounts, wheel bearings, etc. I have watched many automotive videos for years covering repairs and diagnostics, including complete multi-hour transmission videos, of which I have watched several. I felt confident that I could give this job a good go. I figured that the bearings that I thought were “worn” would be the ones I would need to replace and the others could be left alone. This silly, silly idea was my first major mistake.
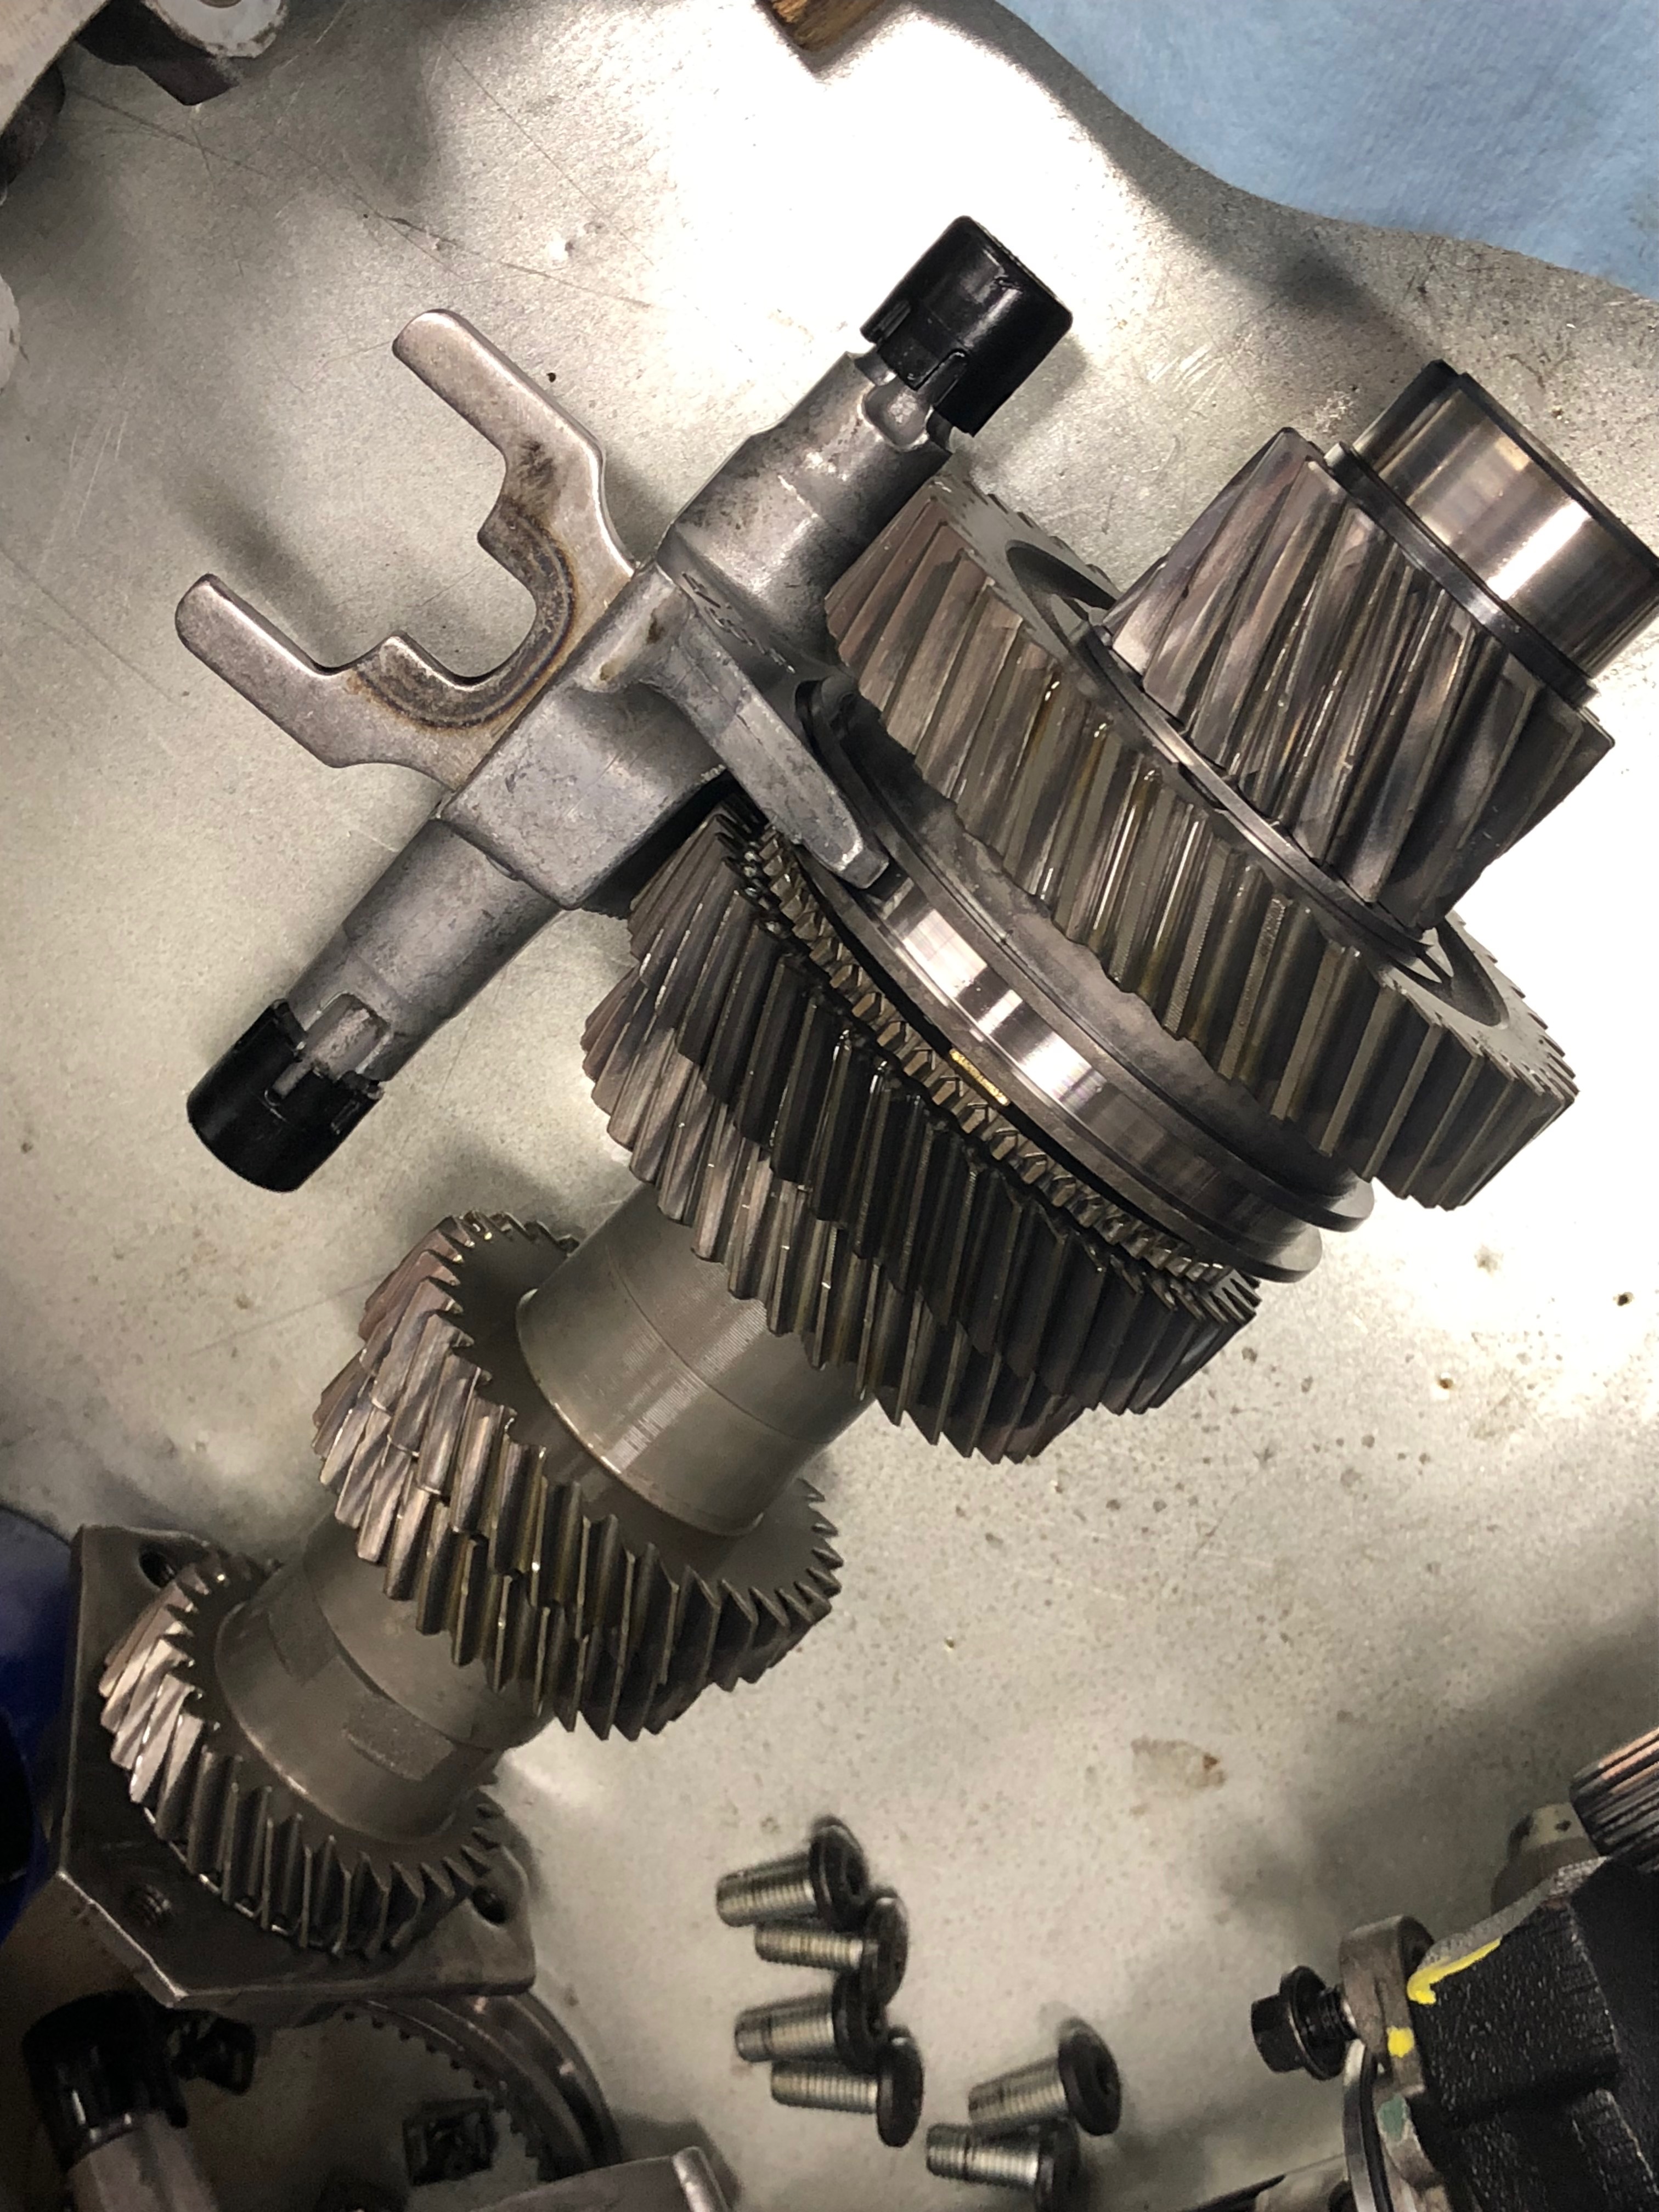
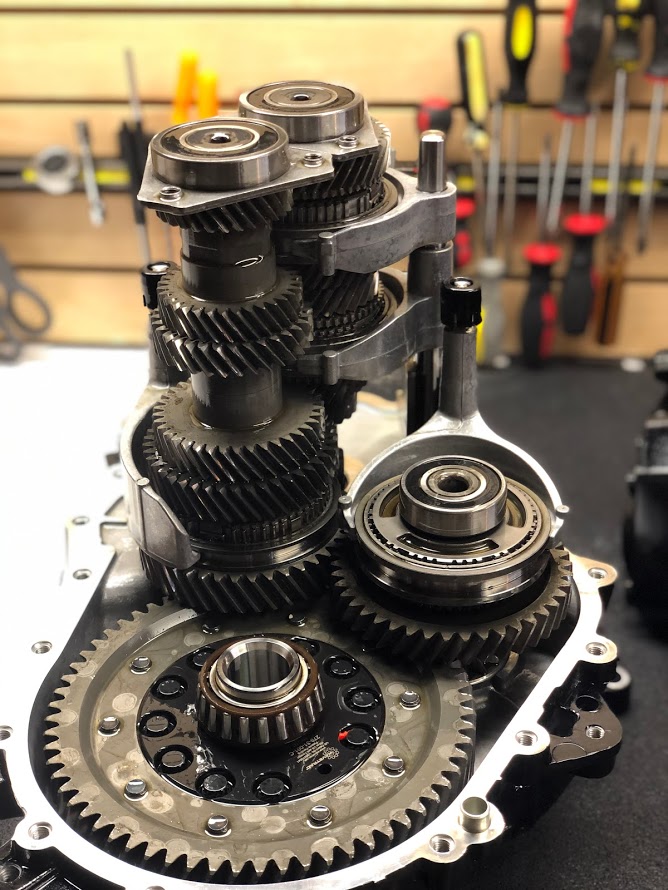
So I set out to replace the bearings that I felt were the most suspect. I also planned on replacing the clutch, flywheel, pressure plate, clutch slave/throw-out bearing, and nearly all of the bolts that the Ford manual dictated should be replaced during the procedures. This would include the “lower” input & output shaft bearings (note that I say “lower” and “upper.” These are designations I came up with for my own reference as I was doing the job. The reason being, when you split the trans case, and lay it on the bench, the two shafts (output and input) are standing upright. The “upper” bearings are attached to a plate that bolts to the trans case. The “lower” bearings are roller bearings; a race is attached to each shaft and a cage with rollers is installed into the trans case.) as the “upper” bearings seemed fine to me. (my second big mistake) I would also replace both differential bearings (conical roller bearings), the shift selector fork bushings (2x), shift selector shaft (roller bearing) and associated bolts.
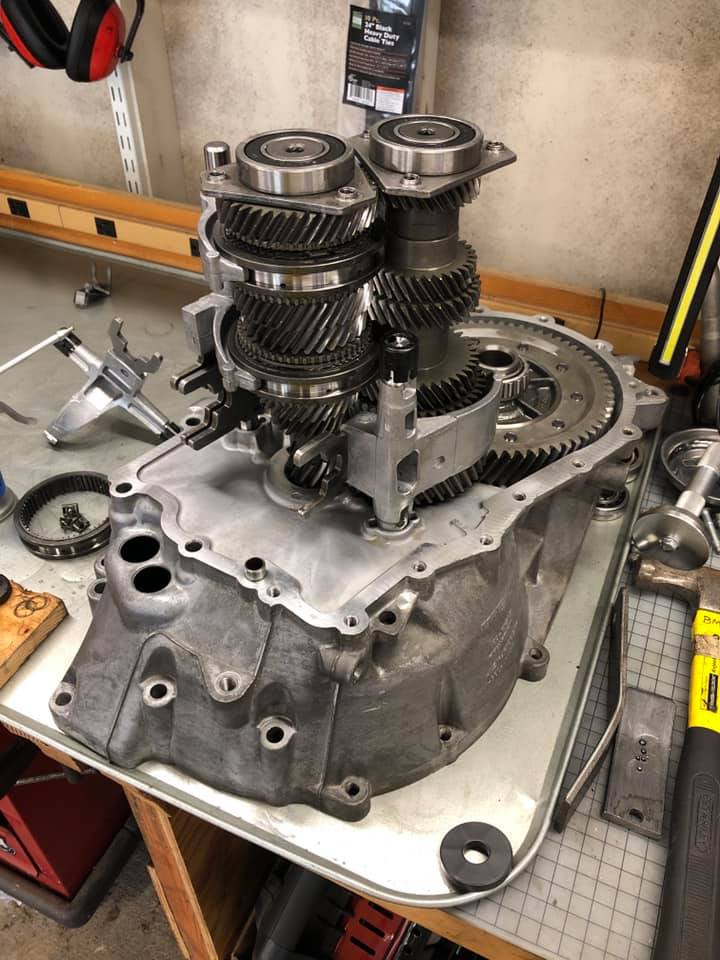
What I refer to as the “upper” bearings are atop the two shafts in this photo. and include the plate with three holes. “Lower” bearings are at the bottom of each shaft.
One of the most challenging things throughout this process has been the sourcing of parts. Sometimes it’s easy. Sometimes it requires reaching out to one of seven dealerships in the nation that happens to have the one part you need. Sometimes the supplier delays your shipment for a month, waiting for something to come in. Sometimes the part arrives and it’s damaged. Sometimes you have to order parts from Europe. I have experienced the gamut; good and bad. I will never again wonder why the shop is taking a long time to fix my car when they say they are waiting on parts. Now I understand. Here is a list of the parts I purchased for the build. I included tools, fluids and other things I felt would be helpful. For those who are doing this on your own, I’m assuming you have a solid set of your own common tools, fluids, etc. so I’m not listing any of those.
I spent days poring over the Ford Parts website, the OEM shop manual, various forums, watching videos, studying photos, visiting 3rd party parts sites cross referencing part numbers and diagrams; what did I learn? It’s a complete shit show. There is no good one-stop-shop when it comes to parts. If you do a rebuild job like this, you will have to deal with shifting supplies, dead ends, great and terrible customer service. I found that some parts are easy to come by and will arrive in a matter of days. Generally, Ford dealerships rocked and were able to get parts in a day or three. 3rd party site, while cheaper, all seem to have the same problem – they’re at the mercy of Ford’s supply chain, which is mediocre at best. If there’s a delay, it gets passed on to you, and then some. Navigating the parts code system is a challenge. I found that I would often have the Ford Parts site open, with the OEM shop manual up, a few 3rd party sites AND Google for additional searching. With all of these sources I was able to pick out the parts I needed for my build and order them.
But then there were the availability issues. You see, Ford doesn’t get many requests for parts needed to rebuild the 6-speed manual transmission out of a 6th generation Fiesta ST. So, what happens. Supplies dwindle and become more scarce. Those that do exist languish on warehouse shelves and oxidize or corrode. In some situations they are on “LONG TERM BACKORDER-NO ETA” which basically means: “good luck, pal. Maybe Ford will restock some day, but otherwise, sorry!” It’s tough. Here’s where things got really tricky for me. When I placed my first order which included the bearings for the output shaft and the differential, all of my sources came back with the same backorder message. No stock anywhere. I called all over the place and came up empty. Backorder, no ETA. What to do? So I figured I could just pull the parts number off of the bearing and get it from Timken, INA, etc. Right? Sort of.
The problem is that over the years some of these bearings come and go. Parts numbers change or like with Ford, become more scarce. For the missing bearings, I searched and searched and searched. Most hits were random Eastern European websites that I could barely understand let alone trust with my credit card info. After reading bearing catalog after catalog and trying desperately to cross reference the numbers with dimensions I had taken off of the bearings I took using my digital calipers, I finally found what I thought were matches. I then started to home in on the parts numbers from Timken & INA. With a bit of luck I managed to find both elusive bearings available at 123Bearing.com. This French company has a great website with a nice selection of bearings and more. I ordered and had my bearings in hand (from FRANCE) only a few days later. This was literally ten times faster than the parts I ordered from a US 3rd party site. (a story for another day.)
I started to remove the bearings from the transmission. Some were easy, some were a real challenge. I purchased a set of bearing separator/puller, pilot bearing pullers, a heat gun and more, all of which were crucial in the process. I also purchased a steering wheel puller set and some impact driver bits from Amazon. I had another pilot bearing puller set, some snap ring pliers, seal installer set and a few other tools on loan from friends. All of them were used. The two differential bearings were on pretty tight. For one side (the one close to the diff housing) I used a bearing separator to pull the race off. For the bearings in the trans housing, I used a punch (per the shop manual). For the two bushings, my friend Randy came up with the solution. We used a length of bicycle brake cable wrapped around the bushing and attached to a slide hammer. This made quick work of the small bushings which were otherwise elusive. (I spent about an hour trying to get them out in other ways.) Getting the bearings off of the output shaft was tricky and required using the Dremel to notch the race and pull it off with a separator. The input shaft was much easier and the bearing separator made quick work of it. (for both input & output, don’t forget to remove the snap ring inside the race first.)
Touching on what was my biggest mistake at this point, which was *not* replacing *all* of the bearings in the transmission at this point. I chose to replace the ones I thought were bad or suspect. In retrospect, I should have replaced all of them, and here’s why. Once I did get all of my parts in and installed all of them, put the whole transmission back together and reinstalled it into the car, put the sub-frame on and all of the associated parts I got to fire it up and see how I did. THE BIG MOMENT. Guess what? The problems were still there. All of them. The transmission still made the same rattling and whirring noise. Why? Well, remember those “upper” input and output shaft bearings? I chose not to replace them. And on the test drive, with the trans back in and the car up on jack stands, my friend and I put a small bit of load on the trans and could then hear specifically where the noise was coming from. Right on the side of the trans case, where the input and output shaft “upper” bearings are. So nothing for it, the trans had to come back out. This time I was going to replace all of the rest of the bearings, which is what I did.
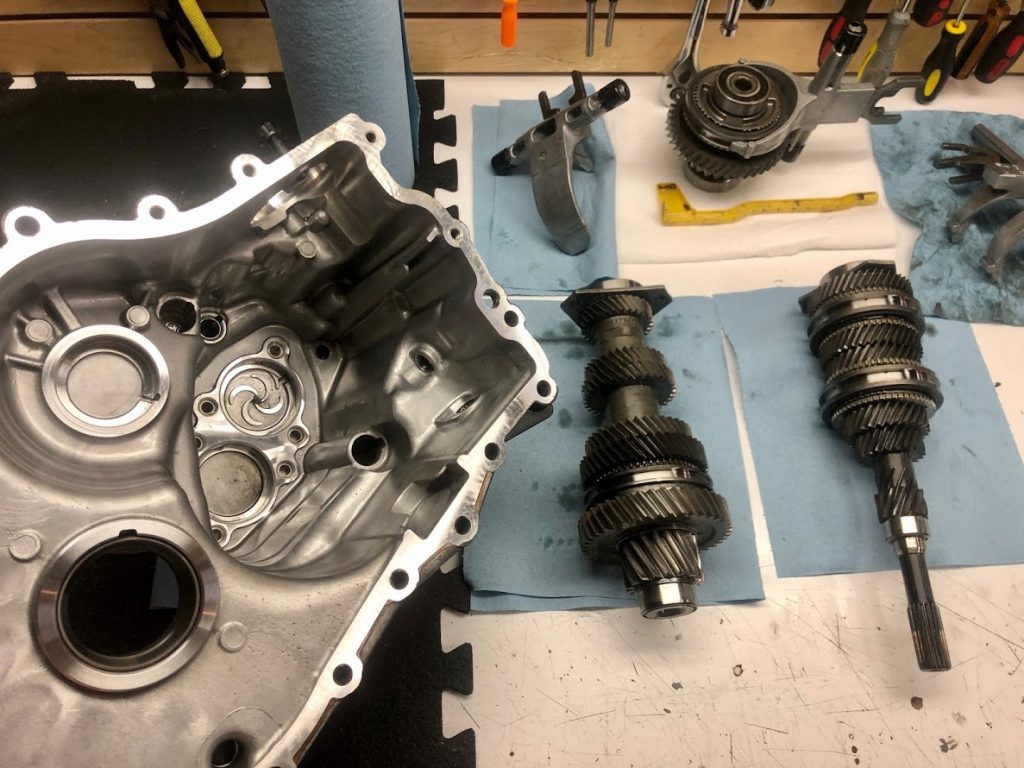
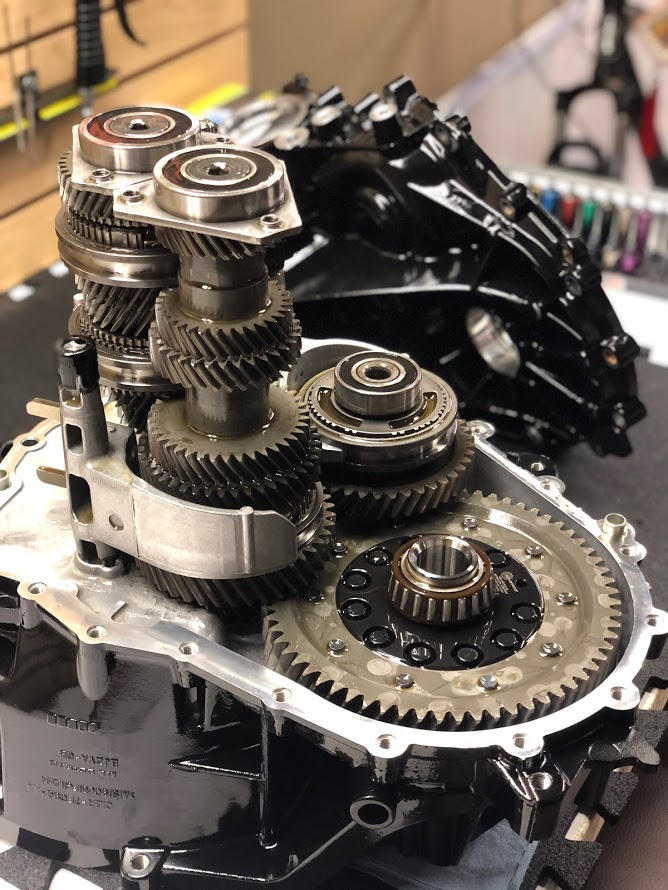
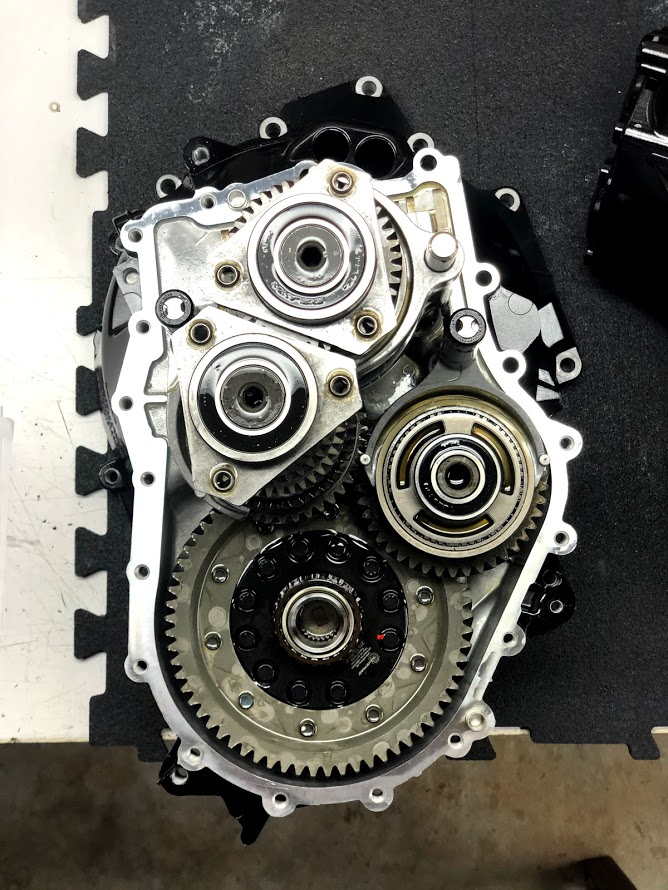
Back out it comes. Hello, again.Trans split in half again, the sealant cleaned off, ready to be disassembled again.
This time I was determined to replace every bearing in the trans. I was going to do the input and output shaft “upper” bearings, the needle bearings on the shafts, buried below the gears – everything. Removing the trans went quite a bit faster, AND I did not remove the sub-frame to get it out. That’s right, folks, you do not need to remove the sub-frame to get the trans out. It all went faster and sourcing parts was going smoothly except for a few bearings and some of the gears. Removing the gears from the Output shaft is tremendously difficult. I would recommend that you hire a capable shop and have them press the gears off. Nothing short of a 20 ton press, a very large bearing separator, an oxy acetylene torch and hammer. Especially the last two sets of gears that need to be pressed off – they are a bear!
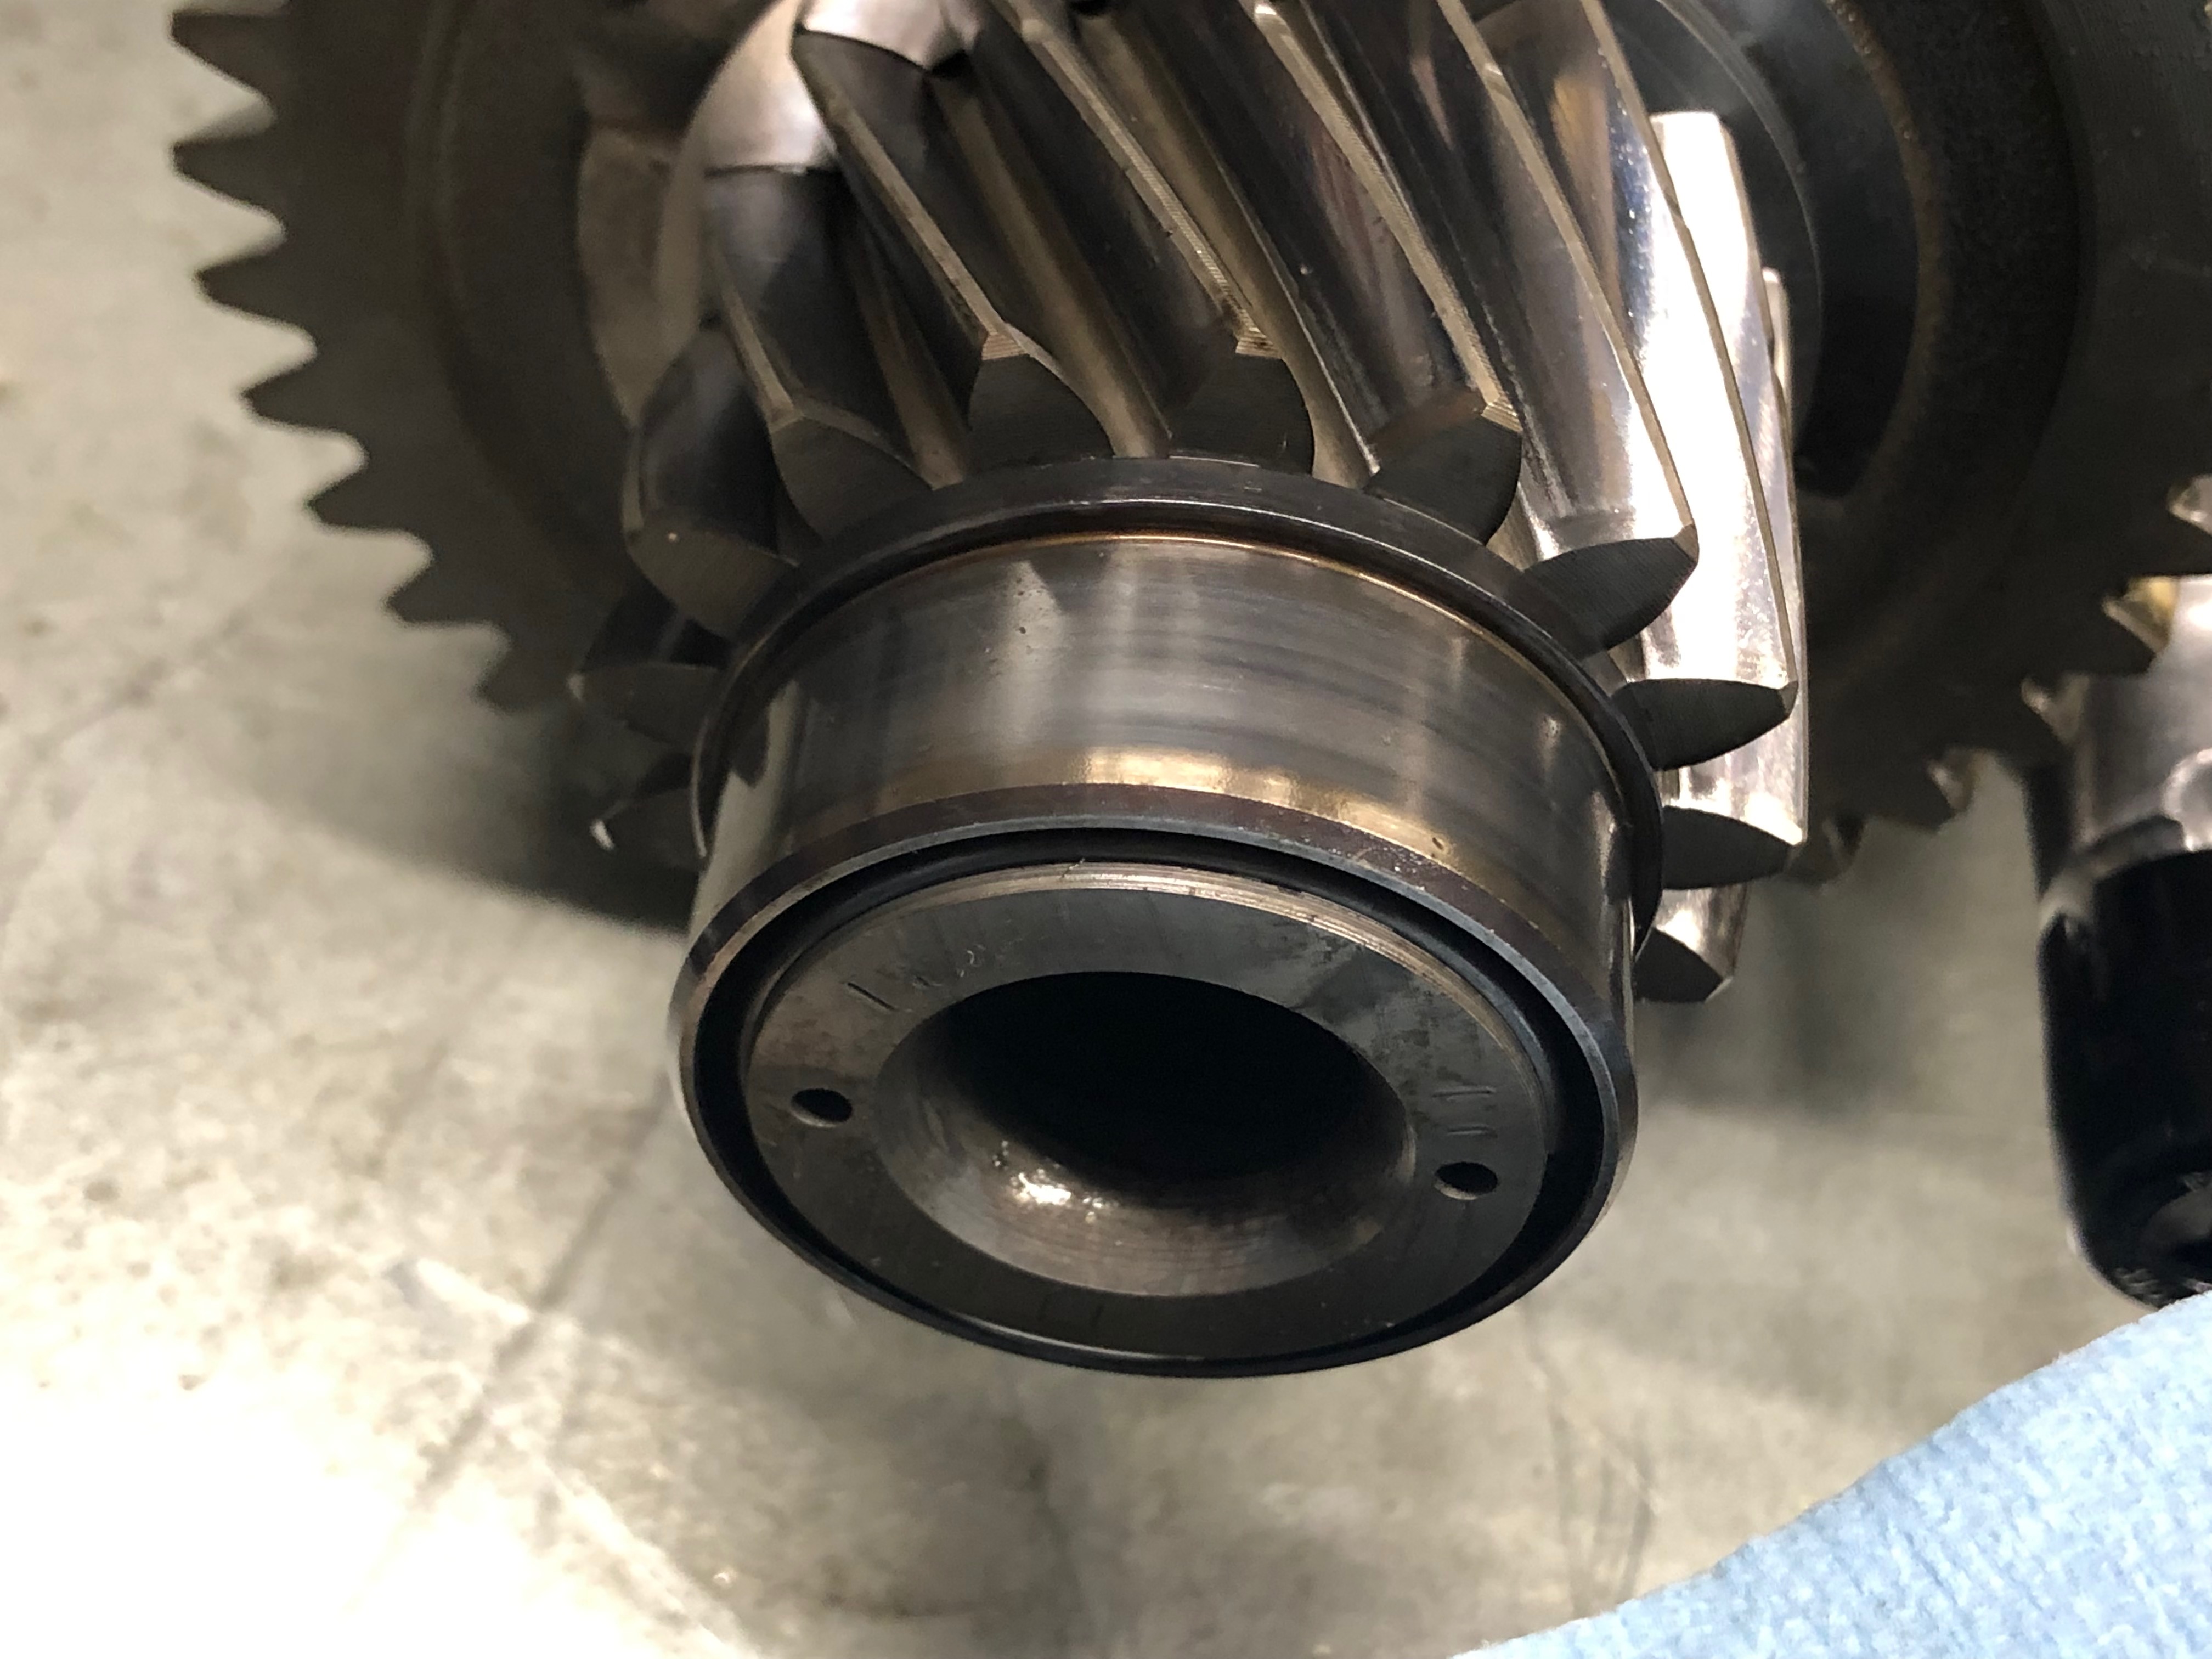
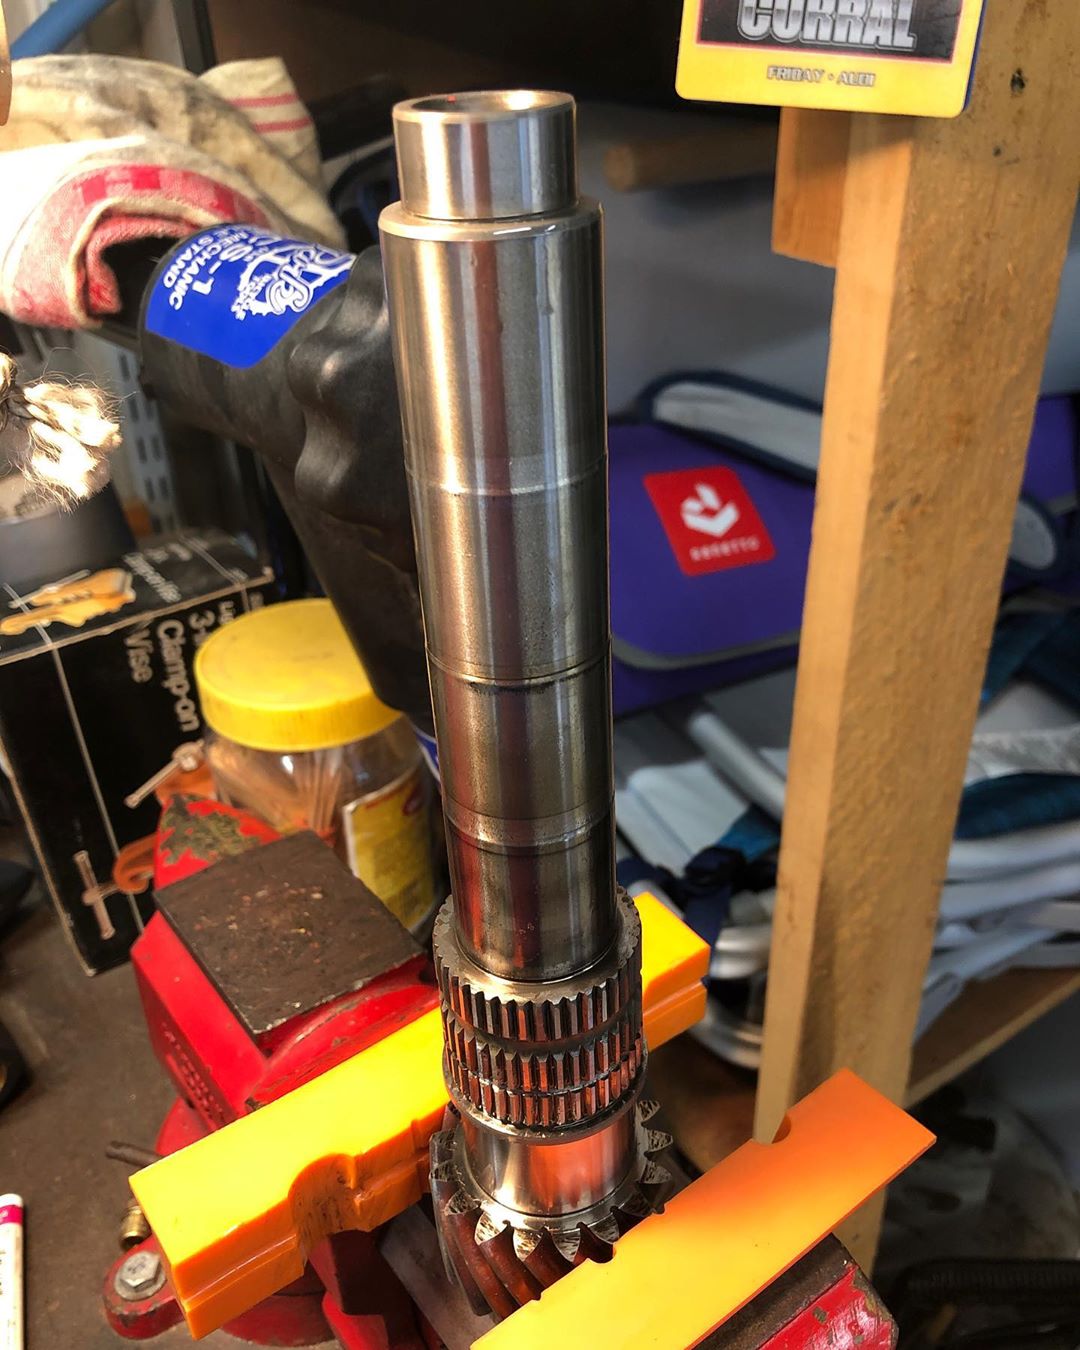
The output shaft, after I had finally removed all of the gears and bearings, ready for reassembly. FINALLY. Note: each one of those four tiers on the shaft is where a gear is pressed. It’s tight quarters!
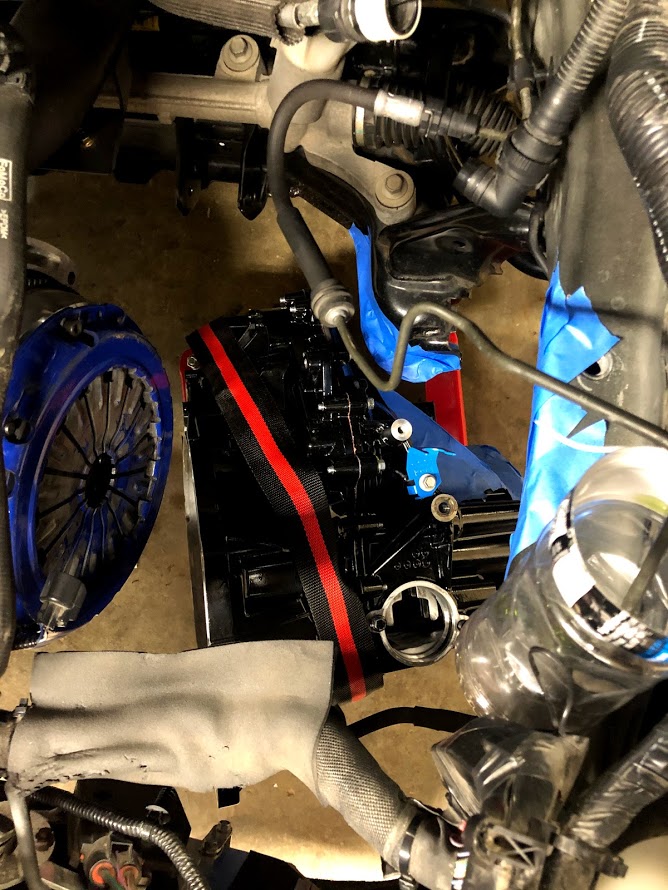
Following along with the OEM manual for the reassembly and reinstall is fairly straightforward especially having gone through it once before. So now, the big moment, part 2. Time to fire up the car for the first time, again. For me, it was a let down at first. I got the car all back together and called Randy to be there to assist and witness. We kept the front of the car up on jack stands so as to let the front end free wheel while we tested it out. When I fired up the car, disappointment. The front wheels spun with the car in neutral and clutch in! Letting the clutch out didn’t help. Only some resistance from the transmission. Putting it into gear made it worse, as it would stutter and stall out. I threw up my hands and was pretty upset. I figured I screwed something up. I hopped out of the car in a fit of despair and proceeded to begin clearing space to put the car on one side of the garage so my wife could finally have her parking space back. I was bummed.
But Randy was not moved. He is much more patient than me. He was pondering the shift linkages and other things and decided to give it another shot. This time, after a moment of the wheels spinning, they stopped, and in neutral, did not spin. Shifting into first gear, they spun. Second, spun. Third, spun. And so on. It seemed to be working! We took it out for a test drive and you know what?
IT VERKED
Hallelujah. We drove it around town, did a few mild pulls, it was perfect. No noise, shifted normally (although I suspect the linkage is a bit out of alignment and needs adjusting, as some of the gears are a little wonky going in & out – nothing major, just minor adjusting; I did not perform the OEM-recommended service procedure to adjust the linkages.) We figured that the reason things were so bad on first star was because oil had not found its way into all of those friction surfaces on the gears. They were probably binding and as the gearsets spun, oil worked its way into the various galleries and set stuff free. And the bearing that was bad? Yeah, it was the input shaft bearing. The top one. The one I didn’t think needed replacing. Well, you have to learn somehow.
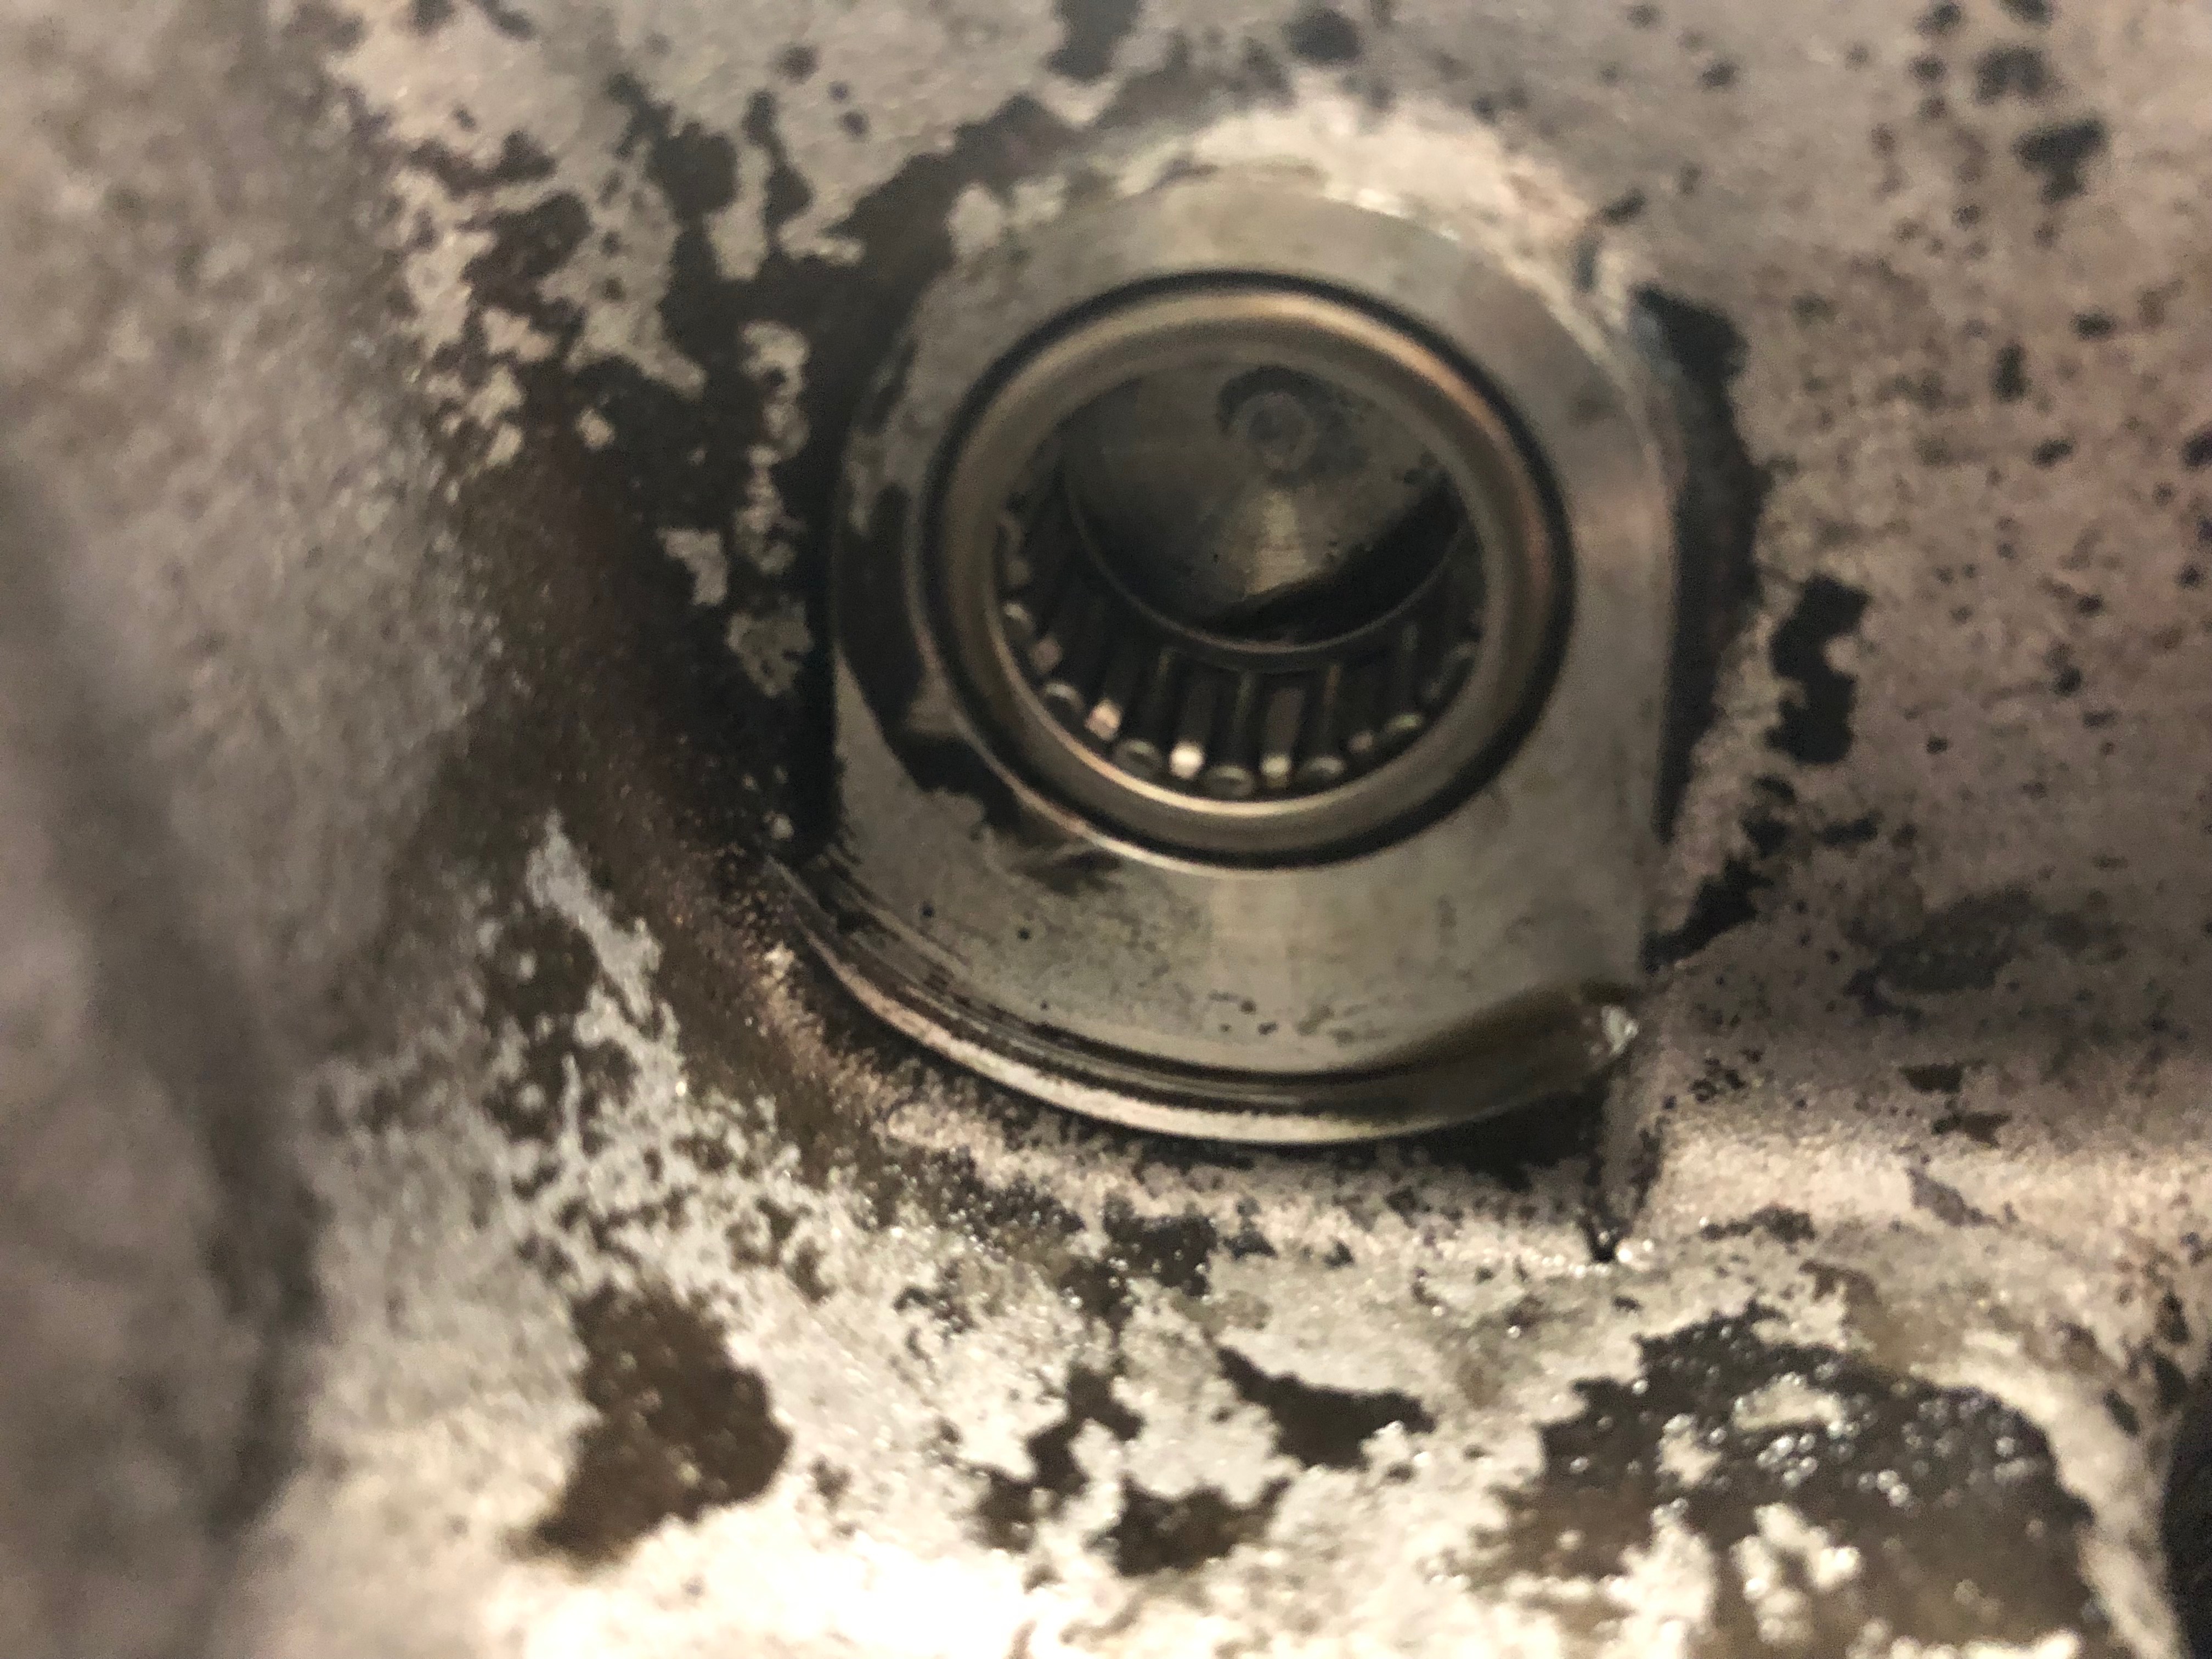
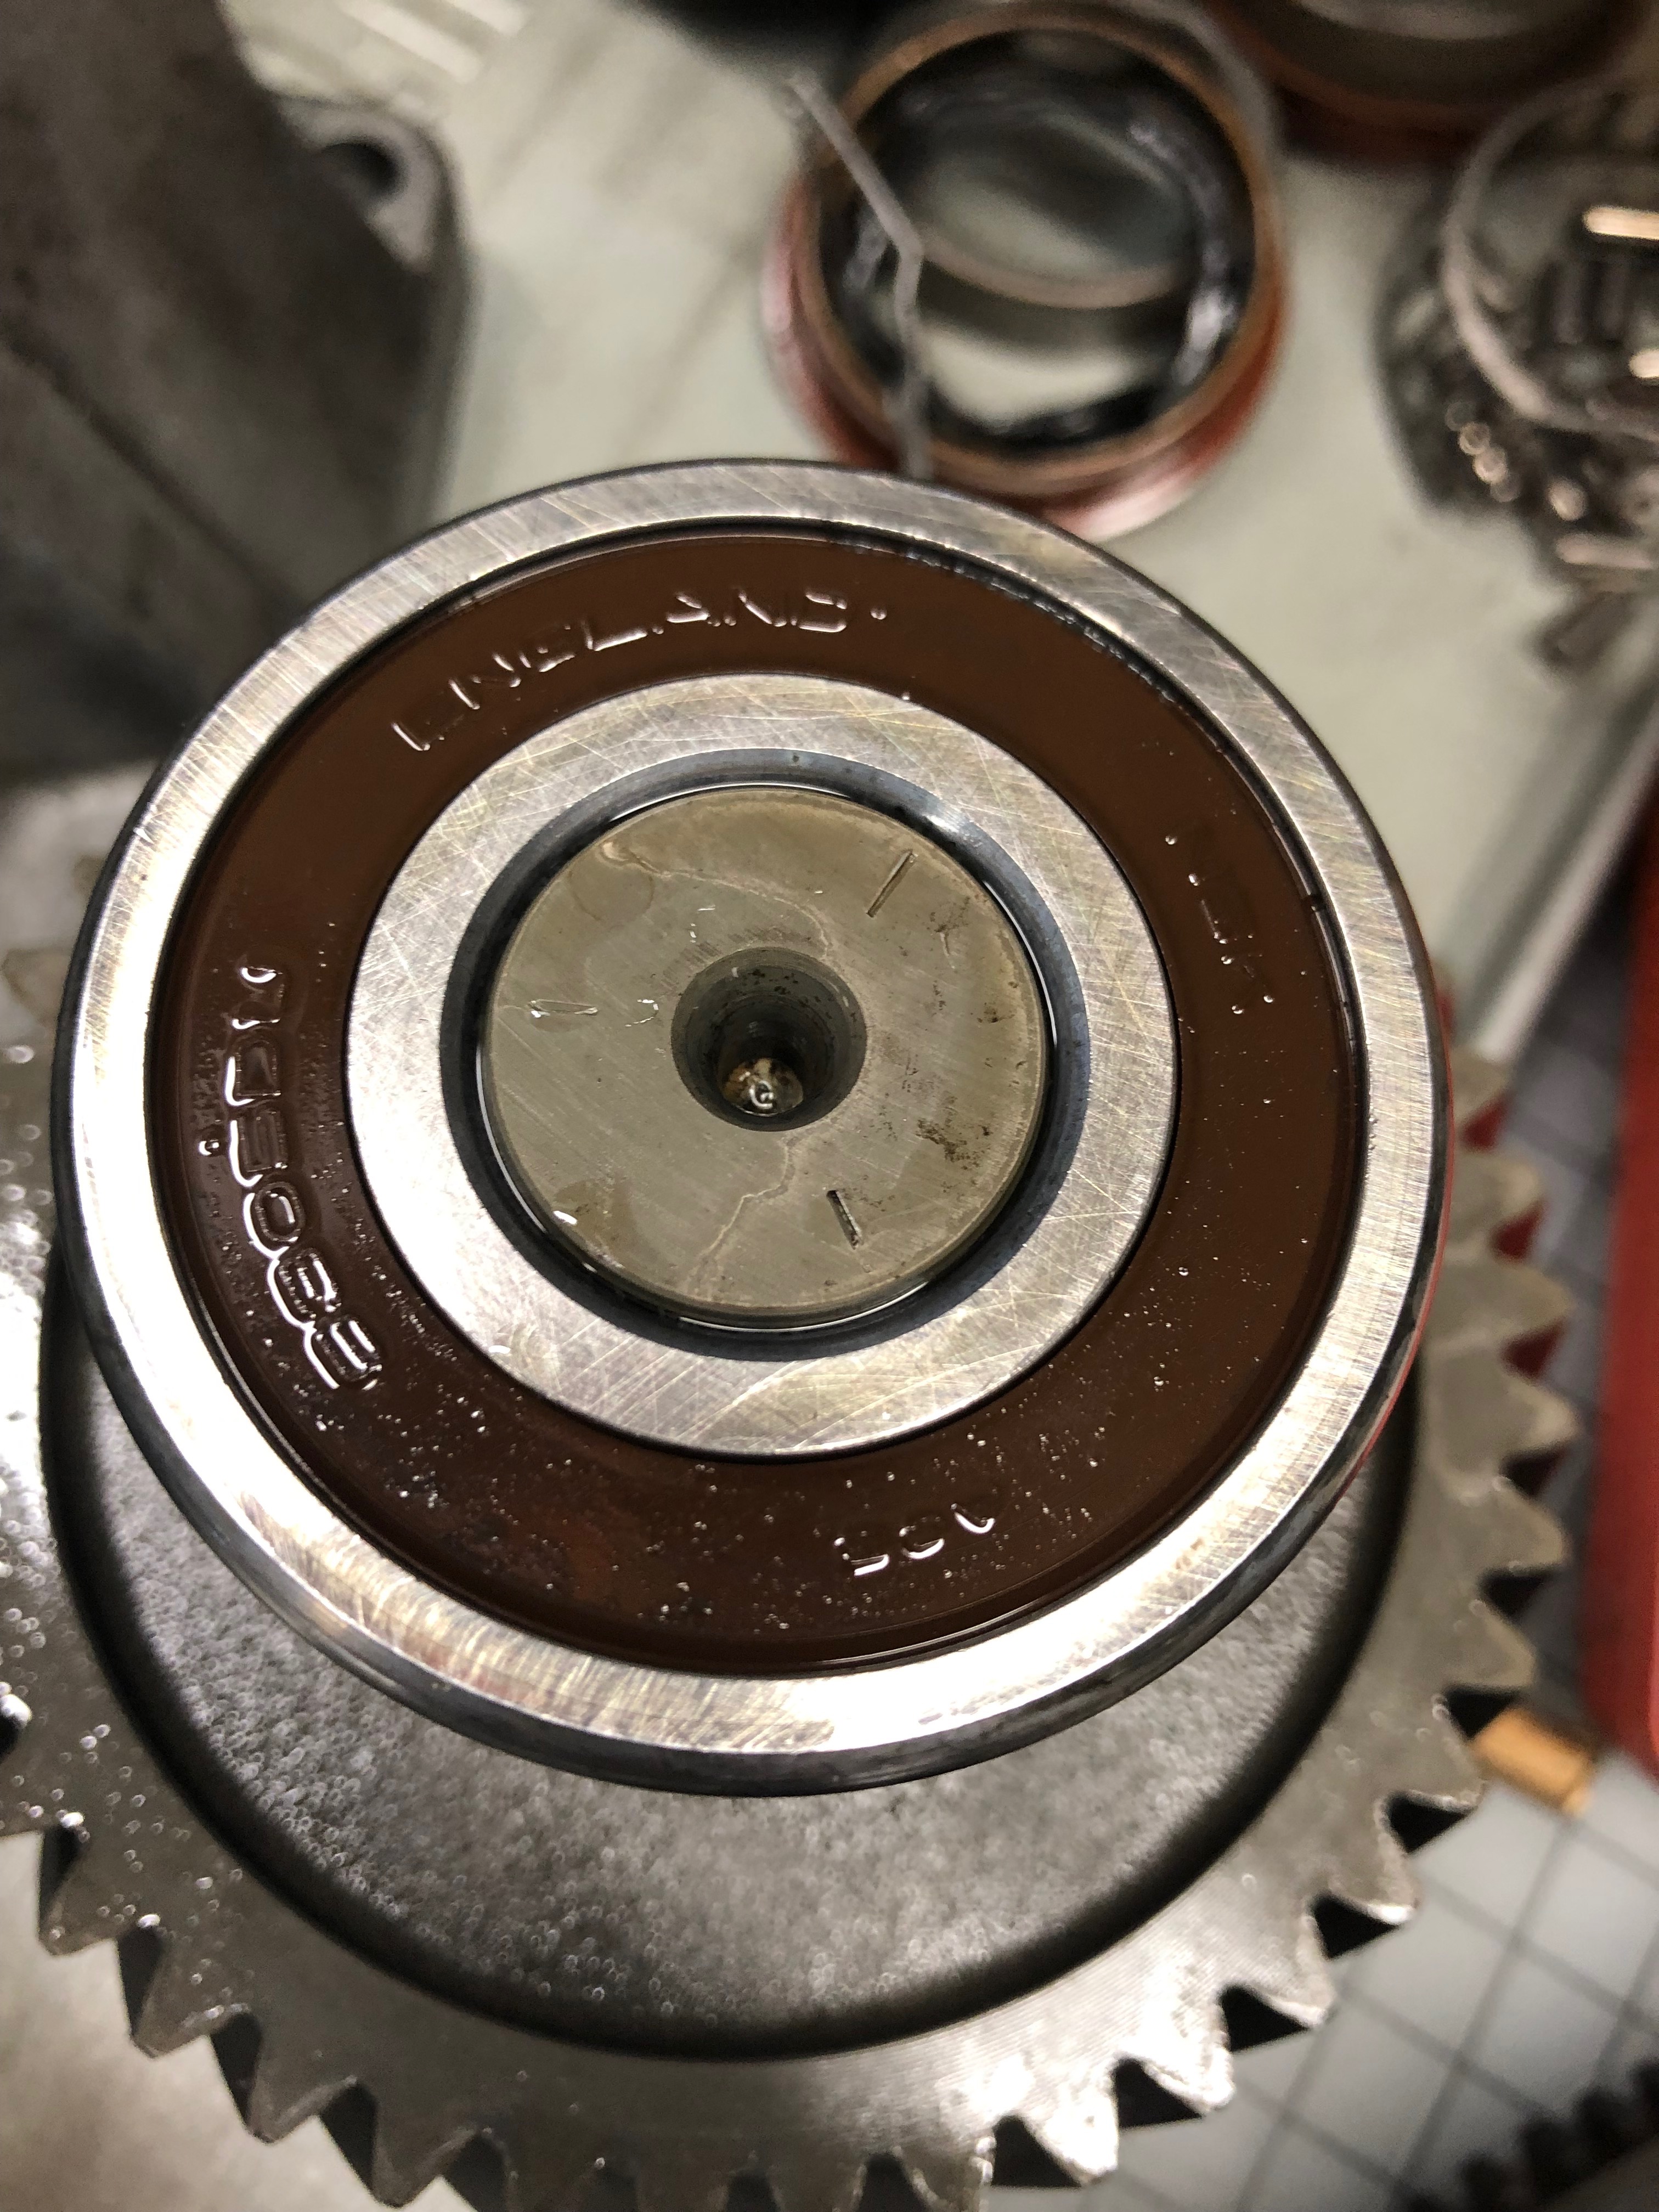
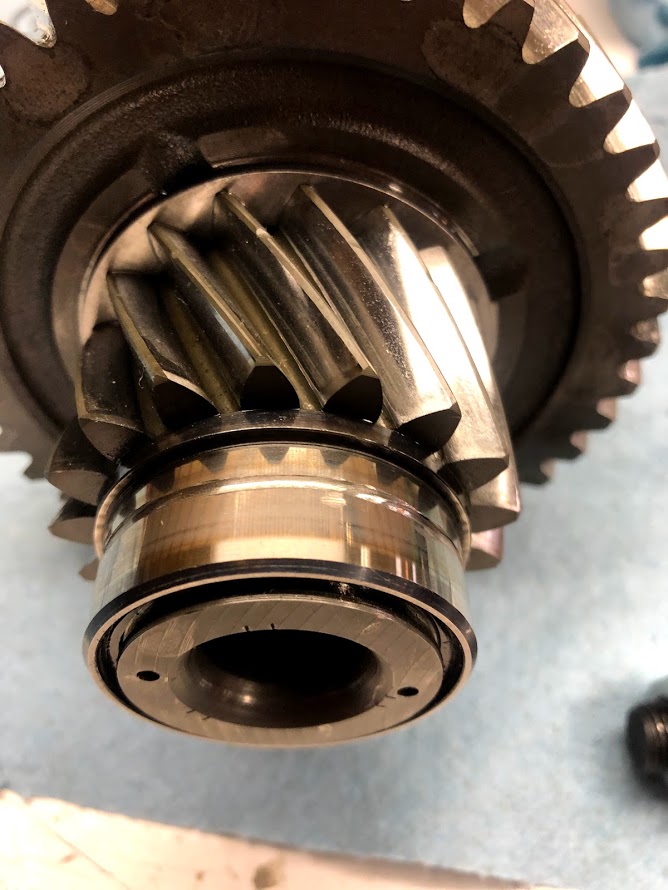
The input shaft bearing that needed replacing. This probably would have been the only thing that absolutely needed replacing. 🙁
I didn’t make any videos. I didn’t feel like documenting all the steps with photos. Most of the time in the garage, I was there to get shit done and would be focused on not screwing something up. That being said, I’m providing all the documentation here for you to use in the hopes that it helps someone tackle this job.
First up is my parts list. If you are looking for parts (and what tools and supplies you will need) here you go! (NOTE: UPDATED 7/9/23- Input Shaft Bearing part number update)
The following is a collection of files from the OEM manual that I have annotated with my comments on each step of the process. I highlighted areas where you need to pay particular attention and how I got the job done.
So I hope this helps you on your journey to rebuild the transmission. I learned a lot in this process on what works and what doesn’t. Lots of folks have asked if I’d do it again, and I think that I would provided I had the time and means to do so. But honestly, if I broke the transmission again, I may just replace it with a Clarke unit that has a warranty and is built to a much higher quality level. If you have any questions, comments, etc., please don’t hesitate to reach out to me! ben.sullivan75 *at* gmail.com
GOOD LUCK!
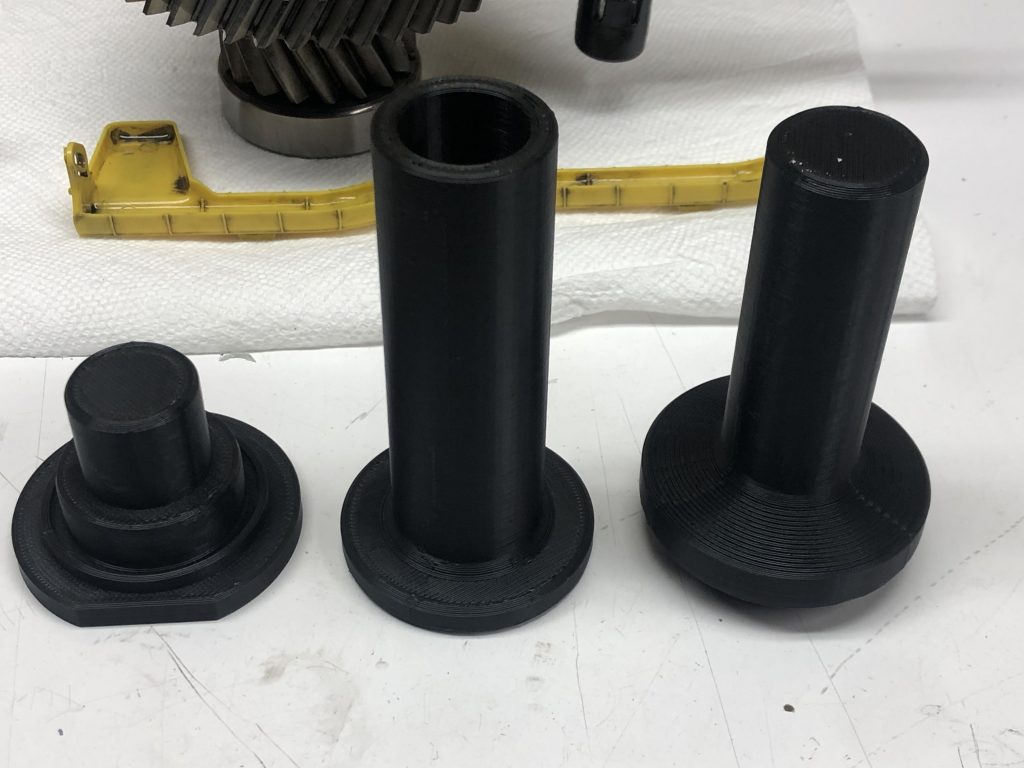
BONUS: 3D Printed Tools!
A generous reader, Foster B, purchased the necessary Rotunda tools and made 3D models of a few of them. He offered to share them so I’m posting the files here for anyone who’d like to give them a try. Dropbox link below which includes the STL files plus a few reference photos. Thanks, Foster!
UPDATE 5/21/22: Link updated. Including two NEW files for your rebuild project! From Foster B:
I don’t remember if I included the shift tower cover or the driveshaft seal cover last time. These are two models I made to help aid in;
a: keeping oil from leaking out when you pull the transmission and are moving it around
b: I like to get the transmission into place without the shift tower, as it gives you much more wiggle room, but I dropped a socket at the hole, and somehow it wedged itself in the case in such a way that I couldn’t get it out. That cover might save you from doing a bunch of extra work.
BONUS: Foster B. shared some photos from his epic rebuild. His project included 3D scanning the internals for an upgrade build, blasting and painting the case (looks great!) as well as an ARP hardware upgrade for the case bolts. He successfully rebuilt his trans, has many hard miles on it already, and has some really cool projects coming up! Thanks, Foster! Enjoy:
Mmm, LSD
Pulling the notched race
Dremel a notch in the race
Measuring diff end float
Blaaaaaaack! Looks hot.
Reassembly
Reassembly
Reassembly
Sandblasting the case
ANOTHER BONUS – MORE TOOLS!
Man, this community is really cool. Another reader, Juan E., reached out and shared a couple 3D printed tools he designed and created to make the job easier. Enjoy!
Also, I designed a couple more 3d printed parts that I needed. That I will link if you want to add to your blog. One is for the differential bearing install tool and the other is a clutch alignment tool.
NOTE: Please read the comments below – it sounds like some folks are having trouble having their trailers registered, being told that since it is a “kit” it must be inspected first. Read on for helpful info but YMMV!
NOTE: At this time, the trailer has been removed from the HF website due to out-of-spec tires. (more on that here)
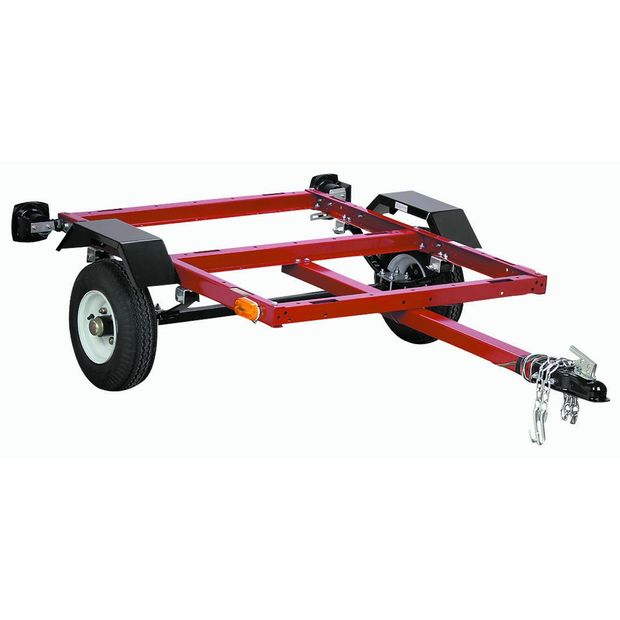
HF 40.5″ x 48″ HaulMaster trailer
Back in 2016 I purchased a 40.5″ x 48″ HaulMaster trailer from Harbor Freight with the intent of using it to haul a large aluminum canoe, junk to the dump, wheels/tires/tools to HPDE’s and other hauling duties. I constructed the trailer, built the deck and sides and after a while prepared to have it titled and registered. Unfortunately the MD MVA site is a bit vague on how this is done and specifically what you need to accomplish this. After gathering my documents together and heading to the MVA with a hope and a prayer, I was successful but not without a bit of difficulty. For those who may be attempting the same thing as me, I’d like to give a brief run-down of what you’ll need to get your trailer registered.
First up, visit the official MD Titling & Registration website, here. Download the VR-005 form and fill it out ahead of time. They consider this type of trailer a new vehicle. When you fill out the form you will fill out the Applicant’s info (your personal info). Then in Vehicle Description section you’ll fill out the year, make, model no, body style, VIN, and check the box for TRAILER. Fill out the Trailer section. Under the section for whether or not there is a lien on the vehicle you will write “NONE” in the first box. Under the APPLICATION FOR NEW REGISTRATION PLATES… section check “new tags”, you can write in your insurance carrier info and then leave the signatures at the bottom for when you are at the MVA itself. If filling out any of this form makes you uneasy, leave it and do it at the MVA. It’s up to you. If you mess up, they have the forms there as well.
What to Bring
Your MD Driver’s License.
Form VR-005 APPLICATION FOR CERTIFICATE OF TITLE – You can download it here. Fill out as much as you can.
Your insurance information – Technically this is not required. I went to one window at the MVA and the woman told me I did, so I had to go to the car, call my insurance provider who told me I didn’t need coverage; that the trailer was covered under my insurance policy for the car itself. So I went back in to the MVA with my insurance card in case I needed it. The next service agent I spoke to told me I did not need my insurance information. So, YMMV. Bring your insurance card in case you need it.
The bill of sale – You’ll need the original receipt from Harbor Freight (or wherever you purchased your trailer from). This will indicate the purchase of the trailer and that you paid tax on it.
The certificate of origin – this is the paper that came with the trailer when you purchased it. If HF did not give you one, you need to contact them immediately and obtain it. It looks like a title document but it’s not a title document. It states the origin of the trailer, the type, manufacturer, capacity and more details. It looks like this.
Credit card/payment – Title and registration is not cheap, unfortunately, in MD. The total cost for me was $195.70. Ouch!
Some tips/thoughts
Make copies of everything, if you are interested in having copies. I was not aware of it, but when they process the paperwork they will take the original bill of sale (receipt from HF) AND the certificate of origin for the trailer. You won’t *need* them after the MD title is issued, but if you care, make copies before hand.
Bring a pen in case you need to go off and fill out any extra forms. It’s just handier than having to search for one at the various windows/shelves.
I went to the MVA on a Friday afternoon before Christmas. The visit, including the snafu where I had to leave the building and go back in, took me about an hour and a half. On a good day I would say about an hour is what you’ll need to get it all done. Having the paperwork ready makes it faster.
As usual, the disclaimer: this is not official information so take it for what it’s worth. I’m sharing it because it was a stumbling block for me and I hope it may help others who are considering the same process. The trailers are inexpensive and quite versatile. You can bust on me all you want for paying nearly the same amount for the trailer as it cost to register it, but I like being on the up-and-up with this sort of thing should an accident happen. The registration is good for two years at which time it will need renewal and that can be done at various places, including the kiosk located in the lobby of the MVA. One more note on the MVA – the folks I dealt with were very helpful and patient. I’m thankful for that. Good luck, everyone!
With the incredible help of my father in law and my buddy Kelly we’ve been able to make amazing progress on the workshop/layout room. Framing is nearly done as is electrical and insulation. Doing drywall and installing fixtures are the biggest jobs left. Very excited!
I know these aren’t that exciting, but for me they are. 🙂 Also, it’s hard to see here but all the old wall along the back and side walls of the house are gone. Also, the wiring in the room has been removed. Next step is to make some calculations, remove a few more wall pieces, clean up some stuff and get framing the new walls and roughing in the electrical. Stay tuned.
My father-in-law Bruce came over today and helped me knock out some serious work on the workshop room. My model RR will be in this room, along with the HVAC unit, the water heater and my work bench/storage. The room was originally part of one large basement room. At some point in the last 30 years the previous owner split the room in half and turned this side into a workshop. He was a serious woodworker and had some large tools (evident by the 220 40A circuit we removed today and bolt casings in the floor) so it’s plenty big. I decided to strip it down and turn it into a combo model RR room and workshop.
When we moved in I set to work removing some of the old storage units, shelves, walls, etc. Unfortunately, there were also some circuits that needed removing around the room and due to a lack of funds after being laid off, this sort of got put on the back burner. Thanks to the generosity of some friends and family I’ve been able to get some building materials and make a go of getting this taken care of. Back to today, Bruce & I traced out circuits, chased wires, rerouted one circuit to combine some lights and removed a lot of old wire. I was even able to remove all the remaining studs from the room (finally) and get things cleared out a bit. The next step is to continue removing wires, random nailed boards and some other shelves/cabinets still in the room. Things are moving along really well. More pics next time. Thanks!
The original Tamiya LRDG 1/35 scale kit fetches a premium these days. I put one together back in high school and at the time it was one of my prized models. It was also one of the few that survived the great “younger brother knocking over the shelves that held all my models” tragedy.
I was recently inspired to take stock of some of the older projects I have and see if I can complete them. The LRDG stood out to me as a really neat kit that could use some work. Yeah, by high school standards I did an OK job, but the model deserves so much more. Much of it was unpainted, poorly weathered, half-done and a little rough around the edges. Finding a ton of really amazing builds online has inspired me to redo this build.
I first took the pieces that would come off and set them aside. I next started with some of the glued-on bits. Thankfully I didn’t do a very good job gluing things back then, so some of the details came off without a fuss. Others required a little bit more persuasion and will require some filling & sanding. Probably the biggest problem is the wheels – the rubber ones that Tamiya supplied were glued and then mounted to the hubs. This invariably caused them to crack as the rubber shrank over the years. None of my original wheels survived this fate and it makes the model look tacky no matter what you do. I found some replacement resin wheels on eBay and snatched them up. I also sourced some decals for the instrument panel. Here are a few photos of the teardown. Expect more soon!
Since I was laid off back in November, things have been different. Suddenly I’m playing Mr. Mom while a tenacious Ms. Dad has gone back to working full time to pay the bills while I search for a job. In my rare spare time I’m trying to finish up some modeling projects. I cleaned up the basement workshop room enough so that I could sit down at my table and take a stab at finishing a few projects. I did!
Life-Like Proto 2000 Hopper kit nearing completion
The P2K War Emergency Hopper Car is one I have had for years. It is a pretty nice kit. The details are exquisite. Lots of really well molded detail parts, grab irons and a nice overall appearance. I brought this kit to Cape Cod with me last summer and never completed it because I ran out of time. It sat on my workbench all Fall and I finally picked it back up. I only had about 20 minutes of work left to complete it and the finished model looks great. Now it just needs a little weathering and it will be good to go.
Suydam 4 track car barn kit
This Suydam kit has a bit more history attached to it and I’ve decided to make it my next project to complete. This kit belonged to my father until I absconded with it years ago when he left the hobby for the most part. It’s identical to a kit that I destroyed as a child (a story for another time) and one that I’ve had half-built for about 12 years now. I picked it out one day many years ago and decided to try out the task of soldering the metal roof sections together which is something that I’d never done. It turned out so well that I painted and lightly weathered the roof. When I assembled the side walls, construction stopped. When this kit was produced, back in the 1960s and 70s, it was really nice. Card stock walls with printed brick patterns and lucite windows with printed on mullions were all relatively good looking. Now, they just look silly. In this day in age when superdetailing is at a mind boggling level, just putting a little effort can take a model like this to a whole new level.
What I’ve decided to do is complete this kit with a few modifications based on a prototype that interests me. This kit is modeled after some Southern California traction car barns. My layout/interest is with the Georgetown Branch of the B&O. I have a photo of the Chevy Chase & Kensington Electric Ry. car barn that once existed at the crossing of Connecticut Ave. in Chevy Chase, MD. The car barn was later repurposed as a car dealership and probably a host of other things before it was eventually torn down and replaced with an apartment building. My goal here isn’t to model the car barn exactly as it appeared but build a car barn model that will represent it with some degree of semblance. As such, even though it’s a very different design overall, I’ll be using this Suydam kit as a basis and adding some details that will give it a feeling of the old Georgetown Branch structure.
First up I’m ditching the old card stock walls. I’m going to replace them with Evergreen Scale Models styrene clapboard siding. The windows and doors are going to be represented with laser cut designs from Rusty Stumpsdoors and windows. I’m not sure how this will all turn out in the end, but if I can pull it off I think this will be a very nice model with lots of detail appeal on the layout. Who knows, I may even try to squeeze a traction line into the layout plan!
Over the last couple years I wired my whole house up for Ethernet, Phone and Cable. It was a fun project and I learned a lot along the way. Photos of the install are up in my Gallery. I don’t post links too often, but on this subject, which can be very complicated (trust me) having a good how-to is very important. A friend is doing some network installation in his new home and I was poking around looking for things related to the process. Here is a great guide I found:
Folks, I know it's been a long, long time since any photos were posted to my Gallery . (See previous post for main reason) Well, I'm hoping to get back into the habit of doing so, and I have a LOT of photos to share. So be patient with me (if you're reading this, I think you already are) and keep bugging me to get more up!
First up are some pics of Kyle & Anna from this winter, the College Park Aviation Museum, Christmas @ Bruce & Dotz's and some recent work on my model railroad. I hope you enjoy.